
Product Manual

Page 13 of 31
Assembly
For your own safety, do not try to plug in the drill press until it is completely assembled and installed
according to the instructions and until you have read and understood this instruction manual.
To avoid injury from unexpected starting, do not plug the power cord into a power source
receptacle during unpacking and assembly. This cord must remain unplugged whenever you are
assembling or adjusting the machine.
If any part is missing or damaged, do not plug the machine in until the missing or damaged part is
replaced, and assembly is complete.
To protect the machine from moisture, a protective coating has been applied to the machined
surfaces. Remove this coating with a soft cloth moistened with kerosene.
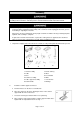
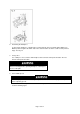
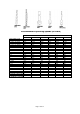
1. Unpack the shipping carton and check the contents to verify all the parts listed below are present
1. Head assembly
7. Chuck and key
2. Table
8. Arbor
3. Base
9. Feed handle
4. Column assembly
10. Bolt
5. Table support assembly
11. Hex wrench
6. Crank handle
12. Wedge
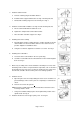
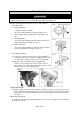
2. Install the column support to the base
a. Position the base on the floor or a workbench.
b. Place the column on the base, aligning the holes in the column
support with the holes in the base.
c. Locate the four long hex bolts from the loose parts bag.
d. Place a bolt in each hole through the column support and the base.
Tighten with an adjustable wrench. See Fig. 1