
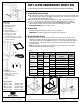
Installation Guide
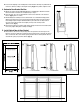

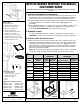

B. Press the cabinet door against the door brackets firmly to ensure the door adheres to the double sided tape.
C. Grasp the bottom of the cabinet door and slowly open the sliding assembly until you have easy access to the door brackets.
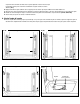
D. Install #6 x 5/8" mounting screws in the center of each of the four horizontal slots shown. (Fig. 10A, 10B and 10C)
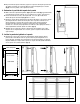
E. Ensure your door is centered by closing the unit into the cabinet.
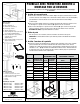
6. Adjust Door Angle
A. Using the door, push trash unit back into the cabinet until it stops. If there is a gap between the top of the door and the cabinet,
adjust the door bracket by loosening the tilt adjusting screw and pivot the door to the desired position. Ensure door is in the desired
position, then install a second locking screw in location shown. (Fig. 11)
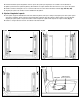
B. Place waste bin(s) in chassis. Installation is now complete.
Fig. 10A
Fig. 10C
Fig. 11
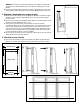
Without Extension Brackets With Extension Brackets - In
With Extension Brackets - Out
Pivot Screw
Locking Screw
(End-User Installed)
Tilt Adjusting Screw
Fig. 10B