Precautions IMPORTANT The lightning flash with arrowhead symbol, within an equilateral triangle, is intended to alert the user to the presence of uninsulated dangerous voltage within the product's enclosure that may be of sufficient magnitude to constitute a risk of electric shock to persons. These labels can be found on the unit's rear panel. Note : This equipment has been tested and found to comply with the limits for a Class B digital device, pursuant to Part 15 of the FCC Rules.
Important Safety Instructions • READ THESE INSTRUCTIONS - All the safety and operating instructions should be read before the product is operated. • VENTILATION - Do not block any of the ventilation openings. Install in accordance with the manufacturer's instructions. • KEEP THESE INSTRUCTIONS - The safety and operating instructions should be retained for future reference. • GROUNDING OR POLARIZATION - Do not defeat the safety purpose of the polarized or grounding type plug.
Table of Contents Before You Start What’s in the box................................................... 5 Putting the batteries in the remote control .....5 Using the remote control.....................................5 Compatible Discs ..................................................6 Controls & Display Front Panel ............................................................. 7 Display...................................................................... 8 Rear Panel ....................................
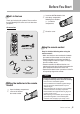
Before You Start 2 What's in the box Thank you for buying this product. Please confirm that the following accessories are in the box when you open it. Insert two AA/R03 batteries into the battery compartment following the indications (+, -) inside the compartment. Accessories 3 Close the cover.
Before You Start Compatible Discs DVD+R/RW compatibility • This unit can play DVD+R and DVD+RW discs recorded as DVD video format. Any disc that displays one of the following logos should play in this system. Other formats, including DVD-RAM, DVD-ROM, DVD-Audio, SACD and CD-ROM will not play. • Also this unit can record the video and audio signal in DVD+R or DVD+RW disc. DVD Video compatibility • Single-sided or double-sided discs. • Single layer or dual layer discs.
Controls & Display Front Panel 1 2 3 4 5 6 12 11 10 9 8 7 1 DISC TRAY Put a disc to be played in here. 8 COMPOSITE VIDEO IN Connect to Composite Video Output of camcorder. 2 OPEN/CLOSE To open or close the disc tray. 9 DV IN Digital input jack for use with a digital video camcorder. This jack is for connection to DV camcorder only. It is not compatible with other digital equipments. 3 PLAY/PAUSE Press to start or pause a disc playing. 4 STOP Press to stop a disc playing.
Controls & Display Display 1 2 8 3 9 4 5 10 11 12 6 7 13 1 TIMER Recording Indicator Lights when timer recording is on. 8 ROTATION Rotates when the disc is spinning. 2 ANGLE Indicates the current disc being played is viewed as multi angle. This function only works for discs having scenes recorded at different angles. 9 HDD Indicator Indicates the HDD mode. 3 DOLBY DIGITAL Indicator Indicates Dolby Digital 5.1CH playback. 4 TITLE Indicator Title number for DVD playback.
Controls & Display Rear Panel 1 2 3 4 5 6 7 8 9 10 11 1 AC POWER CORD Connect to the wall outlet. 7 2 DIGITAL AUDIO OUT Connect COAXIAL OUT to Digital Audio Input (coaxial type) of Audio AMP. Or connect OPTICAL OUT to Digital Audio Input (optical type) of Audio AMP. 5.1 CH AUDIO OUT Connect to analog Audio Inputs of Audio AMP. If you want to connect to TV, connect FRONT L and R to Audio Inputs of TV. 8 ANT IN Connect to external antenna.
Controls & Display Remote Controller Unit A A-B To repeat a certain section. ANGLE To view with a different frame angle. ARROW ( ) To select an item of menu. AUDIO To select the audio language or audio channel when playing a DVD disc. You can also change the audio channel of the broadcast. • If the NICAM broadcast is bilingual, you can select the language. • If the NICAM broadcast is stereo, you can switch between NICAM stereo and Mono audio. B BOOK MARK To create 9 numerical bookmarks.
Controls & Display E R EDIT To edit a title or chapter of disc. RANDOM To play tracks of Audio CD in random order. ENTER Used to select the menu item. REC (Record) To start recording. H REC MODE To select the record quality/recording time. REPEAT To select a repeat mode. HIDE Used to hide a chapter. M MENU Used to display the contents menu of the loaded DVD disc or the program list of HDD. MUTE To turn on/off audio outputs. REPLAY To play back again from the scene of previous 10 seconds.
Controls & Display STOP ( ) To stop a disc or HDD playing. SUBTITLE To select the subtitle language. T TIMESHIFT To store a TV program in the HDD storage cache temporarily. TITLE To display the title menu of the DVD or the program list of HDD. TV/DVD To view channels selected by the recorder tuner or by the TV tuner. It works only when recorder and TV is connected by European Scart cable while Video out setting is RGB in Setup Menu. TV MODE Set up TV type according to type supported by user’s TV.
Connection Connection for Video Output Terminals Composite Video (CVBS) Output The composite video output is supported by most televisions. The composite video jack on TV is usually yellow and may be labeled video, CVBS, composite. Connect “Front L” and “Front R” to AUDIO INPUT (L/R) on TV and set “Analog Output” to “ Stereo” from the AUDIO SETUP menu. EURO AV Output The Euro AV terminal can be connected to the TV equipped with Euro AV connector. The audio transmitted on the Euro AV is stereo sound.
Connection Connection for Audio Output Terminals You can enjoy the Dolby surround sound by connecting 5.1ch audio output or digital audio output to the audio amplifier. 5.1ch Audio Output Use 5.1ch audio outputs for connection with your 5.1ch A/V receiver or amplifier. From the AUDIO SETUP menu, set “Analog Output” to “ 5.1 Surround”. Digital Audio Output Use digital audio outputs for connection with Dolby Digital or DTS decoder.
Getting started Turning on and off 1 Turn on your TV and set the video input to this recorder. 2 Press STANDBY/ON button on the remote controller or the front panel to turn on. You can see the on-screen information. If you want to turn off, press STANDBY/ON button again on the remote controller or the front panel. Displaying disc information on screen (OSD) You can display the playback status on TV screen as follows ; Title, Chapter number, Playing time. 1 Press DISPLAY button during playback.
Basic Playback Playing a DVD disc Playing an Audio CD 1 Press OPEN/CLOSE button to open the disc tray. Put a disc on the disc tray with logo-printed side up. 1 2 Press OPEN/CLOSE button again to close the disc tray. The disc will be loaded automatically. 3 The TV screen shows disc menu. 4 Select the desired item by using , , , or 0 to 9 button, then press ENTER button to start playback. Playing a DVD+RW or DVD+R disc 1 Load a DVD+RW or DVD+R disc. The menu screen is displayed automatically.
Basic Playback Playing a JPEG CD Playing MPEG4 Movie 1 Load a JPEG CD. The file list is displayed on the TV screen. 1 Load a MPEG4 disc. 2 Select the desired file by using or button. You can see the thumbnail picture of selected file on the right window. 2 Press Enter button after selecting the desired movie using , button. 3 Press PLAY button to start playback. The JPEG files are played in order automatically.
Basic Playback Playing a program of HDD 1 Press DVD/HDD button to select the HDD mode. If you are playing a DVD, press STOP button twice to stop a DVD. And then press DVD/HDD button to select the HDD mode. 2 Press PLAY button. The program list of HDD appears on screen. 3 Select the desired program by using button in the program list. 4 Press PLAY button. It starts to play the selected program.
Advanced Playback Fast Forward/Backward Use this function to play the DISC or HDD contents in fast forward or fast reverse. There is no sound during searching. 1 2 Press or button during play mode. Each time you press the button, playback speed changes as below. Press PLAY button to resume normal playback. Slow Forward/Backward (DVD only) Use this function to play the DISC contents in slow forward. 1 Press PAUSE button during play mode. The DVD Recorder pauses the playing temporarily.
Advanced Playback Program Playback (Audio CD only) This feature lets you program the play order of folders, tracks on a disc. 1 Load an Audio CD. The first song is played back automatically. The track list is displayed on the TV screen. 2 Select the desired song by using or button in the track list, then press ENTER button. A mark is put on the selected song. 3 Repeat step 2 if you want to select other songs. 4 Press button, then select “Add” by pressing button.
Advanced Playback Selecting Subtitles (DVD only) It is possible to change the subtitle language to a different language from the one selected at the initial settings. This operation works only with discs on which multiple subtitle languages are recorded. If the loaded disc supports multiple subtitles, you can select the subtitle language. 1 2 Press SUBTITLE button during playing. Select the subtitle language by using , button, then press ENTER button. The subtitle is displayed on the bottom of screen.
Advanced Playback Repeating a Title, Chapter It is possible to repeat the chapter/title for DVD or track/disc for Audio CD. 1 2 Press REPEAT button during playback. The repeat information is displayed on the top of screen. Each time you press REPEAT button, the repeat mode is changed as follows. A-B Repeat (DVD/Audio CD disc only) Use this function to repeat the play of a selected segment. This is very useful for studying foreign languages because it repeats the selected segment until canceled.
Advanced Playback ZOOM screen (DVD/HDD only) Switching the Camera Angle The zoom function allows you to enlarge DVD or HDD screen image up to 8 times. When a DVD contains recorded multiple angles of a scene, you can select the Angle function. 1 1 Press ANGLE button during playing. Available angles of the current scene will be displayed on the top of screen. 2 Each time you press is changed. Press ZOOM button during playback. The picture is zoomed.
Advanced Playback Direct Search (DVD only) Bookmark You can select a specific chapter or title to play. Also you can move to a specific time in a track or title. You can find the desired scene of movie easily. 1 2 Press DISPLAY button during playback. The playback information appears on TV screen. Title Search 1 Select “TITLE” by pressing , button 2 Enter the title number by using numeric 0 to 9 button. It starts to play back from the specified title.
Recording Basic recording 4 To record TV programs, you should search TV channels first. 1 Press DVD/HDD button to select the HDD(Hard Disk Drive) or a recordable DVD (DVD+R/DVD+RW) on which you want to record. If you want to record on the HDD, press TV/DVD button for HDD to be displayed on TV screen. 2 If you want to record on DVD, load a DVD+RW or DVD+R disc with enough free space for the recording. If you load a new blank disc, it asks for formatting the disc.
Recording OTR (One touch Timer Recording) 1 During basic recording, press REC button. Every time you press REC button, the recording time will increase by 30 minutes. It is possible to record for up to 3 hours if there is enough room on the disc or HDD. The DVD Recorder will stop automatically after recording for a specific time. 2 If you want to cancel OTR, press STOP button. Timer Recording For timer recording, the clock, date, and stations must be set correctly.
Recording VPS/PDC The VPS/PDC system automatically adjusts the recording time so that even if a program is not running to schedule you won’t miss it. For VPS/PDC to work properly, you must input the correct announced time and date of the program you want to record. Note that VPS/PDC may not work with every station. If you want to change any of the details, move to the details you want to change by using or button. Then change the 0 to 9 button.
Recording Recording from a DV (Digital Video) camcorder 4 Find the place on the camcorder tape that you want to start recording from. You can use the remote controller for this recorder to control the camcorder using PLAY, STOP, PAUSE, , button when the information of DV is displayed on the top of screen. If the information of DV disappears, press DISPLAY button to show it. 5 Press REC button at the point from which you want to record during playback of DV tape.
Recording Timeshift Recording Copying (from HDD to DVD) You can store a TV program in the HDD storage cache temporarily. Do not miss a scene from a live broadcast. If the telephone rings while you are watching your favorite live broadcast, just press TIMESHIFT or PAUSE button before answering the phone. The timeshift function will be activated and the broadcast is then recorded for later viewing. After the phone call or viewing interruption, press PLAY or button to watch the program.
Editing (DVD+R/DVD+RW/HDD) Editing the title of DVD+R/DVD+RW 1 Load a DVD+RW or DVD+R disc. The DVD menu screen is displayed automatically. 2 Select the title to edit by using button. 3 Press EDIT button. The disc edit menu appears on screen. or Erase Title Select “Erase Title” by using or button, and press ENTER button. Protect Title You can prevent the contents of title from being deleted by mistake. Select “Protect Title” by using or button, and press ENTER button.
Editing (DVD+R/DVD+RW/HDD) Edit Title Name 1 Select “Edit Title Name” by using 3 Press EDIT button during playback. The title edit menu appears on screen. or button, and press ENTER button. The keyboard will show on the screen. 2 Select a letter which you want to input by using , , , button, and press ENTER button to confirm it. 3 Repeat step 2. The maximum length of the title name is up to 17 characters. 4 After the inputting of letters is finished, press ENTER button after selecting “Done”.
Editing (DVD+R/DVD+RW/HDD) Change Thumbnail You can create a new thumbnail or change the thumbnail for the selected title. Select “Change Thumbnail” by using or button, and press ENTER button at the point where you prefer to be the thumbnail. • Edit Name 1 Select “Edit Name” by using or button, and press ENTER button. The keyboard will show on the screen. 2 Select a letter which you want to input by using , , , button, and press ENTER button to confirm it. 3 Repeat step 2.
Using the Setup Menu Once the initial settings have been completed, the DVD recorder can always be operated under the same conditions whenever the power is switched on. These settings are called SETUP data that are easily modified and stored using the SETUP menu. The SETUP menu includes the information for System, Video, Audio, Security, Record, Disc. SYSTEM Basic Operations Press SETUP button during stop mode. And use , , , and ENTER button to navigate and select options.
Using the Setup Menu 2 3 Press ENTER button after selecting “Save”. VIDEO FACTORY RESET Returns the DVD Recorder back to factory default settings. 1 Press ENTER button after selecting “Start”. It asks for the password. 2 Enter the current password in 4 digits by using 0 to 9 button. If you have not changed the password, enter 1, 2, 3, 4. The setup menu screen is exited automatically after factory reset. 1 CHANNEL SCAN This recorder has a built-in TV tuner for recording TV programs.
Using the Setup Menu 2 Select the channel you want to modify by using or button. The information of the selected channel will show on the right of the channel list. Changing the program number You can change the program number assigned to the current preset. 1 Select “Prog Num” by using Fine tune If the captured signal is not good, you can tune the channel fine. 1 Select “Fine tune” by using or button. 2 Tune the channel fine by pressing or button.
Using the Setup Menu 3 SCREEN FORMAT If you have a widescreen TV, select the “16:9 Wide” setting. The wide widescreen DVD disc is shown using the full screen area. When playing the DVD disc recorded in conventional format (4:3), the settings on your TV will determine how the material is presented. (See the manual that came with your TV for details on what options are available.) If you have a conventional TV, choose either “4:3 Letter Box” or “4:3 Pan Scan”.
Using the Setup Menu 5 2 EQUALIZER You can adjust the equalization curve and store it. 1 Select the frequency of which you want to adjust the tone by using 2 Press or equalization. or button. button to adjust the 3 Press ENTER button after selecting “SAVE” to store the equalization curve. 2 SET PASSWORD 1 Press button after selecting “Change” . The password window appears on TV screen. 2 Enter the current password in 4 digits by using 0 to 9 button.
Using the Setup Menu RECORD DISC 1 1 AUDIO LANGUAGE Set this value to the preferred audio language. If an audio language is selected, whenever you start playing a new disc, the selected audio language is played. (if the selected language is contained in the disc) 2 SUBTITLE LANGUAGE Set this value to the preferred subtitle language. If a subtitle language is selected, whenever you start playing a new disc, the selected subtitle language is played.
Using the Setup Menu 2 Press ENTER button after selecting “Yes”. NOTE • Initializing a disc will erase everything recorded on it. Make sure there is nothing on the disc that you want to keep. • You may not be able to re-Initialize a disc if it was initialized on other brand DVD recorders. 6 8 SCANDISK HDD You can scan the disk of HDD whether the data is broken or not. 1 Press ENTER button after selecting “Start” by pressing button. It asks for confirmation again.
Additional Information Specifications Supported disc types General Recording Timer Euro AV connectors (21-pin connector) S-Video output Video Output Audio output Audio characteristics Digital output DV input Accessories Supported video formats TV system Power requirements Power consumption Weight Dimensions Operating temperature Operating humidity Recording format Recordable media Programs Clock Power off memory AV connector input / output x 1 AV connector output x 1 Y (luminance) - Output level C
Additional Information Troubleshooting Incorrect operation is often mistaken for trouble or malfunction. If you think that there is something wrong with this component, check the points below. Sometimes the trouble may lie in another component. Inspect the other components and electrical appliances being used. If the trouble cannot be rectified after checking the items below, ask your nearest authorized service center or your dealer to carry out repair work.
Additional Information Problem The remote control doesn't seem to work. Solution • The remote control is too far from the player, or the angle with the remote sensor is too wide. Use the remote within its operating range. • The batteries are exhausted. Put in new batteries. Some DVD discs do not output digital audio. • Switch your amplifier to the player's analog outputs. Dirt, dust, etc. on the disc. • Clean the disc. Interconnects are not fully inserted into the terminals (or are not connected).
WARRANTY and SUPPORT Updates Please check out regularly our web site for further updates and assistance about this product: www.hb-direct.com. Important safety information Read these instructions carefully and pay attention to all warnings and guidelines. Do not overload electrical sockets or extension cables. Overloading can result in fire or electric shock. Never insert objects into the DVD player's cabinet door.