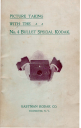
PICTURE TAKING WITB ? THE , .J!. .J!. _./ No.4 BULLET SPECIAL KODAK. , EASTMAN KODAK CO. ROCHESTER, N. Y.
KODAK, Trade Mar", 1888. EASTMAN KODAK COMPANY, ROCHESTER , N . Y. MANUFACTURERS OF Kodaks, Eureka Cameras, Cartridge Roll Holders, Eastman's Solia Paper, Western Collodion Paper, Eastman's Dry Plates, Eastman's Royal Bromide Paper, Eastman's Sta ndard Bromide Paper, Eastman's Platina Bromide Paper, Eastman's Enameled Bromide Paper, Eastman's Matte-Enamel Bromide Paper, Eastman's Transparent Film, Eastman's Transparency Plates, Tripods and Other Special ties.
INS-TRUCTIONS FOR USING THE No. 4 BULLET SPECIAL KODAK. MANUFACTURED ONLY BY EASTMAN KODAK COMPANY, ROCHESTER , N . Y .
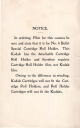
NOTICE. In ordering Film for this camera be sure and state that it is for No.4 Bullet Special Cartridge Roll Holder. This Kodak has the, detachable Cartridge Roll Holder and therefore requires Cartridge Roll Holder film, not Kodak film. Owing to the difference in winding, Kodak Cartridges will not fit the Cartridge Roll Holders, and Roll Holder Cartridges will not fit the Kodaks.
BEFORE LOADING. Before taking any pictures with the Bullet Special, read the following instructions carefully and make yourself perfectly familar with the instrument, taking especial care to learn the construction of the shutter. \Vork it for both time and instan- taneous exposures several times before threading up the film or putting a plate in position.
CONTENTS. PART 1. Loading. PART Section f. Loadin g with Films. Sedion 2. Load in g with Plates. II. . Making the Exposures. PART Sectiolt f. Operatin g the Shutter. Section 2. In stantan eo us Exposures. Section J. Time Exposures Indoors. Section 4. Time Exposures Outdoors. S ection 5. Flash Light Pictures. III. Remo ving the Film fr om Roll Holder. PART I V. Developing. PART V. Printing on Solio Pa per.
PART I. Section I. LOADING WI fH FILM. The first step in loading the No. 4 Bullet Special Ktldak with film is to remove the Cart-' rid ge Roll H older from the ca mera as shown in Fig. A. To accomplish this open the door in side of Kodak by means of ·thumb piece and release roll holder by pushing inward on the brass catc hes at sides, as shown in ill u s tra tion. I t will then cume ou t readily. Fig. A.
II. Pul. upward on the aluminum lock, as shown in Fig. 2, and remove the carrier from its au tel' case, as shown in Fig. 3. Fig. 2. II I. Throw back the brass plate at top of recess on ri ght Fig. 3. side of carrier, and insert th e fi·lm cartridge in place, fitting the round hole in axis of s pool onto th e wooden pin at bottom Fig. 4. (See Fig. 4) and inserting the hub in brass tension plate in slotted end of reel. See Fig . 5. Fig. S. IV.
, V . ' Press on the ratchet wheel-:and give one or '. t wo 'slight turns to the left to bind the p aper firmly onto the reel, taking care that it d raws straight and true, bearing meantime upon the cartridge with the fingers of the left hand to give sufficient Fig. 7. t("n ~ion to make the paper draw taut. (See Fig. 7.) VI. Reinsert the carrier In Case and lock by pu shin g down on aluminum catch, as shown in Fig. 8. VII. Spring key back into position and turn to the left until it is seated in place.
on p age 5. Care should be taken, however, that the r oll holn e r fits into place, th e lip on th e bottom being entered in slot a t bottom of ca mera and th e brass catches a t side s prung into position . The dark slide may now be removed a nn th e exposu res made, as described in Part II. (The dark slide need not be re-in serted until it is desired to remove th e roll hold er fr o m the camera.) X.
Section 2. LOADING WIT H PLAT ES. I. In using g lass plates the plate holders must be loaded in a dark room-tha t i" a room from which all white light has been excluded a s described on page 29. JI. Provide Bullet Special Kodak Dou ble P la te H old er s. dozen Eastman's Extra Rapid Dry Plates, 4 x 5. 1 Eastman Orange Candle Lam p. A shelf o r table on w hich to w o rk. N O.4 I III. Set up the lamp as described in th e directions contained in the box in which it is pa~ked . Fig. r. IV.
X I. Insert ground glass frame, as shown in Fi!':". 3. X II. Insert one of the plate holders, pushing it in just ahead of the ground glass. See Fig. 4. It will go in easily and need not be forced. See that the lip on the plate holLler fi ts down into groove in camera. Fig. 3. XIII. Pullout the dark slide and insert it for con ve ni e nce back of the p late holder. XIV. After making the exposures as described in Part II., reinsert the dark slide, with the word " exposed" toward the .
PART II. M AKING T HE EXPOSURES. Section I. -Operating the Shutter. Perfect familiarity with the shutter is essential to successful picture taking with a ny camera. Th e following directions should therefore be carefully read and the shutter operated seve ral times before threading the film up for use. Open the front of Kodak by pulling out the thumbpiece show n in Fig. r. " SN AP SHOTS!' For all Ordinary Instantaneous Exposures. First-Set the lever E at the point "I".
Third-Set the speed r egu lator G at the middle poin! of the slot in which it trav els. ~OTR: For very fast work, such as horse races, moving trains, a thletic sports, etc , push 1\ G " do'wn tu li mit of motio n. This increases the speed of s hutter. If the lig ht is a trifle weak but you still wish to take some object ttJat cannot be taken with time exposure, push lever H G" up to the limi t of mo tion. This slows the shutter. Do not in./er .trom lItis fltat snap sllOts can be 1ltade in dark.
FOU R ESSE NTIALS. Before making an exposure with the NO.4 Bu llet Special , either time or instantaneous, be su re of four things: First-That the shutter is set properly. (For time. Hl evcr " or instantaneous exposures as desired.) Second-That the dia ph ragm is se t at the proper opening. T hird-That the Kodak is focused. Fourth- T hat an une xposed section of the film is tu rned into position and the dark slide withdrawn. (Or a fresh plate is in position . ) Section 2.-Instantaneous Exposures.
When desired the focusing may be done on the ground glass instead of by the figures on the dial. Remove the plate or roll holder (first, of course, inserting the dark slide); set the shutter open (see page 12) and turn the focusing key (Fig. I) until the image shows sharp on the Fig. 2. ground glass (Fig. 2.) Now close the shutter, insert the roll or plate holder once more and withdraw dark slide. 2.-SET THE SHUTTER.
3.- LOCATE THE IMAGE. To take instantaneous pictures the object should be in the b road ' open sunlight but the Kodak should not. The sun should be behind the back or over the shoulder of the operator. Aim the camera at the object to be photographed and locate the image in the finder. There are two finders, one for horizontal and one for vertical exposures. For a horizontal picture hold the camera as shown in Fig. 4. (When a focusing glass is employed the image may be located on that instead of in the Fig.
4.- HOLD IT LEVEL. The Kodak must be held level. If the operator attempts to photograph a tall building, while standing near it, by pointing the Kodak upward (thinking thereby to center it) the result will be similar to Fig. 6. This was pointed too high. This building should have been taken from the middle story window of the building opposite. Fig. 6. The operator should hold the Kodak level, after withdrawing to a proper distance, as indicated by the image shown in the finder at the top of the Kodak.
WIT H FILMS. Turn the key slowly to the left until the next number appears before the window in the back of Kodak. Three or four turns will be sufficient to accompl ish thi s. Repeat the foregoing operations for each instantaneous picture. WITH PLATES. If p lates a re used, open the door in side and re-insert the dark slide, putting it in with the word "Exposed" towards front of camera so that it will show when the plate holder is removed. Pull out the plate holder, pushing it back a trifle to start it.
Section 2. Time Exposures Indoors. First put the Kodak in position, using some firm support, like a tripod or table. Set in such a position that the finder will embrace the view desired. The diagram shows the proper position for the camera. It :should not be pointed directly at a window as the glare of light will blur the picture. If all the windows cannot be avoided, pull down the shades of such as come within the range of the Kodak. Fig. 1. I I ~ D ilg ralll sho\\'ing ,pos it:oll of Kudak.
the proper time, (using a watch if more than two seconds) and again press the lever to close the shutter. For extremely short time exposures set the shutter for "lever" exposure (see page 12 ). Press down on exposure lever to open shutter and release it to close shutter. Th e shutter is open as long as the lever remains under pressure. Turn a new film or place a new plate in position as described before. See page 17. Time Needed for Interior Exposures. This table is for No.8 stop. When No.
Dark colored walls and hangings and more than one w.i ndow : blight sun outside, 10 seconds; hazy sun, 20 seconds; cloudy bright, 40 seconds; cloudy dull, I minute, 2 0 seconds. Dark colored walls and hangings and only one window: bright sun outside, 20 seconds; hazy sun, 40 seconds; cloudy bright, 80 seconds ; cloudy dull, 2 minutes, 40 seconds. The foregoing is calc ulated for rooms whose windows get the direct light from the sky and for hours from 3 hours after sunrise until 3 hours before sunset.
Section 3. TIME EXPOSURES IN THE OPEN AIR. When the stop No. 128 is in the lens the light admitted is so much reduced that time exposures out of doors may be mittie the same as interiors but the exposure must be much shatter. WITH SUNSHINE-The shu tter can hardly be opened and dosed quickly enough to avoid over-exposure. WITH LIGHT CLOUDs-F rom Yz to 1 second will be sufficient. WITH H EAVY CLOUDs - F rom 2 to 5 seconds will be tequ.ired.
Section 4. FLASH - LIGHT PICTURES. The invention of the flash light apparatus renders the taking of photographs at night easy, with such a camera as the Bullet. The requisites are The Kodak, Actina Flash Lamp, Bottle Actino Powder, $r. 2 5 .60 $r. 85 The flash light apparatus consists of a specially constructed alcohol lamp, having in front of it a little tray upon which is poured about a teaspoonful of flash light powder.
front of Kodak, the flash would strike the lens and blur the picture. It should be placed at one side as well as behind, so a.s to throw a shadow and give a little relief in lighting. The lamp should be at the same height or a little higher than the camera. The support upon which the lamp is placed should not project far enough in front of it to cast a shadow in front of the Kodak. A piece of cardboard a foot square placed under the lamp will prevent any sparks from the flash doing damage.
proper distance from the camera to the subject can be ascertained by looking at the image in the finder. For a bust picture this will be 5 to 7 feet; for a three-quarter picture, 7 to 9 feet, and for a full figure, 9 to 12 feet. The lamp should be on the side of the camera away from the face, 1hat is, the sitter should not face the lamp. The lamp should not be placed higher than the head of the sitter. To MAKE A GRoup.
PART II. REMOVING THE FILM. No dark room is required in changing the spools in Cartridge Roll ~ Holder. The operation should, however, be perform ed in a subdued light. I. When the last film (No. 12) has been exposed, turn the key until it will turn:no further or about 15 half turns to the left and remove the roll holder from camera, as before described. II. Provide an extra spool of NO.4 Horizonta l Cartrid g e Roll Holder (4 in.
VI. Throw back the brass tension plate as shown in Fig. 3 and take out the exposed roll, snappin.; a rubber band about it to hold the paper securely and wrap up immediately to prevent damage from light. VII. Now take out the empty spool, as shown in Fig. 4, and transfer it to the recess at winding side, fitting the slotted end of spool into the hub in tension plate, as shown in Fig. 5. Swing the spool into the recess and fit into position.
We have larger and better facilities for developing and printing and more skilled operators than anyone else, and it is to our interest to get the best results f rom e7Jery nq{ati7Je . IN ORDERING Film for tbis camera specify "Follr i11ch Roll Holder Cartridge for NO.4 Bllllet Special." Th e ordinary No. 4 Bllllet and Bulls-Eye cartridges can110t be used ill tbis ca mera .
PART .IV. DEVELOPING. Provide an Eastman's ABC Developing and Printing Ou tfit. THE OU fFIT CO:-lTAINS: Ea stma n Candle Lamp. Developing Trays, I Glass Beaker, J: 4 x 5 Printing Frame, I 4 x 5 Glass for same, I Stirring- Rod, ~2 Dozen Developer Powders, I 4 $ . .07 .23 Yo ·4° 2 • 2.::' I Pound H yposulphile Soda, Doze n Sheet s 4 x 5 Solio Paper, 2 ~OZ • BOllie So lio T on in g I Solu tion, Package Bromide Potassium, -I5 .0s . 25 1 Ounce Glycerine, .
By a dark roQnJ is meant one that is wholly dark-not a ray of light in it. Such a room can easily be secured at night almost anywhere. The reason a dark room is required is that the film is extremely sensitive to white light, either daylight or lamplight, and would be spoiled zf exposed to it even for a fraction of a second. Having provided such a room or closet, where, when the door is closed, no ray of light can be seen: 1.
III. Cut the strip of film apart at point where perforations occur in the middle. The object of this is so fhat it may be the more readily handled. IV. Fill one of the trays with water and pass each of the two strips of film through it, face down (t he face is the dull side) as shown in the cut, h olding one end in eac h hand. Pass throug h the water several times, that th ere may be no bubbles remaining on the fi lm.
two or three time s ~'i th water, leaving it to soak while the next film is being developed. NOTE : Eight or ten 4 x 5 negatives can be developed , one after the other, in one portion oof the developer ; then it should be thrown awa y a nd a fresh ponion mixed. Only on e negative should be developed a t a time until the ,?perato r becomes expert, the n he can manage three or four in the tray at one time and the developer will answer for twenty-four 4 x 5 films before being exhausted.
The g lycerine solution may be us ed repeatedly. Th e tr ays and beaker should now be rinsed- out a nd se t away to drai n and dry. When the negati ves a re dr y, they are read y for printing , as d esc rib ed in Part I V. DEFECTIVE NEGATIVES. By follo wi ng closely th e foregoing dir ec tions, th e no vice ca n make se venty-five per cent., or upw a rds. of good negatives. Sometimes, however, the direc tions a re not follow ed , and fa il ures re sult.
film to remain uncovered in part by the various solutions whi le in them. White, milky spots are evide nce that th e negative has not been properly fixed, and the negative should be put b ac k into the fixing bath, and then r ewashed. DEVELOPING DRY PLATES. The foregoing directions a pply to dry plates as we ll as films, the chemical treatment being the same , exce pt th at the preliminary wetting, and the soaking in glycerine may be omitted with plates.
PART V. PRINTING ON EASTMAN'S SOLIO PAPER. Having found that amateurs can easily handle our Solio Paper we have now substituted it for the Ferro·Pr ussiate Paper, which we formerly furnisht'd with the ABC outfits as it makes far handsomer pictures than the blue prints. Solio prints have a warm, brown tone and are usually mounted on cardboard and highly burnished. METHOD OF PRJNTl NG.-Open the printing frame of the ABC Outfit and lay the negative back down upon the glass ( the back is the shiny side) .
Pour the toning solution into one of the trays and immerse the prints one after the other in the toning bath. Five or six prints can be toned together if they are kept in motion and not allowed to lie in contact. Turn the prints all face down and then face up and repeat this all the time they are toning. The prints will begin to change color almost immediately from reddish brown to reddish yellow, then brown to purple.
PRICE LIST. NO.4 Bullet Special Kodak, for film or plates, including Cartridge Roll Holder, and one Double Plate Holder, Rapid Rectilinear lens, Eastman shutter, iris diaphragm stops (not loaded), $25 00 Do., with one Double Plate Holder, but wit hout Roll 20 00 Holder, 00 Cartridge Roll Holder for NO.4 Bullet Special, 4·inch Light-proof Roll Holder Cartrirlge. !2 exposures 4 x 5, (Specify fo r Cartridge Roll-Holder) 90 I 00 Double Plate Holders, 4 x 5 inches. ea h, Black Sale Leather Carrying Case for Kor\
Eastman's negative pins (for pinning up film negatives while drying), per box of 25, Eastman's Indexed Negative Albums, to hold 100 4 x 5 film negatives, 50 I Hyposulphite Soda, pulverized, per pound, Bromide Potassium, per ounce bottle, Eastman's Improved Orange Candle Lamp, No. I Kodak Dark Room Lamp, one inch wick, No.
ENLARGEMENTS. Every amateur has among his negatives some that are well worth enlarging and framing. Ou r enlarging department contains only skilled operators and we secure the very best -results possible from every negative. Where th e kind of paper is not specified we will make t he enlargements upon the pa per whic h, in our judgment, is best suited to the negative and the 'subject. Price List.
EASTMAN'S FEATHER TRIPOD. Length, folded, J4 Yz inches. Length, extended, 52 Yz inches. Suitable for any 4 x 5 camera or smaller. Wonderfully light. compact and strong, this tripod is espec ially designed for the tourist or cycling Kodaker. Only qYz inches in leng th when closed, it can be readily strapped to the bicycle handle bar, whe th e r carried in a case or not.
T HE BULLS-EYE TRIPOD. A compact and convenient tripod for use with any camera up to and including 4 x 5. A brass top plate with milled edges holds the socket screw securely and seats it in place in the camera when turned - thus doing away with the nuisance of the ordinary screw, turned by means of a key handle inconveniently located under the plate between the tripod legs, and always likely to be missing when most wanted.
There is no Kodak but the Eastman Kodak • /