
User Manual

77
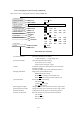
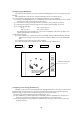
(5) Setting the receiver GAIN (GAIN)
Using this function, you can set up the automatic and manual gain level. As widely accepted conven-
tion, the receiver gain should be set to the level that the noise speckles is slightly shown on the screen.
There are two modes of setting for AUTO and MANUAL, to each mode you can independently set the
GAIN level. Use the following procedure to set up.
In MANUAL mode, you can preset the MANUAL GAIN to current MANUAL gain level as standard.
When you enter "G60" as gain level, for instance, "G60" will be preset as standard MANUAL level.
(1) Select ADJUST by "common operations for CUSTOM" and select GAIN from the pull-down menu
items. Press the "ENT" key to fix the selection.
(6) Turn the rotary control to set the desired level from 1 to 30.
(7) Press the "ENT" key to fix the setting.
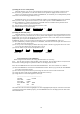
Up/Down → ENT → Control knob → ENT
Select GAIN Choose value Complete
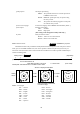
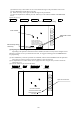
(6) Setting the STC level (STC)
Using this function, you can set up the STC level to your needs. Proper STC setting should be such that
small targets such as buoy and small craft are clearly shown while slight sea clutter appears on the screen. In
AUTO mode, you can preset the AUTO STC level and AUTO FTC level as well. When entered at HARBOR
(HBR) mode, you can preset the HARBOR STC level.
In MANUAL mode, you can preset the best suited STC level as standard MANUAL STC level.
(1) Select ADJUST by "common operations for CUSTOM", and select STC from the pull-down menu. Press
the "ENT" key to fix the selection.
(2) The set up screen will be displayed. Rotate the rotary control to obtain an appropriate STC level on the
screen. The STC digital value will change from 1 to 16.
(3) Press the "ENT" key to exit from the adjustment screen.
Up/Down → ENT → Control knob → ENT
Select STC Choose value Complete
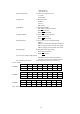
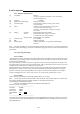
5.5.4.5.6 ATA preset (ATA PRESET)
Before using the ATA function, the settings described below are necessary.
Note: Use the ATA function in either the PPI or ALL PPI mode. Even if other modes are used, the ATA
still continues tracking though the symbols and data are not displayed on the radar.
Select the ATA PRESET items from the SET UP/CUSTOM menu. The menu contents are as follows.
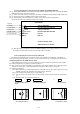
(1) When ATA PRESET is selected from CUSTOM items and the "ENT" key is pressed, the ATA PRESET
screen (See chart below) appears.
(2) Select items with up-down cursor keys and change the value of each item with encoder knob.
(3) Change the item of VECT(vector) MODE with right-left cursor keys.
(4) Change the item of ATA with right-left cursor keys.
--------------------------------------------------------
CPA SET 0.0 NM
TCPA SET 0 MIN
VECT SET 6 MIN
VECT MODE REL TRUE
ATA ON OFF
--------------------------------------------------------
Check that ON in the ATA items is highlighted. If OFF is highlighted (selected), the ATA does not function.
* Unless the ATA board is installed properly, the ATA PRESET items are not displayed on the above SET
UP/CUSTOM menu.