
User Manual


38
5.4.4 Distance measurement (VRM2)
The operation is the same as VRM1, refer to VRM1 operation. The "VRM2" will appear in a reverse display at
the lower right side of the screen.
5.4.5 Measuring the angle between two points (FL EBL2)
Note: VRM2 and EBL2 do not follow the OFF-C function while floating.
Note: Refer to "5.5.1.5 Measuring the distance or angle between two points ( FL EBL2, FL VRM2 )".
(a) Setting a reference point for measurement of the angle.
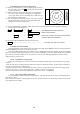
(1) Press "FL EBL2" key. “SET START POINT” is displayed and a small cross mark appears.
FL EBL2
→
FL EBL2 is turned ON and
(Select FL EBL2) the small cross mark appears.
(2) Use the left-right and up-down cursor keys to place the small cross mark on one of the two echoes whose angle
will be measured, and press the "ENT" key.
Up/Down & Left/Right
→
--------- ENT Criterion of the reference point is set.
(Place the cross cursor on an echo)
(b). Measuring
Perform the operations in the above mentioned and "measuring the angle (EBL2)", and place the EBL2 on other
echo.
EBL2 is displayed on the screen referenced by the fixed cross cursor, which is positioned.
The " 2 xxx.x
°
" will be displayed at the lower right side that shows the angle between the two points.
5.4.6 Measuring the distance between two points (FL VRM2)
Note: Refer to "5.5.1.5 Measuring the distance or angle between two points ( FL EBL2, FL VRM2 )".
(a) Setting a reference point for measurement of the angle.
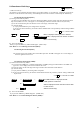
(1) Press the FL VRM2 key. The “SET START POINT” sign will be displayed and a small cross mark appears.
FL VRM2
→
FL VRM2 is turned ON and the small cross mark appears.
(Select FL VRM2)
(2) Use the left-right and up-down cursor keys to place the small cross mark on one of the two echoes whose angle
will be measured, and press the "ENT" key.
Up/Down & Left/Right
→
--------- ENT Criterion of the reference point is set.
(Place the cross cursor on an echo)
(b) Measuring
Perform the operations mentioned above and "measuring the distance(VRM2)", and put the VRM2 on other echo.
VRM2 is displayed on the screen referenced by the fixed cross cursor, which is positioned.
The distance between two points will be shown like " x. xNM", which is displayed at the lower right side
of the screen.
5.4.7 Changing the group of Soft Keys (NEXT)
Any function can be optionally allocated to the key upon which numbers 1-7 are indicated. You can allocate 4
groups of functions at maximum to each soft key, and switch between those functions by the "NEXT" key.
The "NEXT" key switches between allocated function groups on the soft key with numbers 1-7 indicated.
Every time you press the "NEXT" key, function group changes one another. You can also change the function group
using the left-right cursor key, at the "KEY ASSIGNMENT" function in the "CUSTOM" menu of the "SETUP".
2