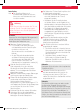
7 B. I A 7 3 6 5 B. II 2 2 1 1 2 2 6 3 Built-in Dishwasher KDW 60121 A2 BI 4 8 B. III B. IV B. V DE EN ES FR IT NL 8 9 1 8 8 82 888 3 Auto Intens. Öko 90 min Glass Schnell 10 Normal P 8 84 8 Auto Intens. Öko 90 min 5 Glass Normal Auto Intens.
1 A1 A2 A3 A4 A5 A6 A7 A8 A9 1 888 A A12 Auto Intens. Öko 90 min Glass Schnell Normal 2 P Geschirrspüler/ Dishwasher A 2 a Geschirrspülertür/ Door of dishwasher A11 A10 3 4 1.5 Liter 5 1.5 kg b 6 589 K 888 Auto Intens. Öko 90 min Glass Schnell Normal P B 3 J 888 C 7 Auto Intens.
Deutsch Sicherheitshinweise • Dieses Produkt kann von Kindern ab 8 Jahren und Personen mit verminderten körperlichen, sensorischen oder geistigen Fähigkeiten oder fehlender Erfahrung und Kenntnis benutzt werden, wenn sie zum Gebrauch des Geräts von einer für ihre Sicherheit verantwortlichen Person angeleitet und beaufsichtigt werden und sie es verstehen, das Gerät sicher zu benutzen. • Kinder dürfen nicht mit dem Produkt spielen.
Deutsch Sicherheitshinweise • Dieses Produkt ist für die Verarbeitung haushaltsüblicher Mengen im Haushalt oder in haushaltsähnlichen, nicht-gewerblichen Anwendungen bestimmt. Haushaltsähnliche Anwendungen umfassen z. B. Die Verwendung in Mitarbeiterküchen von Läden, Büros sowie die Nutzung durch Gäste von Pensionen, kleinen Hotels und ähnlichen Wohneinrichtungen. • Diese Geschirrspülmaschine verfügt über Ventilationsöffnungen im Gehäuseboden.
Deutsch Sicherheitshinweise • Lesen Sie diese Bedienungsanleitung vor dem ersten Gebrauch gründlich durch und geben Sie sie zusammen mit dem Produkt weiter. Beachten Sie die Warnungen auf dem Produkt und in dieser Bedienungsanleitung. Sie enthält wichtige Sicherheitshinweise sowie Gebrauchs- und Wartungsanleitungen für das Produkt. • Verwenden Sie das Produkt nur zweckbestimmt und mit den empfohlenen Zubehörteilen und Komponenten. Eine unsachgemäße oder falsche Nutzung ist gefährlich.
Deutsch Herzlichen Glückwunsch! Vielen Dank, dass Sie sich für ein KOENIC ﹣ Produkt entschieden haben. Bitte lesen Sie die Bedienungsanleitung aufmerksam durch und bewahren Sie sie für späteres Nachschlagen auf. Bestimmungsgemäße Benutzung Dieses Produkt ist nur für das Reinigen von Geschirr und Besteck geeignet. Jeglicher anderer Gebrauch kann zu Schäden am Produkt oder Verletzungen führen. Das Gerät ist nur für die Benutzung im privaten Haushalt bestimmt und nicht für kommerziellen Gebrauch geeignet.
Deutsch Installation Abb. 1 Der Geschirrspüler muss in ausreichender Nähe eines Wasser-, Abwasser- und Elektroanschlusses installiert werden. 7 Achtung Öffnen Sie nach dem Auspacken die Tür und entfernen Sie alle Transportsicherungen. Stellen Sie sicher, dass sich die Sprüharme frei drehen können. Hinweis: Beachten Sie das beiliegende Montagematerial Winkel, Schrauben und Klettband zur Befestigung der Dekorplatte, usw. 1 2 3 4 5 6 Beachten Sie die Einbaumaße.
Deutsch 11 12 13 14 Stecken Sie den Netzstecker in eine geeignete Steckdose. Der Geschirrspüler muss in Einbaulage nivelliert werden sodass er absolut waagerecht steht. • Der hintere Standfuß kann durch Drehen der mittleren Kreuzschlitzschraube (Pos. A) in der Höhe verstellt werden. Beachten Sie dazu die Abbildung neben der Schraube (UP: Hinterseite wird angehoben, DOWN: Hinterseite wird abgesenkt). • Die vorderen Standfüße können durch Verdrehen von Hand verstellt werden.
Deutsch Achtung • Benutzen Sie nur spezielles Salz welches für Geschirrpüler geeignet ist. Alle anderen Salze welche nicht speziell für Geschirrspüler entwickelt wurden, insbesondere Tafelsalz, werden den Geschirrspüler beschädigen. Im Falle von Schäden welche durch ungeeignetes Salz hervorgerufen werden erlischt die Garantie und der Hersteller übernimmt keinerlei Haftung für entstandene Schäden. • Wenn Salz verschüttet wurde starten Sie einen Schnellspülgang um Salzspuren zu entfernen.
Deutsch Geschirrspülpulver oder -tabs einfüllen Abb. 4 Das Geschirrspülmittelfach muss vor jedem Spülgang neu aufgefüllt werden. Für die richtige Menge beachten Sie die Hinweise und Anleitungen des Geschirrspülmittels. • Drücken Sie die Deckelöffnungstaste und der Deckel springt auf. • Füllen Sie das Geschirrspülmittel (Pulver oder Tabs) unmittelbar vor dem Spülvorgang ein, da es sonst durch länger anhaltende Feuchtigkeit verkleben oder verhärten könnte.
Deutsch Geschirrkorb auffüllen • Reinigen Sie im Geschirrspüler nur geschirrspülerfestes oder -geeignetes Geschirr und Besteck. • Schaben Sie Speisereste ab. Weichen Sie angebrannte Reste z.B. in Bratpfannen an. Es ist nicht nötig das Geschirr unter fließendem Wasser vorzureinigen. • Beladen Sie den Geschirrspüler folgendermaßen mit Geschirr und Besteck: -- Teile wie Tassen, Gläser, Töpfe/ Pfannen mit der Öffnung nach unten, sodass Wasser rausläuft.
Deutsch Abb. Abb. 7a 7b Beachten Sie den Plan zum Einlegen von Besteck ín den Besteckkorb. Beachten Sie nachfolgende Tabelle für die Teilebeschreibung. 1 Suppenlöffel 2 Gabeln 3 Messer 4 Teelöffel 5 Kompottlöffel 6 Servierlöffel 7 Serviergabeln 8 Soßenkelle Die Besteckablage lässt sich variieren und somit Ihren Anforderungen anpassen. I. Standardposition, beide Hälften geneigt II. linke Seite flach, rechte Hälfte geneigt III. beide Hälften flach, rechte Hälfte erhöht IV.
Deutsch 7. Um den Spülvorgang zu einem späteren Zeitpunkt zu starten, drücken Sie die Startzeitverzögerungtasten. Durch mehrmaliges Drücken der Tasten oder stellen Sie die Stunden ein, um der de Start verzögert werden soll. Es können 1-24 Stunden Startzeitverzögerung eingestellt werden. Drücken Sie danach die Taste . Der Geschirrspüler Start/Pause beginnt mit dem Spülvorgang sobald die voreingestellte Zeit abgelaufen ist.
Deutsch Abb. 9 Programm auswählen Beachten Sie nachfolgende Tabelle um das für Ihren Zweck richtige Programm auszuwählen. Programm Einsatzgebiet Programmabfolge Rei- LaufEnerWasser- Klarniger zeit gieververVor/ in brauch in brauch spüHaupt min kWh in Liter ler Auto Automatischer Waschvorgang, leicht, normal oder stark verschmutztes Kochgeschirr mit oder ohne festgetrockneten Speiseresten Vorspülen (45 °C) Auto. Spülen (45-55 °C) Ausspülen Ausspülen (65 °C) Trocknen 5/30 g (oder 2 Stück) 150 0.9 -1.
Deutsch Reinigung Und Pflege Achtung • Verwenden Sie zur Reinigung keinesfalls Lösungs- und Scheuermittel, harte Bürsten, metallische oder scharfe Gegenstände. Lösungsmittel sind gesundheitsschädlich und greifen die Plastikteile an; scheuernde Reiniger und Hilfsmittel zerkratzen die Oberfläche. • Reinigen Sie die Außenflächen des Produktes mit einem leicht angefeuchteten Tuch und trocknen Sie sie anschließend gut ab. Achten Sie darauf, dass kein Wasser ins Produktinnere gelangt (z. B. an den Schaltern).
Deutsch Fehlercodes Code Bedeutung E1 Kein oder schwacher Wasserzulauf E4 Überlauf Mögliche Ursachen • Wasserhahn geschlossen • Wassereinlass blockiert • Wasserdruck zu niedrig • Leck an Komponenten des Produkts Fehlerbehebung Sollte es während des Betriebs zu Störungen kommen, beachten Sie nachfolgende Tabelle. Sollten die Probleme wie unter Behebung angegeben nicht behoben werden können, wenden Sie sich an Ihren Händler.
Deutsch Schlagendes Geräusch in der Wasserleitung • Wird eventuell durch bauseitige Verlegung bzw. den zu geringen Querschnitt der Wasserleitung verursacht. • Hat keinen Einfluss auf die Funktion des Geschirrspülers Geschirr ist nicht sauber • Geschirr wurde nicht richtig eingeordnet • Ordnen Sie die Geschirrteile wie im Kapitel Geschirrkorb auffüllen • Sprüharme werden durch Geschirrteile blockiert • Es wurde zu wenig Reiniger dosiert • Verwenden Sie mehr Reiniger oder wechseln Sie evtl.
English Safety instructions • This product can be used by children aged from 8 years and above and persons with reduced physical, sensory or mental capabilities or lack of experience and knowledge if they have been given supervision or instruction concerning use of the appliance in a safe way and understand the hazards involved. • Children shall not play with the product. • Cleaning and user maintenance shall not be made by children without supervision.
English Safety instructions • The product is designed for the preparation of normal household quantities in the home, or in household-like, non-commercial environments. Household-like environments include staff kitchens in shops, offices, agricultural and other small businesses or for use by guests at bed-andbreakfast establishments, small hotels and similar residential facilities. • The dishwasher has ventilation openings in the base. These openings must not be obstructed by a carpet.
English Safety instructions • Read this user manual thoroughly before first use and pass it on with the product. Pay attention to the warnings on the product and in this user manual. It contains important information for your safety as well as for the use and maintenance of the product. • Use the product only for its intended purpose and with recommended accessories and components. Improper use or wrong operation may lead to hazards. Never leave the product unsupervised while it is switched on.
English Congratulations! Thanks for your purchase of a KOENIC product. Please read this manual carefully and keep it for future reference. Content 1 x Dishwasher 1 x User manual 1 x warranty card Intended use This product is only intended for cleaning dishes and cutlery which are dishwasher proof or suitable for dishwashers. Any other use may result in damages to product or injuries. This product is designed for household use only and not intended for commercial use.
English Installation Fig. 1 The dishwasher must be installed in sufficient proximity of water, sewage and electrical connection. 7 Caution After unpacking open the door and remove all transport protections from the baskets and spray arms. Ensure that the spray arms can rotate freely. Note: Please check the included mounting material, brackets, screws and Velcro strip for attaching the decorative panel, etc. 1 2 3 4 5 6 Observe the installation dimensions.
English 11 12 13 14 Connect the power plug to the mains. The dishwasher must be placed in the installation position so that it is absolutely level. • The rear stands can be adjusted in height by turning the middle Phillips screw (Pos. A). Please refer to the figure next to the screw (UP: rear is raised, DOWN: rear is lowered). • The front feet can be adjusted by turning by hand.
English Warning • Only use salt specifically designed for use in dishwashers! All other types of salt not specifically designed for use in a dishwasher, especially table salt, will damage the dishwasher. In case of damages caused by the use of unsuitable salt the manufacturer does not give any warranty nor is liable for any caused damages. • If salt has been spilled a soak or a rapid program should be run to remove the excess salt.
English Adding detergent Fig. 4 The dispenser must be refilled before the start of each wash cycle. For the correct amount follow the instructions provided with the detergent. • Press release button. The lid springs open. • Always add the detergent just before starting each wash cycle, otherwise it could get damp and will not dissolve properly. • If the dishes are heavily soiled, place an additional detergent dose in the pre-wash detergent chamber. This detergent will take effect during the pre-wash phase.
English Loading the dishwasher basket • Only dishes and cutlery which are dishwasher proof or suitable for dishwashers. Follow instructions of manufacturers. • Scrape off any large amounts of leftover food. Soften remnants of burnt food e.g. in pans It is not necessary to rinse the dishes under running water. • Place objects in the dishwasher in the following way: -- Items such as cups, glasses, pots/ pans, are face down.
English Fig. 7a Observe the plan for placing cutlery into the cutlery basket. See table below for possible part designations. 1 Soup spoons 2 Forks 3 Knives 4 Teaspoons 5 Dessert spoons 6 Serving spoons 7 Serving forks Fig. 7b 8 Soup ladle The cutlery tray can be adjusted according to your needs. I. standard position, both halves inclined II. left side flat, right half inclined III. both halves flat, right half increased IV. left flat, right open, right half moved over the left half V.
English 7. To start the washing process at a later time, press the timer or buttons and by pressing them several times set the hours by which the start is to be delayed. 1-24 hours start time delay can be set. Then press the Start/Pause button. The dishwasher starts washing cycle when the preset time has elapsed. Note: The program lights show the state of the dishwasher: • Program light on: standby or pause. • Program light blinking: washing process ongoing. 8.
English Fig. 9 Choosing program Consider below table to choose the correct program according your needs. Energy Water Rinse Description of Detergent Running time in cons. in cons. in aid cycle Pre/Main min kWh litre Pre-wash (45 °C) Auto sensing wash, Autowash (45lightly, normally or °C) 5/30 g Auto heavily soiled crockery, 55 150 0.9 -1.3 11-15 (or 2 piece) with or without dried- Rinse Rinse (65 °C) on food. Drying Pre-wash 45 °C For normally soiled Wash 55 °C 5/30 g such as pots, 185 1.3 13.
English Cleaning and care Warning • When cleaning, never use solvents or abrasive materials, hard brushes, metallic or sharp objects. Solvents are harmful to human health and can attack plastic parts, while abrasive cleaning mechanisms and tools may scratch the surface(s). • Clean the exterior surfaces of the product with a slightly damp cloth and dry them well. Make sure that no water enters the product interior (e.g. at the switches).
English Error codes Code Meaning E1 Longer inlet time E4 Overflow Possible causes • Faucets not opened • Water intake is restricted • Water pressure is too low • Some component of dishwasher leaks Troubleshooting If there are any problems during operation, please refer to the following table. If problems cannot be solved as indicated under Solution, please contact your manufacturer.
English Knocking noise in water pipes • Caused by on- site installation or cross section of the piping • This has no influence in the dishwasher function Dishes are not clean • Dishes not loaded correctly • Re-arrange the dishes • Spray arms are blocked Cloudiness on glassware • Not enough detergent • Add more detergent • Program was not powerful enough • Choose another program • Filter is dirty or not correctly inserted • Clean the filter and ensure it is assembled correctly • Too much deterg
Español Instrucciones de seguridad • Este producto puede ser usado por niños de más de 8 años de edad y personas con capacidades físicas, sensoriales o mentales reducidas, o falta de experiencia y conocimientos, si reciben supervisión o instrucciones sobre el uso del producto de forma segura y comprenden los riesgos que implica. • Los niños no deben jugar con el aparato. • La limpieza y el mantenimiento del usuario no deben ser realizados por niños a menos que sean mayores de 8 años y reciban supervisión.
Español Instrucciones de seguridad • El producto está diseñado para la preparación de las cantidades propias del uso doméstico, o de entornos similares al doméstico, y no es adecuado para uso comercial. Los entornos similares al doméstico incluyen cocinas para el personal en tiendas, oficinas y otros negocios pequeños, o para los huéspedes en albergues, hoteles pequeños e instalaciones residenciales parecidas. • El lavavajillas tiene aperturas de ventilación en la base.
Español Instrucciones de seguridad • Lea por completo este manual del usuario antes del primer uso y entréguelo con el producto. Preste atención a las advertencias del producto y el manual del usuario. Contiene información importante para su seguridad y el uso y mantenimiento del equipo. • Use el producto exclusivamente para su finalidad y con los accesorios y componentes recomendados. Un uso inadecuado o incorrecto puede provocar riesgos. • Nunca deje el producto sin supervisión mientras esté encendido.
Español Felicidades! Gracias por adquirir un producto KOENIC. Lea atentamente este manual y consérvelo como referencia en el futuro. Contenido 1 x Lavavajillas 1 x manual de instrucciones 1 x tarjeta de garantía Uso pretendido Este producto solo está destinado a lavar la vajilla y las cuberterías que sean aptas o adecuadas para el lavavajillas.. Cualquier otro uso puede provocar daños en el producto o lesiones personales.
Español Instalación Fig. 1 Instale el lavavajillas cerca de una entrada de agua, de un desagüe y de una conexión eléctrica. 7 Precaución Después de desembalar, abra la puerta y retire todas las protección de transporte de las cestas y los brazos rociadores. Asegúrese de que los brazos rociadores puedan rotar libremente. Nota: Compruebe el material de montaje que se incluye: soportes, tornillos, cinta de velcro para sujetar el panel decorativo, etc.
Español 12 13 14 Nivele el lavavajillas. • Regule las patas traseras con el tornillo Phillips (Pos. A). Fíjese en la imagen al ladode los tornillos (SUPERIOR: se levanta la parte posterior, INFERIOR: se baja la parte posterior). • Las patas delanteras se pueden ajustar girándolas con la mano. • Compruebe que el aparato está horizontal con un nivel, colocándolo sobre las superficies horizontales o verticales del interior del lavavajillas y la puerta. Coloque el lavavajillas en su sitio.
Español Advertencia • Utilice únicamente sal concebida específicamente para su uso en lavavajillas! Cualquier otro tipo de sal no concebida específicamente para lavavajillas, especialmente la sal de mesa, dañará el descalcificador. En caso de averías provocadas por el uso de sal inadecuada, el fabricante no concederá ninguna garantía ni será responsable de los daños causados. • Si hay vertidos de sal, deberá seleccionar un programa de remojo o un programa rápido para eliminar el exceso de sal.
Español Vaatwasmiddel toevoegen Fig. 4 El dispensador debe volver a llenarse antes del comienzo de cada ciclo de lavado. Para añadir la cantidad correcta, siga las instrucciones que aparezcan en el detergente. • Presione el botón de liberación. La tapa se abrirá como un resorte. • Añada siempre el detergente justo antes de poner en marcha el lavavajillas; de lo contrario, podría humedecerse y no disolverse adecuadamente.
Español Carga de la cesta del lavavajillas • Cargue el lavavajillas solo con platos y cubiertos aptos para lavavajillas. Siga las instrucciones de los fabricantes. • Quite los restos de comida de gran tamaño. Reblandezca los restos de comida quemada en la sartén. • No es necesario enjuagar los platos bajo el grifo. • Coloque los objetos en el lavavajillas de la siguiente manera: -- Los utensilios como tazas, vasos, ollas o sartenes, etc. se colocan boca abajo.
Español Fig. 7a Tenga en cuenta la distribución designada de los cubiertos en la cesta de cubiertos. Observe la tabla inferior para las colocaciones posibles 1 Cucharas soperas 2 Tenedores 3 Cuchillos 4 Cucharás para el té 5 Cucharas de postre 6 Opscheplepels 7 Tenedores de servir Fig. 7b 8 Cucharón de sopa La bandeja de cubertería puede ajustarse según las necesidades. I. posición estándar, ambas mitades inclinadas II. lado izquierdo plano, mitad derecha inclinada III.
Español 7. Para iniciar el proceso de lavado en un momento posterior, pulse los botones de temporizador o y al pulsarlos varias veces se establecen las horas que se retrasa el inicio. Se puede establecer un retraso de hora de inicio de 1-24 horas. Luego pulse el botón de Inicio/Pausa . El lavavajillas empieza un ciclo de lavado cuando haya pasado el tiempo preestablecido. Nota: El programa muestra con luces el estado del lavavajillas: • Luces encendidas de programa: en espera o pausa.
Español Fig. 9 Selección del programa Tenga en cuenta la tabla a continuación para elegir el programa adecuado según sus necesidades. DeterTiemConsuAbriInformación y Descripción gente (pre- po de mo ener- ConsullanPrograma mo de función del ciclo lavado/ lavado gético agua (l) tador principal) en min (kWh) aid Prelavado (45 °C) Lavado con Autolavado (45autodetección, lavilla 55 °C) 5/30 g Auto ligeramente, normal 150 0.9 -1.3 11-15 (o 2 piezas) o muy sucia, con o sin Enjuague Enjuague (65 °C) alimentos.
Español Antes del primer uso Advertencia • Al limpiar, no use nunca disolventes ni materiales abrasivos, cepillos rígidos, objetos metálicos o afilados. Los disolventes son dañinos para la salud humana y pueden afectar a las piezas de plástico, mientras que los mecanismos y herramientas de limpieza abrasivos pueden rayar las superficies. • Limpie las superficies exteriores del dispositivo con un paño húmedo y después séquelas completamente.
Español Códigos de error Código Significado E1 Tiempo de entrada más largo E4 Rebosamiento Posibles causas • Las canillas no están abiertas • Se restringe la entrada de agua • La presión de agua es demasiado baja • Se ha producido la fuga de algún componente del lavavajillas. Resolución de problemas Si aparecen problemas de funcionamiento, consulte la siguiente tabla. Si los problemas no se pueden resolver como se indica en Solución, contacte con el fabricante.
Español Se oye un golpeteo en el interior • Un aspersor está golpeando contra un objeto en una cesta • Interrumpa el programa y vuelva a colocar la vajilla Sonido de tintineo • Algunas piezas de la vajilla están sueltas en el interior Se oye un golpeteo en las tuberías de agua • Puede ocasionarlo el cruce de las tomas de agua • Esto no influye en el funcionamiento del lavavajillas Los platos no están limpios • La vajilla no se ha cargado correctamente • Vuelva a colocar los platos • Los brazos as
Français Consignes de securite • Ce produit peut être utilisé par des enfants âgés de plus de 8 ans et par des personnes à capacités physiques, sensorielles ou mentales réduites, ou inexpérimentées et sans connaissances, s’ils sont surveillées ou s’ils ont reçu des instructions concernant l’utilisation en toute sécurité du produit et s’ils comprennent les risques qui en découlent. • Les enfants ne doivent pas jouer avec l’appareil.
Français Consignes de securite • Ce produit est conçu pour la préparation de quantités adaptées à un domicile, ou à un environnement similaire, non commercial. Les environnements similaires au domicile peuvent être la cuisine du personnel d’un magasin, un bureau, de petites entreprises agricoles et autres, une chambre d’hôte, un petit hôtel ou des logements résidentiels de même importance. • Le lave-vaisselle est muni d’orifices de ventilation au socle.
Français Consignes de securite • Lisez intégralement ce mode d’emploi avant la première utilisation. Si vous cédez ce produit à quelqu’un, donnez-lui mode d’emploi. Soyez attentif aux mises en garde sur le produit et dans ce mode d’emploi. In contient des informations importantes pour votre sécurité, l’utilisation et l’entretien de l’équipement. • N’utilisez le produit que pour son usage prévu et avec les accessoires et composants recommandés. Une mauvaise utilisation peut entraîner des risques.
Français Félicitations! Merci d’avoir acheté un produit KOENIC. Veuillez lire soigneusement ce manuel et le conserver pour une consultation future. Sommaire 1 x Lave-vaisselle 1 x Manuel d’utilisation 1 x Carte de garantie Usage prévu Cet appareil n’est destiné qu’au nettoyage de la vaisselle et de la coutellerie qui peuvent être lavés au lave-vaisselle ou adéquats pour les lave-vaisselles. Toute autre utilisation peut endommager l’appareil ou entraîner des blessures.
Français Installation Fig. 1 Le lave-vaisselle doit être installé à proximité d’une source d’eau, d’un point d’évacuation et d’une prise électrique. 7 Attention Après déballage, ouvrez la porte et retirez toutes les protections de transport des paniers et des bras de pulvérisation. Assurezvous que les bras de pulvérisation peuvent tourner librement. Remarque: Vérifiez la présence du matériel de montage, des supports, des vis et des bandes Velcro destinées fixer les panneaux décoratifs, etc.
Français 12 13 14 Le lave-vaisselle doit être exactement à niveau lorsqu’il est installé. • Le socle arrière peut être réglé en hauteur en faisant tourner la vis cruciforme du milieu (Pos. A). Aidez-vous des marquages situés à côté des vis (UP : l’arrière est levé ; DOWN : l’arrière est abaissé). • Les pieds avant peuvent être réglés en les faisant tourner à la main.
Français Avertissement • N’utilisez que du sel spécialement destiné à être utiliser pour les lave-vaisselle ! Tous les autres types de sel qui ne sont pas spécialement destinés à l’utilisation aux lave-vaisselle, en particulier le sel de table, endommageront l’adoucissant d’eau. Dans le cas de dégâts provoqués par l’utilisation de sel inadéquat, le fabricant ne donne aucune garantie et ne sera pas tenu responsable des dégâts occasionnés.
Français Ajouter du détergent Fig. 4 Le compartiment doit être re-rempli avant le commencement de chaque cycle de lavage. Pour la quantité adéquate, respectez les instructions indiquées avec le détergent. • Appuyez sur le bouton de déverrouillage. Le couvercle s’ouvre. • Ajoutez toujours le détergent juste avant de commencer chaque cycle de lavage, sinon, il pourrait s’humidifier et ne pas se dissoudre correctement.
Français Charger le panier du lave-vaisselle • Ne nettoyez que la vaisselle et les couverts qui résistent au lave-vaisselle ou qui sont adaptés. Respectez les instructions des fabricants. • Raclez toute grande quantité restante de nourriture. Ramollissez les restes de nourriture brûlée dans une poêle. • Il n’est pas nécessaire de rincer la vaisselle au robinet. • Mettez la vaisselle dans le lavevaisselle de la manière suivante : -- La vaisselle telles les tasses, verres, plats/casseroles, etc.
Français Fig. Fig. 7a 7b Respectez l’organisation de l’emplacement de la coutellerie dans le panier à coutellerie. Voir le tableau suivant pour les désignations possibles. 1 Cuillères à soupe 2 Fourchettes 3 Couteaux 4 Petites cuillères 5 Cuillères à dessert 6 Cuillères de service 7 Fourchettes de service 8 Louche à soupe Le plateau à couverts peut être ajusté selon vos besoins. I. Position standard, les deux moitiés inclinées II. Moitié gauche à plat, moitié droite inclinée III.
Français 7. Pour commencer le processus de lavage, appuyez sur les boutons de retardateur ou . Appuyez sur ces dernier plusieurs fois pour définir les heures de délai de démarrage. Le délai peut être de 1 heure à 24 heures. Appuyez ensuite sur le bouton Démarrer/Pause . Le lave-vaisselle commence le cycle de nettoyage lorsque la durée du retardateur est écoulée.
Français Fig. 9 Selection du programme Respectez le tableau suivant pour sélectionner le programme pertinent selon vos besoins. DéConsom- ProDurée ConsomProInformations et Description du tergent du mation mation duit cyle gramme objectif cycle Pré/Prin- en min d’énergie d’eau en de rincipal en kWh litre çage Détection de puissance Prélavage (45 °C) de lavage auto, qui peut Lavage auto détecter si la vaisselle (45-55 °C) 5/30 g Auto est légèrement, Rinçage (ou 2 150 0.9 -1.
Français Nettoyage et entretien Avertissement • Lors du nettoyage, ne jamais utiliser de solvants ou des matériaux abrasifs, des brosses dures, des objets métalliques ou pointus. Les solvants sont dangereux pour la santé humaine et peuvent ronger les éléments en plastique, alors que des mécanismes et des outils de nettoyage agressifs peuvent rayer les surfaces. • Nettoyez les surfaces extérieures de l’appareil avec un chiffon humide et puis essuyez-les soigneusement.
Français Codes d’erreurs Code Signification E1 Durée d’arrivée plus longue E4 Débordement Causes possibles • Robinets fermés • Arrivée d’eau limitée • Pression d’eau trop faible • Un élément du lave-vaisselle fuit Dépannage En cas de problèmes pendant le fonctionnement, veuillez consulter le tableau suivant. Si les problèmes ne peuvent pas être résolus tels indiqués dans Solutions, veuillez contacter votre fabricant.
Français Bruits de chocs dans le compartiment • Les jets d'eau butent dans un élément du panier Bruits de cliquetis • De la vaisselle se déplace dans le compartiment Bruits de chocs dans les tuyaux d’eau • Cela est entraîné par l'installation particulière des tuyaux ou un croisement • Cela n'influence pas le bon fonctionnement du lavevaisselle La vaisselle n’est pas propre • Vaisselle mal chargée • Réorganisez la vaisselle Pellicule pale sur le verre • Interrompez le programme et réorganisez les
Italiano Istruzioni di sicurezza • Questo apparecchio può essere utilizzato da bambini di età superiore agli 8 anni e persone con ridotte capacità mentali, fisiche o sensoriali o prive di esperienza e conoscenze in merito, in presenza di altre persone che ne sorveglino l’operato o ricevano istruzioni sull’uso dell’apparecchio in modo sicuro e ne comprendano i pericoli. • I bambini non devono giocare con l’apparecchio.
Italiano Istruzioni di sicurezza • Il prodotto è progettato per la preparazione di normali quantità in ambiente domestico, o ambienti simili non commerciali. Ambienti comparabili a quello domestico includono cucine per staff nei negozi, uffici, ambito agricolo o altre piccole attività o per l’uso da parte degli ospiti presso costruzioni bed & breakfast, piccoli hotel e strutture residenziali simili. • La lavastoviglie ha delle aperture di ventilazione alla base.
Italiano Istruzioni di sicurezza • Leggere con attenzione questo manuale dell’utente al primo utilizzo e consegnarlo col prodotto. Far attenzione alle avvertenze sul prodotto e in questo manuale d’uso. Contiene informazioni importanti per la sicurezza nonché relative all’uso e alla manutenzione del dispositivo. • Usare il prodotto solo per lo scopo previsto e con gli accessori e componenti consigliati. L’uso improprio o funzionamento sbagliato possono determinare pericoli.
Italiano Congratulazioni! Grazie per aver acquistato un prodotto KOENIC. Leggere questo manuale con attenzione e conservarlo per futura consultazione. Contenuto 1 x Lavastoviglie 1 x Manuale dell’utente 1 x Carta garanzia Uso previsto Questo prodotto è destinato esclusivamente per la pulizia di piatti e posate lavabili in lavastoviglie o adatti per il lavaggio in lavastoviglie.
Italiano Installazione Fig. 1 La lavastoviglie deve essere installata in prossimità sufficiente di acqua, scarichi e collegamenti elettrici. 7 Attenzione Dopo il disimballaggio aprire lo sportello e rimuovere tutte le protezioni per il trasporto dai cestelli e dai bracci spruzzatori. Assicurarsi che i bracci spruzzatori possano ruotare liberamente. Nota: Controllare il materiale di montaggio fornito, staffe, viti e nastro adesivo Velcro per attaccare il pannello decorativo, ecc.
Italiano 11 12 13 14 Collegare la spina di alimentazione alla rete elettrica. La lavastoviglie deve essere posizionata nella posizione di installazione in modo che sia del tutto in piano. • I supporti posteriori possono essere regolati in altezza ruotando la vite Phillips al centro (pos. A). Fare riferimento all’immagine accanto alla vite (SU: la parte posteriore viene sollevata, GIU: la parte posteriore viene abbassata). • I piedini anteriori possono essere regolati ruotando a mano.
Italiano Attenzione • Utilizzare solo sale specifico per lavastoviglie! Tutti gli altri tipi di sale non specifici per l’uso in lavastoviglie, in particolare il sale da cucina, possono danneggiare l’addolcitore dell’acqua. In caso di danni causati dall’utilizzo di un sale inadatto, il costruttore non fornisce alcuna garanzia né è responsabile per eventuali danni. • Se vi sono fuoriuscite del sale, va eseguito un risciacquo o un programma rapido per eliminare il sale in eccesso.
Italiano Aggiunta del detersivo Fig. 4 L’erogatore deve essere riempito prima dell’inizio di ogni ciclo di lavaggio. Per la quantità corretta seguire le istruzioni fornite con il detersivo. • Premere il pulsante di rilascio. Il coperchio scatta automaticamente. • Aggiungere sempre il detersivo poco prima dell’inizio di ogni ciclo di lavaggio, altrimenti potrebbe inumidirsi e non dissolversi correttamente.
Italiano Caricamento del cestello della lavastoviglie • Solo stoviglie pulite e posate lavabili in lavastoviglie o adatte per lavastoviglie. Seguire le istruzioni dei produttori. • Raschiare eventuali avanzi di cibo. Ammorbidire i residui di bruciato nelle padelle. Non è necessario sciacquare le stoviglie sotto l’acqua corrente. • Posizionare gli oggetti nella lavastoviglie nel modo seguente: -- Oggetti come tazze, bicchieri, pentole/padelle, ecc. vanno a faccia in giù.
Italiano Fig. Fig. 7a 7b Osservare lo schema per il posizionamento delle posate nell’apposito cestello. Vedere la tabella qui sotto per le denominazione delle parti. 1 Cucchiai 2 Forchette 3 Coltelli 4 Cucchiaini da te 5 Cucchiaini per dolce 6 Opscheplepels 7 Forchette 8 Mestolo di servizio La vaschetta per le posate può essere adattata secondo le proprie esigenze. I. posizione standard, entrambe le metà inclinate II. lato sinistro piano, metà destra inclinata III.
Italiano 7. Per avviare il processo di risciacquo in un secondo momento, premere il timer o i pulsanti e premendoli diverse volte impostare le ore entro le quali l’avviamento deve essere rimandato. Può essere impostato un ritardo del tempo di avviamento da 1 a 24 ore. Successivamente premere il pulsante Avvio/Pausa. La lavastoviglie avvia il ciclo di lavaggio una volta trascorso il tempo preimpostato.
Italiano Fig. 9 Scelta del programma Consultare la tabella qui sotto per scegliere il programma corretto in base alle proprie esigenze. Funzio- Cons. Cons. BrilProgramInformazione e Detersivo namento energ. Descrizione ciclo in lanma scopo Pre/Princ. Tempo in in kWh idrico litri tante min Lavaggio con Prelavaggio (45 °C) sensore intelligente Lavaggio automatico di controllo, per (45-55 °C) posate leggermente, 5/30 g Auto normalmente oppure Risciacquare 150 0.9 -1.
Italiano Pulizia e manutenzione Attenzione • Durante la pulizia, non usare mai solventi o materiali abrasivi, spazzole metalliche, oggetti metallici o taglienti. I solventi sono pericolosi alla salute umana e possono attaccare le parti in plastica, mentre i meccanismi di pulizia e gli utensili potrebbero graffiare la superficie. • Pulire le superfici esterne del dispositivo con un panno umido e quindi asciugarle completamente.
Italiano Codici di errore Codice Significato E1 Ingresso dell’acqua più lento E4 Troppo pieno Possibili cause • Il rubinetto non è aperto • L’ingresso di acqua è limitato • La pressione dell’acqua è troppo bassa • Alcuni componenti della lavastoviglie perdono Risoluzione dei problemi Se ci sono problemi durante il funzionamento, fare riferimento alla seguente tabella. Se i problemi non possono essere risolti come indicato sotto Soluzione, si prega di contattare il produttore.
Italiano Rumore martellante • Il braccio spruzzatore nel telaio sbatte contro un oggetto nel cestello Rumore metallico • Interrompere il programma e risistemare gli oggetti • Le stoviglie sono sparse nel telaio • Questo non influisce sul funzionamento Rumore martellante • Causato dall'installazione nei tubi dell’acqua in loco o dalla sezione della lavastoviglie trasversale della tubazione Le stoviglie non sono pulite • Stoviglie caricate in modo scorretto • Risistemare le stoviglie • I bracci spruzzat
Nederlands Veiligheidsinstructies • Dit product kan worden gebruikt door kinderen in de leeftijd vanaf 8 jaar en ouder en personen met verminderde lichamelijke, zintuiglijke of geestelijke vermogens of gebrek aan ervaring en kennis als zij onder toezicht staan of worden geïnstrueerd over het veilige gebruik van het product en de betrokken gevaren begrijpen. • Kinderen mogen niet met het product spelen.
Nederlands Veiligheidsinstructies • Het product is ontworpen voor de bereiding van normale hoeveelheden thuis of in huishoudelijke niet-commerciële omgevingen zoals personeelskeukens in winkels, kantoren, boeren- en kleine bedrijven of door gasten bij een bed&brakfast, kleine hotels en soortgelijke verblijfsomgevingen. • De vaatwasser heeft ventilatieopeningen in de onderkant. Deze openingen mogen niet worden belemmerd door een tapijt.
Nederlands Veiligheidsinstructies • Lees deze gebruikershandleiding voor het eerste gebruik aandachtig door en geef het met het product door. Neem de waarschuwingen die op het product en in deze gebruikershandleiding staan vermeld, in acht. De waarschuwingen bevatten belangrijke informatie voor uw veiligheid en voor het gebruik en onderhoud van het apparaat. • Gebruik het product uitsluitend voor het beoogde gebruik en met de aangeraden accessoires en onderdelen.
Nederlands Gefeliciteerd!! Bedankt voor uw aankoop van een KOENIC product. Lees het zorgvuldig en bewaar het voor toekomstig gebruik. Inhoud 1 x Vaatwasser 1 x Handleiding 1 x Garantiekaart Beoogd gebruik Dit product is uitsluitend bedoeld voor het reinigen van bestek en vaat dat vaatwasserbestendig of geschikt voor vaatwassers is. Elk ander gebruik kan tot schade aan het product of tot letsel leiden. Dit product is ontworpen voor huishoudelijk gebruik en is niet voor commercieel gebruik bestemd.
Nederlands Installatie Fig. 1 De vaatwasser dient geïnstalleerd te worden in de nabijheid van een watervoorziening, een afvoer en elektrische aansluiting. 7 Opgelet Na het uitpakken opent u de deur en verwijdert u alle transportbescherming uit de korven en sproeiarmen. Zorg dat de sproeiarmen vrij kunnen draaien. Opmerking: Contoleer het meegeleverde montagemateriaal, beugels, schroeven en klittenband om het sierpaneel etc. vast te maken. 1 2 3 4 5 6 Let op de installatie afmetingen.
Nederlands 11 12 13 14 Steek de stekker in het stopcontact. De vaatwasser dient geplaatst te worden in de installatiepositie zodat hij absoluut waterpas staat. • De achterste pootjes kunnen versteld worden in hoogte door aan de middelste Phillips schroef te draaien (Pos. A). Zie de afbeelding naast de schroef (OMHOOG: de achterkant gaat omhoog, OMLAAG: de achterkant gaat omlaag). • De voorste pootjes kunnen handmatig versteld worden door ze te draaien.
Nederlands Waarschuwing • Gebruik alleen zout speciaal ontwikkeld voor het gebruik in vaatwassers! Elke andere soort zout die niet specifiek ontwikkeld is voor gebruik in een vaatwasser, vooral tafelzout, zal de waterwasser beschadigen. In het geval van schade veroorzaakt door het gebruik van ongeschikt zout, geeft de fabrikant geen garantie en is niet aansprakelijk voor de veroorzaakte schade. • Als er zout gemorst is, moet een snelprogramma worden gedraaid om het overtollige zout te verwijderen.
Nederlands Vaatwasmiddel toevoegen Fig. 4 De dispenser moet vóór het begin van elke wasprogramma opnieuw worden gevuld. Volg de instructies bij het vaatwasmiddel voor de juiste hoeveelheid. • Druk op de ontgrendelingsknop. Het deksel springt open. • Voeg altijd het vaatwasmiddel vlak voor het starten van de vaatwasmachine toe, anders kan het vochtig worden en zal het niet goed oplossen. • Als de vaat erg vuil is, plaatst u een extra dosis vaatwasmiddel in het voorwasmiddelvak.
Nederlands De vaatwassermand vullen • Reinig uitsluitend borden en bestek die vaatwasserbestendig en geschikt voor vaatwassers zijn. Volg de instructies van de fabrikanten. • Schraap eventuele grote hoeveelheden etensresten eraf. Week aangebakken etensresten in de pannen in. Het is niet nodig om de vaat aft e spoelen onder stromend water. • Plaats artikelen op de volgende manier in de vaatwasser: -- Artikelen zoals kopjes, glazen, potten/pannen, enz. naar beneden gericht.
Nederlands Fig. 7a Let op het algemene plan voor het plaatsen van bestek in de bestekmand. Zie onderstaande tabel voor mogelijke benamingen. 1 Soeplepels 2 Vorken 3 Messen 4 Theelepels 5 Dessertlepels 6 Opscheplepels 7 Opdienvorken Fig. 7b 8 Soeplepel De bestekbak kan naar eigen goeddunkenworden aangepast I. standaard positie, beide helften schuin II. linkerkant plat, rechter helft schuin III. beide helften plat, rechter helft groter IV.
Nederlands 7. Om het afwassen op een later tijdstip te starten, drukt u op de timer of toetsen en door deze meerdere malen in te drukken stelt u het aantal uren in waarmee de start wordt uitgesteld. U kunt 1-24 uur startvertraging instellen. Druk vervolgens op de Start/Pauze toets. De vaatwasser start de was cyclus als de ingestelde tijd verlopen is. Let op: De programmalampjes geven de status van de vaatwasser weer: • Programmalampje brandt: standby of pauze. • Programmalampje knippert: wasproces bezig. 8.
Nederlands Fig. 9 kiezen van een programma Raadpleeg onderstaande tabel om het juiste programma te kiezen volgens uw behoeften. Program Auto Normal Intensive Glass (*EN 50242) (Öko) 90 min. Rapid Beschrijving van het programma Voorwas (45 °C) Autosense wassen, Auto was (45licht, normaal of sterk 55 °C. vervuilde vaat, met of Spoelen zonder aangedroogde Spoelen (65 °C) etensresten.
Nederlands Reiniging en onderhoud Waarschuwing • Gebruik tijdens het reinigen nooit oplosmiddelen, schurende materialen, harde borstels, metalen voorwerpen of scherpe voorwerpen. Oplosmiddelen zijn schadelijk voor de gezondheid en kunnen de kunststof onderdelen van het apparaat aantasten, terwijl schurende reinigingsmiddelen krassen kunnen veroorzaken op het oppervlakte/de oppervlaktes. • Reinig de buitenvlakken van het apparaat met een vochtige doek en droog ze vervolgens volledig af.
Nederlands Foutcodes Code Betekenis E1 Langere inlaattijd E4 Overloop Mogelijke oorzaken • Kranen zijn niet geopend • Waterinname is beperkt • De waterdruk is te laag • Een onderdeel van de vaatwasser lekt Problemen oplossen Als zich problemen voordoen tijdens het gebruik, raadpleeg de volgende tabel. Als problemen niet kunnen worden opgelost zoals aangegeven onder Oplossing, neem contact op met de fabrikant.
Nederlands Kloppend geluid in de kast • Een sproeiarm klopt tegen een artikel in een korf • Onderbreek het programma en herschik de vaat Ratelend geluid • Artikelen van het servies liggen los in de kast Kloppend geluid in de waterleidingen • Veroorzaakt door installatie • Dit heeft geen invloed op de ter plekke of diameter van de functie van de vaatwasser buizen De vaat is niet schoon • Onjuist beladen vaat • Plaats de vaat anders • Sproeiarmen zijn geblokkeerd • Niet genoeg wasmiddel • Voeg meer
Deutsch Produktdatenblatt a Lieferanten Warenzeichen Imtron KOENIC b Modellkennung KDW 60121 A2 BI c Nennkapazität in Standardgedecken für den Standardreinigungszyklus 14 d Energieeffizienzklasse A++ e EU-Umweltzeichen Ja Jährlicher Energieverbrauch (AE C ) Energieverbrauch 266 kWh/Jahr auf der Grundlage von 280 Standardreinigungszyklen bei Kaltwasserbefüllung und dem Verbrauch der Betriebsarten mit geringer Leistungsaufnahme.
English Product fiche a Supplier’s name Trade mark Imtron KOENIC b Model identifier KDW 60121 A2 BI c Rated capacity, in standard place settings, for the standard cleaning cycle; 14 d Energy efficiency class A++ e EU Ecolabel Yes Annual energy consumption (AE C ) in kWh per year Energy consumption 266 kWh per year, based on 280 standard cleaning cycles using cold water fill and the consumption of the low power modes. Actual energy consumption will depend on how the appliance is used.
Español Ficha del producto a Nombre del proveedor Marca comercial del proveedor Imtron KOENIC b Identificación del modelo KDW 60121 A2 BI c Capacidad asignada, en número de cubiertos tipo, para el ciclo de lavado normal; 14 d Clase de eficiencia energética A++ e Etiqueta ecológica Si Consumo de energía anual (AE C ) expresado en kWh al año, Consumo de energía 266 kWh al año, basado en 280 ciclos de lavado normal, utilizando agua fría y el consumo de los modos de bajo consumo.
Français Fiche produit Nom du fournisseur Nom du marque Imtron KOENIC b Référence du modèle KDW 60121 A2 BI c Capacité nominale, en nombre de couverts standard, correspondant au cycle de lavage standard 14 d Classe d’efficacité énergétique, A++ e Label écologique de l’Union européenne Oui Consommation d’énergie annuelle (AE C ) en kWh par an Consommation d’énergie de 266 kWh par an, sur la base de 280 cycles de lavage standard avec alimentation en eau froide et de la consommation des modes à
Italiano Scheda prodotto a Nome del fornitore Marchio del fornitore Imtron KOENIC b Identificatore del modello KDW 60121 A2 BI c Capacità nominale, espressa in numero di coperti 14 standard, per il ciclo standard di lavaggio d La classe di efficienza energetica A++ e Marchio UE di qualità ecologica Si Consumo annuo di energia (AE C ) in kWh/anno Consumo energetico 266 kWh all’anno, basato su 280 cicli di lavaggio standard con acqua fredda e consumo dei modi a basso consumo energetico.
Nederlands Productkaart De naam van de leverancier of het handelsmerk Imtron KOENIC b De typeaanduiding KDW 60121 A2 BI c De nominale capaciteit in standaardcouverts voor de standaardcyclus 14 d De energie-efficiëntieklasse A++ e EU-milieukeur ja Het jaarlijkse energieverbruik (AE C ) in kWh per jaar Energieverbruik 266 kWh per jaar, gebaseerd op 280 standaardcycli met toevoer van koud water en het verbruik in de energiebesparende standen.