Web Access to KCS Version 5.01.
TC/WEB Tcweb_User_50112.Doc © 2012 Kofax, Inc., 15211 Laguna Canyon Road, Irvine, California 92618, U.S.A. All rights reserved. Use is subject to license terms. This product is protected by one or more of the following patents: U.S. Patents No. 4,994,926, No. 5,291,302, No. 5,459,584, No. 6,643,034, and No. 6,785,021 and Canadian Patents No. 1329852 and No. 2101327. Third-party software is copyrighted and licensed from Kofax‟s suppliers.
TC/WEB Tcweb_User_50112.Doc TABLE OF CONTENTS 1. INTRODUCTION .............................................................................................................................................. 5 1.1 Features ...................................................................................................................................................... 5 1.2 Requirements .....................................................................................................................
TC/WEB Tcweb_User_50112.Doc 2.7.7 3. Job Notifications -------------------------------------------------------------------------------------------------------- 44 EXTENDED FEATURES ............................................................................................................................... 45 3.1 Directly Open a Specific Page After Login ............................................................................................... 45 3.2 Save/Edit/Delete Message ...................
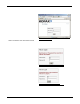
TC/WEB Tcweb_User_50112.Doc 1. INTRODUCTION TC/Web Access is an internet application providing access to the Kofax Communication Server via a web browser. Because it is an internet application, no installation of a TC/Web client is necessary. It is immediately accessible from a web browser. TC/Web is a multifunctional tool, intended to be used by both end-users and administrators of Kofax Communication Server services.
TC/WEB Tcweb_User_50112.Doc 2. 2.1 STANDARD FEATURES Getting Started Login To use TC/Web a user must first login with a Username and Password. If a user attempts to access any other page of TC/Web, the user will always be redirected to the login screen. Autologon TC/Web can be configured to automatically log a user in. In this case no login screen will be displayed. Autologon uses the login information from the currently logged in Windows user.
TC/WEB Tcweb_User_50112.Doc You are trying to log in as System administrator but your IP address is not listed in the Trusted IP addresses list. Picture 4: User‟s IP is not listed in Trusted IP list You tried to log in with an incorrect username or password more times than allowed by the TC/Web configuration. Picture 5: Access from user‟s IP address is blocked You cannot access TC/Web with the current protocol. You must change the protocol to HTTP or HTTPS and try once again.
TC/WEB 2.1.2 Tcweb_User_50112.Doc User Inactivity Timeout After a period of user inactivity, TC/Web will automatically log the user out. If a user tries to use TC/Web after this inactivity timeout has occurred, the user will be redirected to the Login screen with a message indicating what has happened. The User Inactivity Timeout is a security measure that ensures that no one can access the user‟s account when they are out of office for an extended period.
TC/WEB 2.1.5 Tcweb_User_50112.Doc Toolbar The toolbar on the left is used to access the TC/Web tools and other functionalities, e.g. to compose a message. All of the tools can be configured to be displayed or not.
TC/WEB Tcweb_User_50112.Doc well as all messages sent via one of the supported mail clients are automatically archived making local storing or archiving of messages obsolete. You can easily retrieve a message with the integrated search engine. Public Folder The public folder stores documents for easy retrieval. These stored documents are usually company documents such as leaflets, forms, price lists and any other information your company wants to make widely available.
TC/WEB Tcweb_User_50112.Doc To select all currently visible items in a list press the Select All button in the list header above the check boxes. Picture 13: Select All button 2.1.7.2.2 Action Menu The Action Menu is accessible via the Action button on the left side of each list item. Simply click the Action button, and then click the desired action. The Action Menu is context sensitive, showing only the available actions for the current item in the current tool. Picture 14: Action menu 2.1.7.
TC/WEB 2.1.7.3.1 Tcweb_User_50112.Doc Refresh Refresh updates the current list. For example, clicking Refresh in the Inbox displays any newly arrived messages. Picture 16: Refresh button 2.1.7.3.2 Filter A user can reduce the number of items in a list by applying a filter on one or more columns. This is an effective way to search for specific items. Filters can be set in two ways: Master Filter: The Filter button at the top of the tool displays a form with a control for every column in the tool.
TC/WEB Tcweb_User_50112.Doc All filters with date/time values have popup calendar control, so the date can be entered from this control. Filter Permissions If the current user does not have the right to set a specific filter (e.g.
TC/WEB values. There is a default option displayed at the top of the list. If the default option is selected, the number of items displayed per page for the current tool will be as defined in the registry for that tool in the “entries” sub key for that tool. If a user selects another value from the dropdown list, the list will be immediately rerendered and the user is presented with the beginning of the list. The value selected by the user will be saved.
TC/WEB 2.2 Tcweb_User_50112.Doc Opening Messages There are six tools that provide access to messages; Inbox, Outbox, Archive, Public, Private and System. End-users generally only need the Inbox, Outbox and Archive tools. These message tools (sometimes called folders) have some additional functionality: a preview feature. 2.2.1 Preview The Preview button enables or disables the preview pane for the current folder view.
TC/WEB 2.2.2 2.2.2.1 Tcweb_User_50112.Doc Outbox Actions Cancel If the user wants to cancel one or more outgoing messages he simply has to select them in the outbox folder view and press the Cancel button. If possible, the messages will be canceled. A message that has been cancelled will not be sent. Picture 27: Cancel button The message will not be terminated. Whether the message moves into the Short Term Archive depends on the termination settings of the source of the message.
TC/WEB Tcweb_User_50112.Doc not be sent. The user can select one or more messages in a tool and press Reactivate. Now the retries counter of the KCS system is reset and new send attempts will be initiated. This option is available for all messages that have not been successfully sent except those currently being sent. Note: Multiple selection works. 2.2.3 Inbox Actions For the Inbox folder, a special functionality is available: 2.2.3.
TC/WEB 2.2.3.3 Tcweb_User_50112.Doc Mark Completed With this button, selected messages can be marked completed. This means the message will be terminated positively. Depending on the termination settings of the source of the message (LINK, TCfW,…), the message will either be moved into the short time archive or not. Picture 34: Mark Completed button Note: Multiple selection works. 2.2.3.
TC/WEB Tcweb_User_50112.Doc Picture 39: Inbox view – new status „unread‟ of message 2.2.3.5 Explanation of Icons Inbox: Outbox: unread messages locked unread message read message deleted message message sent with high priority message sent with low priority waiting waiting locked sent OK cancelled problems sending sending locked active active locked Number locking means that out of two or more send orders to the same telephone number only one can be active at any time.
TC/WEB 2.2.4.2 Tcweb_User_50112.Doc Text View The Text view is the standard message view. It displays the message header followed by the message attachments. Message header (From, To, CC, Sent time, Subject) Text content of message Attached files as plain text Attached html files as formatted text List of attachments Note: If opened in a new browser window, the text portion of a message can be printed with standard browser functionality. Printing using the browser functionality is not logged.
TC/WEB Tcweb_User_50112.Doc image files (FAX) is logged. See “History View” for detailed information. Note: To view images it is necessary to have the latest version of SUN Java Runtime Environment installed. 2.2.4.4 History View The History view displays the history of the message. The following actions are logged to the message history: Sent: Each time a message was sent within the KCS system. Split: In TCfW it is possible to split and distribute incoming faxes.
TC/WEB Tcweb_User_50112.Doc Note: Because the information is coming from the archive, there can be a delay before the most recent actions are displayed. 2.2.4.5 Attachments If a message has attachments, they are listed after the text of a message. Clicking on the Attachments button simply displays the Text view, but the window is automatically scrolled to the position of the attachments. This can be helpful in the situation of a long text message.
TC/WEB Tcweb_User_50112.Doc Picture 48: Supported image formats list 2.2.4.7 Voicemail Player Like other attachments, voicemail or sound attachments can also be opened or downloaded to the computer. TC/Web is also able to play voice attachments directly to a telephone. A user must simply enter a phone number and press the Play button. Picture 49: Voicemail player A dropdown menu allows the user to pick from up to three saved numbers.
TC/WEB Tcweb_User_50112.Doc Picture 51. Message Properties ©Kofax, Inc.
TC/WEB 2.3 Outbox 2.3.1 Long Text for Error Codes Tcweb_User_50112.Doc The Result column in the Outbox view displays the two letter KCS error codes when there is a problem. Rolling over this two letter code shows a short description of the error code in a tool tip. The tool tip will also show the contents of the Response column if this is different than the error code description. In order to view Response and Error columns, they must be enabled by the system administrator.
TC/WEB 2.4 Tcweb_User_50112.Doc Sending a Message New messages can be created in four locations with a New Message button: 1) The Toolbar 2) The Home tool 3) The Inbox 4) The Outbox Picture 54: New Message buttons 2.4.1 New Message Tool Recipient addresses can be entered directly or by means of an address book tool. Entering an address directly TC/Web automatically recognizes email addresses by the @ symbol, and recognizes numbers with more than four digits as fax addresses.
TC/WEB 2.4.2 Tcweb_User_50112.Doc Cover Page Selection When creating a new message, the user can select a desired cover page from a dropdown list box. It contains cover pages for the current user and cover pages from „FIS Folder‟. By default it is set according to the cover page specified in the default template for this user. If you do not want a cover page for the message, the No Cover option must be selected. Picture 56: Cover page selection 2.4.
TC/WEB 2.4.4 Tcweb_User_50112.Doc Manage Attachments To attach files to a message you have to upload them to TC/Web via the Manage Attachments tool. In the New Message tool, click Manage Attachments. Click Browse…, and locate the file to upload. Click Add to Attachments. NOTE: many attachments can be added. Click Return to Message. Picture 59: Manage Attachments 2.4.5 Voice Attachments To attach a new voice file to a message you have to record a voice message through the Record Voice Message tool.
TC/WEB Tcweb_User_50112.Doc Select a priority level for all TO and CC/BCC recipients the message is being send to. The following values can be used: Low, Normal, High, High 1, High 2, High 3, High 4, High 5, High 6, High 7, High 8, High 9 or Highest. The TO Priority determines the priority for all TO recipients, the CC/BCC Priority for all CC/BCCs.
TC/WEB Tcweb_User_50112.Doc Sending a registered message will create a message with an active forwarded state in your outbox until the recipient opens the message. Afterwards you are notified, as the message will change its state to “Send OK”. 2.4.7 Sending a Message for Authorization Some users do not have the right to send out certain messages without authorization.
TC/WEB 2.4.8 Tcweb_User_50112.Doc Resubmit a Message This command resends a message with a specified time delay. The ‘Resubmit’ command is available for new, read and terminated messages (Inbox and Outbox). In order to resubmit a message the user needs to select the ‘Resubmit’ command in the Action menu of the corresponding message, as indicated in picture 66. A new window will display, where the user has to specify the time and date for the message to be resubmitted.
TC/WEB Tcweb_User_50112.Doc Note: Messages from both Inbox and Outbox can land the Archive. The Send Confirmation feature does not provide any benefit for messages from the Inbox, but TC/Web does not distinguish from where a message came. I.e., it is possible to send a confirmation for an archived inbox message. Note: It is not possible to send confirmations for cancelled messages. The state of a message is not immediately visible in Archive; you can use the History view to see it. 2.
TC/WEB 2.5.2 Tcweb_User_50112.Doc Creating and Editing Recipients A recipient can be created and edited from the recipients tool or from the distribution lists tool. A recipient can contain one or more addresses. Each address must have a service and a number. The available services depend on the TC/Web system. Addresses can be marked as active. When a message is addressed to a recipient, the message will be sent to the first active address. Additional addresses can be added with the Add Address button.
TC/WEB Tcweb_User_50112.Doc they do not have the rights to view/edit these records, so it is not recommended to add recipients from other users. Nevertheless, sending is possible to these “invisible” addresses. It is not possible to create a new recipient or distribution list for other users, only changes are allowed. Note: The user must have the read right for „All Priv. Address Books‟ to view recipient/distribution lists and the writing right for „All Priv.
TC/WEB 2.6.1 Tcweb_User_50112.Doc Creating or Editing a Distribution List To create a new distribution list or to edit an existing one, click the New List or Edit button. The basic properties, e.g., the description for the distribution list can be entered and edited here. TC/Broadcast only: Priorities: Priority high and Priority low can be set for a distribution list. When a broadcast job is sent with the New Job tool, the user can choose to send it with high or low priority.
TC/WEB 2.6.3 Tcweb_User_50112.Doc Importing Recipients from a Text File Recipients can be added to a distribution list by importing recipient data from a text file. This functionality facilitates importing distribution lists that are stored in other applications or databases. A list of addresses can be exported from another application, formatted so that it will be accepted by TC/Web, and then imported into a TC/Web distribution list.
TC/WEB Tcweb_User_50112.Doc Performing the Import The Import form can be opened in two ways. 1. Clicking the Import List button on the Distribution Lists tool which will create a brand new list. 2. First opening a Distribution List and then clicking the Import button will import a list of recipients into an existing distribution list. Note that when importing to an existing list, all existing recipients will be removed before the new recipients are imported.
TC/WEB Tcweb_User_50112.Doc Picture 80: Import Distribution List The user can refresh this list by pressing the Refresh button. When the import process has finished, it is possible to remove it from the list by clicking the Remove button.
TC/WEB Tcweb_User_50112.Doc process was not finished) 2.6.4 Exporting Distribution Lists to a Text File To export the recipients in a distribution list to a local file, select a distribution list and click the Export List button. A new window indicating that the distribution list is being generated will be displayed. There is the possibility to cancel the export by pressing the Cancel button. After the export files have been generated, there are two options: Download this file or close popup window.
TC/WEB Tcweb_User_50112.Doc Note: To avoid automatic opening of the file, be sure to set your web browser‟s options appropriately. Note: The export of multiple files to a ZIP file does not support characters with umlauts or accents such as Ö,Ü,Ä. 2.6.5 Downloading Fax OCR Cover Sheets TC/Broadcast only. On specially configured systems it is possible to create a TC/Broadcast fax OCR cover sheet in PDF format. A fax OCR cover sheet is a special form including a list of the user‟s distribution lists.
TC/WEB 2.7 Options 2.7.1 Identity Tcweb_User_50112.Doc The Identity tool provides access to the basic information of a user. When an administrative user accesses a user via the User tool, the Identity tool for that user is displayed. From the Identity tool, tabs can be used to move to the Addresses and Events tools for the current user. Which fields are displayed in the Identity tool, and whether they are editable can be configured on a per user basis by a System Administrator.
TC/WEB Tcweb_User_50112.Doc Picture 87: Password options 2.7.3 Addresses With the Addresses tool, it is possible to edit a user‟s addresses. Whether the Addresses tool is available for end users can be configured by a System Administrator. Picture 88: Addresses tool 2.7.4 Events The Events tool enables the editing of a user‟s events.
TC/WEB Tcweb_User_50112.Doc "Your password has NOT been changed. You did not enter your old password correctly. Please retry ..." For security reasons, a user must enter his/her old password in order to change their password. "Your passwords did not match. Please retry …" This error occurs if both fields for the new password do not match. The user must enter the new password two times to ensure that there is no typing mistake. 2.7.
TC/WEB 2.7.7 Tcweb_User_50112.Doc Job Notifications TC/Broadcast only: A user can select to send notifications for three job events: When a job is started. When a job is completed. When a job changes to an error state. For each job event it is possible to set up to 9 addresses that should receive a notification. Each notification address requires a service and a number. The Attention field is optional.
TC/WEB Tcweb_User_50112.Doc 3. 3.1 EXTENDED FEATURES Directly Open a Specific Page After Login On logging in to TC/Web, it is possible to configure a default page which will be shown by default. This can be done by adding to URL “tool=” option. Example: http://www.tcweb.
TC/WEB Tcweb_User_50112.Doc Edit content of the message To edit a message, the user must call the Action popup menu for this message, and select Edit. This function is accessible only in Public Folder, Private Folder and System Folder. Picture 95:Edit button Picture 96: Edit message window Delete a message To delete a message from the TCOSS Folder, the user must call the Action popup menu for this message, and select Delete.
TC/WEB Tcweb_User_50112.Doc If you do not have the right to send certain messages out directly, you must not only specify the final recipient in the To field, but also the authorizer in the Auth field. The message will then be relayed to the authorizer. If he approves it, it will be sent out from his workstation; otherwise it will be sent back to you. If you are an authorizer, outgoing messages from other users will first be sent to you.
TC/WEB Tcweb_User_50112.Doc message will not be rejected until the authorizer clicks Send Message. The rejected message will be sent to the originator of the message. Picture 102: Reject message window Signing messages If an authorizer receives a message which contains a signature mark, the signature mark will be included in the message text.
TC/WEB 3.4 TC/Broadcast 3.4.1 About TC/Broadcast Tcweb_User_50112.Doc TC/Broadcast is a system for sending, monitoring, and maintaining message sending to a large number of recipients (broadcasting). TC/Web provides a TC/Broadcast user interface for system administrators and end-users. With TC/Broadcast it is possible to send broadcasts to as many as 30,000 recipients. It is possible to send messages to a large number of recipients without TC/Broadcast in TC/Web.
TC/WEB 3.4.3 Tcweb_User_50112.Doc New Job Tool Click New Job in the toolbar, on the Home tool, or in the Active Jobs tool to create a new job. Picture 106: New Job button There are two possible distribution list selectors depending on the TC/Web configuration. Select which distribution lists the broadcast job should be sent to. Multiple distribution lists can be selected by holding the CTRL key while clicking on lists.
TC/WEB 3.4.4 Tcweb_User_50112.Doc Job Monitoring There are three tools for job monitoring: Active Jobs Displays jobs that are queued or are currently being sent. Problem Job Items Displays each individual send order that could not be delivered to its address. Completed Jobs Displays jobs having already been sent. The Problem Job Items tool is only available to system administrators. Picture 109: The job tools 3.4.4.1 Active Jobs The Active Jobs tool displays all queued and currently sending jobs.
TC/WEB Tcweb_User_50112.Doc The Correct button allows a user to change the recipient of a problem job item and resend the message. Picture 111: Problem Job Addressing Note: During job correction, the TO recipient must be changed. “#FREE#INTERCEPT:#MULTIFAX/“ must be replaced with “FREE#RESOLVE: “. For example “#FREE#INTERCEPT:#MULTIFAX/kit*4*1234*list1*3*kit“ must be changed to “FREE#RESOLVE:kit*4*1234*list1*3*kit“ The Problem Job Items tool is only available to a system administrator.
TC/WEB Tcweb_User_50112.Doc No actions are possible with completed jobs.
TC/WEB range, or if the same DID number is assigned twice. If a problem is found, the name of the corresponding user will be displayed. Tcweb_User_50112.Doc Picture 115: Number of DIDs The Show Total Number of Used DIDs button scans all of the users in the group and counts the number of used DID numbers for group. The number of DIDs is displayed in popup window. ©Kofax, Inc.
TC/WEB 3.6 Tcweb_User_50112.Doc Metamail The Metamail product saves storage capacity on linked mail systems (Exchange, Novell GroupWise, Lotus Notes, etc.). Normally, a user receives a fax as an image attachment in a message in the mail client. With the Metamail feature, a user receives an internet hyperlink in the message instead. Clicking on the link will open a TC/Web message in a web browser where the attachment can be accessed.
TC/WEB 3.7 Tcweb_User_50112.Doc Voice Settings The Voice Settings tool allows a user to manage their voicemail greetings via the web. A user can create new greetings, edit their settings, and delete greetings. Greetings can either be recorded via a telephone or audio files can be uploaded via the web tool. Weekly schedules can be created, allowing users to choose which greetings should be played at which time of day and on which day of the week. 3.7.
TC/WEB 3.7.3 Tcweb_User_50112.Doc Greeting and Schedule List The primary screen presents a list of all of the user‟s greetings and schedules. Greetings and schedules can be created, edited and deleted by clicking the appropriate buttons on this screen. Only one greeting or schedule can be active at a time. A greeting or schedule is made active by clicking on the row in the table. The active item is highlighted. 3.7.
TC/WEB 3.7.6 Tcweb_User_50112.Doc Disable the Mobile (and Alternative Phone) Number for Some Greeting Profiles The user can disable the mobile phone (and alternative phone) number for some greeting profiles. It can be done from “VoiceSettings->Edit Greeting” view in TC/WEB. Picture 123: Disable a number for greeting 3.7.7 Schedules A schedule is a week-long calendar allowing the user to specify when particular greetings should be played. A greeting can be used in more than one schedule.
TC/WEB 3.8 Default Message Template 3.8.1 Select Default Template The default message template is the message the user starts with when he/she clicks „New Message‟. It can contain all the components of a message: cover sheet, recipient list, subject, send options, and message text. It may also be empty. The purpose of having a default template is to save the user‟s time and trouble of specifying the same message components over and over again. Tcweb_User_50112.
TC/WEB Tcweb_User_50112.Doc Picture 132: Identity page – default template is cleared 3.8.2 Create New Message from Message Template The purpose of creating a new message from a template is to save the user‟s time and trouble of specifying the same message components over and over again. The user can select a template for a single message. Picture 133: Registry key „MessageFromTemplateEnable‟ To enable this feature, the registry key in the registry value ‘MessageFromTemplateEnable’ must be set to ‘1’.
TC/WEB Tcweb_User_50112.Doc Picture 136: New Message form with data taken from selected template Picture 137: Message forwarded to Server ©Kofax, Inc.
TC/WEB 3.9 Tcweb_User_50112.Doc Export Folder View to .CSV File This feature allows the user to create an ASCII file of a folder view in any directory the user specifies. When a user clicks the ‘Export' button, a new window appears, offering two options: ‘Export visible' (default) and ‘Select fields'. After pressing the ‘Export' button and with ‘Export visible' selected, TC/Web creates a ‘.csv’ file with the columns that are visible in the current folder view.
TC/WEB Tcweb_User_50112.Doc Picture 143: MS Internet Explorer dialog ©Kofax, Inc.
TC/WEB 3.10 Tcweb_User_50112.Doc Change the Originator of a Message TC/Web offers the possibility to send a message with changed originator/sender. For this feature to be available, the following steps are necessary: The user has to be granted the Change sender right. ‘SendAsUserEnable’ key value in Windows registry must be set to ‘1’. This can be done with the ‘Registry Editor’. The default value of this key is ‘0’.
TC/WEB 3.11 Tcweb_User_50112.Doc Correct Recipients of Message in the Outbox and Resend It With this command a user can correct the delivery address of a message or message send options in the Outbox. First, the user needs to open the Outbox. There are two options for correcting a message. First option: the user must mark the message he/she intends to correct. Then he/she has to click the Correct button. Second option: the user must open the Action menu by clicking Action.
TC/WEB Tcweb_User_50112.Doc 3.11.2 Change Recipients of Message The user can change recipients directly in the correction page by entering address(es) in the corresponding textbox for that recipient type. To remove a recipient, the user can simply delete it from the textbox. There is also an option to select recipients from an address book, which can be accessed by clicking one of the recipient type buttons.
TC/WEB 3.12 Tcweb_User_50112.Doc Login/Logout Auditing The Login/Logout Auditing tool provides access to login/logout auditing feature in the TCOSS.
TC/WEB 3.13 Tcweb_User_50112.Doc Message History View Through Action Context Menu There are two possibilities how to inspect the History of a particular message. The first is the Standard History View invoked via opening the message and pressing button History (for details see chapter Opening Messages\Message View\History View). Second one is the History View in the Action Context Menu in the particular tool (Inbox, Outbox, Archive, Public, System, …).
TC/WEB Tcweb_User_50112.Doc 4. USER ADMINISTRATION The user can also be enabled to manage other KCS users. The administrator is in charge of maintaining the KCS user profiles. Each KCS system has a set of user profiles, defining the rights of all users. Several features can be enabled for a User Administrator, e.g. a list of users, the ability to change a user‟s password, and the ability to “UserSwitch” to another user.
TC/WEB 4.1.1 Tcweb_User_50112.Doc Address View By default, the users‟ tool is opened in User view, and contains a list of administrable users. It is possible to switch between “User view” and “Address view”, by selecting Address View from the drop down list. Address view is the combination of all active and inactive addresses specified for a KCS user. The view allows filtering on service and address, allowing only a specific set of users to be listed.
TC/WEB Tcweb_User_50112.Doc When creating a new user, you must fill out the „Identity‟ tab, and after saving the new user, you can edit addresses, events and rights. In order to create new users, you must be either Group Admin or System Admin and have the right to write to „Group User Profiles‟ or to write to „System User profiles‟. Note: After saving a new user, when the template is selected, all settings except addresses will be copied from the template.
TC/WEB Tcweb_User_50112.Doc Picture 169: User rights editing You can switch to any tab of this sub-tabs control and change any rights. If you want to save changes made to the rights you must press the „Save Changes‟ button. If you switch to „Identity‟, „Address‟ or „Events‟ tab before pressing the „Save Changes‟ button, you will lose your changes. If saving of new right values was successful, you will receive an “Edit successful.” message.
TC/WEB Tcweb_User_50112.Doc Defines access authorization to the System Folder on the KCS Server. Only users with the TECH USER check box activated can see all the files on the KCS. System Address Book Defines access authorization to the System Address Book. It should be set to both, Read and Write, for Administrators and Distributors. For the standard user it is recommended that this be set to Read only. User Address Book Defines access authorization to the user's address book.
TC/WEB Tcweb_User_50112.Doc When activated, most entry fields in the user‟s inbox, outbox, and message folder are displayed. This right should only be granted to special users, e.g. Distributor or TECH user. Preferences If selected, user has access to TCfW Common Preferences menu. May Mark Complete If selected, user has the right mark incoming messages as complete. This right is granted by default. If you want to prevent a user from marking messages complete, clear this checkbox.
TC/WEB Tcweb_User_50112.Doc Picture 170: Navigation tab The values can have one of three states: State Result Show The tool is visible Hide The tool is hidden Default from Registry Use default server settings of TC/WEB taken from Registry for that tool Default value for Public folder, Private Folder, System Folder is “Show”, for other items is “Default from Registry”. 4.1.4.2 TC/WEB Identity Rights The "Identity" tool in TC/Web allows the access to the data of the user.
TC/WEB Tcweb_User_50112.Doc Picture 171: Options tab The values can have one of three states: State Result Show The tool is visible Hide The tool is hidden Default Use default server settings of TC/Web for that tool 4.1.4.4 Manual Fax Settings This tab defines the fax settings for the selected user. Access number identifies the user.
TC/WEB Tcweb_User_50112.Doc View first page only prevents the distributor from viewing any pages of a message other than the first page. Print enabled grants the user the right to print messages on any printer. Save as enabled grants the user the right to save messages to any folder. Terminate enabled grants the user the right to terminate incoming messages. Split message grants the user the right to split incoming messages.
TC/WEB Tcweb_User_50112.Doc 4.1.4.6 Authorize/Signature Settings The Administrator can add a signature to a specified user and also clear a user‟s signature. Picture 174: Authorize/Signature page on the Rights tab May authorize: Grants the user the right to authorize messages for sending Change options and reference: The user may change all send options and the reference field (only in TCfW). Change message content: The user may change the contents of the message (only in TCfW).
TC/WEB Tcweb_User_50112.Doc Adding signature 1. Click the Add signature button. Form “Add signature” will appear: Save button – save signature Cancel button – close the form without saving Browse button – open browse folder dialog box Signature path text box Picture 175: Add signature form 2. Click the Browse button. 3. Find and select the signature in the Browse folders dialog box and click the Open button. The path to the image will be inserted in the input box.
TC/WEB Tcweb_User_50112.Doc Clearing signature After clicking Clear signature, a dialog box will ask the user for the confirmation to clear the signature. Clicking OK, the signature will be deleted. Picture 179: Confirm „Clear signature“ dialog box 4.1.4.
TC/WEB Tcweb_User_50112.Doc Picture 181: Services rights 4.1.6 Restricted Services User Configuration TC/Web offers the possibility to restrict the use of services for each user. On the Rights tab there is the ‘Restrict use of services’ check box. If this check box is selected, each of the user‟s services must be marked separately with one of the two settings described below. If checked, all services are automatically reset to Authorization needed.
TC/WEB authorizer. If a user with restricted authorization writes a message to a recipient who can be reached through several services, all services for which the user has no rights will be deactivated automatically. If there is no active address left, the recipient entry in the recipient list will appear in square brackets and the message will not be sent. Tcweb_User_50112.
TC/WEB Tcweb_User_50112.Doc o Can create TC/Broadcast fax OCR cover sheet for switched user Recipients – shows switched user data. o Can view Personal/Group/System address book of switched user. o Can view and edit recipient entries. User Extensions – shows switched user data o Can edit DID numbers as the switched user normally would. Options: Identity – shows switched user data. o Can edit. o Which fields are visible to a System or Group User Administrator is configurable.
TC/WEB Tcweb_User_50112.
TC/WEB Tcweb_User_50112.Doc 5. 5.1 RESTRICTIONS General Users (ids) and distribution lists must be numeric; otherwise sending with covers created by fax OCR does not work. As compared to TopDeskPro: no scanning support, no attaching into other mail client The tool may appear differently in different browsers such as Netscape and Internet Explorer. The functionality of TC/Web is limited if Security settings of Internet Explorer are set to “high”.