
Installation Guide


Product Information (cont.)
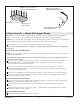
Connections and Service Access
Before installation, ensure proper access to the final connections.
NOTICE: Provide unrestricted service access to the pump. You must provide access for servicing the
pump and controls. The access must be located immediately next to the pump. Study the Roughing-In
Guide packed with the whirlpool.
Table of Contents
Important Information .............................................................. 2
Product Information ............................................................... 2
Tools and Materials ............................................................... 3
Before You Begin ................................................................. 3
Prepare the Site ................................................................. 5
Prepare the Whirlpool ............................................................. 5
Disconnect the Pump .............................................................. 5
Secure the Unit — Models With Support Blocks .......................................... 6
Secure the Unit — Models With Whirlpool Base .......................................... 8
Relocate and Mount the Pump ...................................................... 10
Install the Plumbing .............................................................. 11
Install a Rim-Mounted Faucet ....................................................... 11
Make Electrical Connections ........................................................ 12
Test Run the Whirlpool ............................................................ 12
Complete the Finished Wall ........................................................ 13
Clean-Up After Installation ......................................................... 13
Confirm Proper Operation .......................................................... 14
Troubleshooting ................................................................. 15
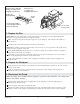
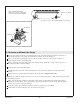
Tools and Materials
Before You Begin
We recommend this whirlpool for drop-in installation.
Inspect the whirlpool for damage before you begin installation.
Confirm adequate mounting and connection space for the faucet specified for your installation.
Silicone Sealant
Pencil
Level
Safety Glasses
Tape Measure
Pipe Wrench
Plus:
• Conventional woodworking tools
and materials
• Drop Cloth
• Construction adhesive (optional)
• Cement or mortar (optional)
• 2x4s or 2x6s
• Screws or Lag Bolts
Kohler Co. 3 1055820-2-C