Operation and Installation Manual Marine Generator Sets Models: 3.5CFZ 4CZ 5CFZ 6.
California Proposition 65 WARNING Engine exhaust from this product contains chemicals known to the State of California to cause cancer, birth defects, or other reproductive harm.
Table of Contents SUBJECT PAGE Safety Precautions and Instructions . . . . . . . Reference Material . . . . . . . . . . . . . . . . . . . . . . . Routine Service Parts . . . . . . . . . . . . . . . . . . . . . . Glossary of Abbreviations . . . . . . . . . . . . . . . . i viii x xi Section 1. Specifications . . . . . . . . . . . . . . . . . . Introduction . . . . . . . . . . . . . . . . . . . . . . . . . . . . . . . Specifications . . . . . . . . . . . . . . . . . . . . . . . . . . . . .
Safety Precautions and Instructions A generator set, like any other electro-mechanical device, can pose potential dangers to life and limb if improperly maintained or imprudently operated. The best way to prevent accidents is to be aware of the potential dangers and to always use good common sense. In the interest of safety, some general precautions relating to the operation of a generator set follow. Keep these in mind. This manual contains several types of safety precautions which are explained below.
EXHAUST SYSTEM WARNING Carbon monoxide can cause severe nausea, fainting, or death. In addition to routine inspection of the exhaust system, a carbon monoxide detector should be considered. Consult your boat builder or marina for installation of approved detectors. It is essential that all detectors be routinely inspected for proper operation. Carbon monoxide. Can cause severe nausea, fainting, or death. The exhaust system must be leakproof and routinely inspected.
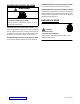
BATTERY WARNING Sulfuric acid in batteries. Can cause severe injury or death. Use protective goggles and clothes. Can cause permanent damage to eyes, burn skin, and eat holes in clothing. Sulfuric acid in batteries can cause severe injury or death. Sulfuric acid in battery can cause permanent damage to eyes, burn skin, and eat holes in clothing. Always wear splash-proof safety goggles when working around the battery.
FUEL SYSTEM WARNING Explosive fuel vapors can cause severe injury or death. Additional precautions must be taken when using the following fuels: Gasoline— Store gasoline only in approved red containers clearly marked GASOLINE. Do not store gasoline in any occupied building. Explosion. Gasoline vapors can cause explosion and severe injury or death. Before starting generator set, operate blower 4 minutes and check engine compartment for gasoline vapors. WARNING Explosive fuel vapors.
ACCIDENTAL STARTING WARNING Accidental starting. Can cause severe injury or death. Disconnect battery cables before working on generator set (negative lead first and reconnect it last). Accidental starting can cause severe injury or death. Disconnect battery cables (remove negative lead first and reconnect it last) to disable generator set before working on any equipment connected to generator. The generator set can be started by remote start/stop switch unless this precaution is followed.
ENGINE BACKFIRE/FLASH FIRE WARNING Fire. Can cause severe injury or death. A sudden backfire can cause severe injury or death. Do not operate with air cleaner/silencer removed. A sudden flash fire can cause severe injury or death. Do not smoke or permit flame or spark to occur near fuel system. Keep the compartment and generator set clean and free of debris to minimize chances of fire. Wipe up all spilled fuel and engine oil.
NOTES NOTE HARDWARE DAMAGE! Engine and generator may make use of both American Standard and metric hardware. Be sure to use the correct size tools to prevent rounding of bolt heads and nuts. NOTICE This generator set has been rewired from its nameplate voltage to: NOTE Special attention should be given when checking for proper coolant level. After the coolant has been drained, it normally requires some time before complete refill of the engine water jacket takes place.
Reference Material It is recommended that the following Regulations and Standards be followed when installing Marine Generator Sets. Pleasure Craft Designed and manufactured to meet U.S. Coast Guard Title 33. U.S. Coast Guard Code of Federal Regulations Title 33 Subparts I--Electrical Systems Subparts J--Fuel Systems Title 46 Subchapter F--Marine Engineering Part 58--Main and Auxiliary Machinery and Related Systems Order the above publications from: Superintendent of Documents U.S.
Commercial Vessels In order to use these generator sets for commercial applications where U.S. Coast Guard Title 46 Certificate is required, additional modifications will be necessary. U.S.
Routine Service Parts Contact your Kohler generator dealer/distributor for a complete listing of service parts for your generator set. Part Description Engine: Air Filter Oil Filter Belt, Timing Ignition System: Spark Plug Sea Water Pump Impeller Zinc Anode White Spray Paint x Routine Service Parts Kohler Part No.
Glossary of Abbreviations Abbreviations are used throughout this manual. Normally in the text they will appear in complete form with the abbreviation following in parenthesis the first time they are used. After that they will appear in the abbreviated form. The commonly used abbreviations are shown below. Abbreviation AC AHWT ALOP AM Amp Amps ANSI API approx. A/R A/S ASA assy. ASTM ATDC ATS aux. AWG AWM bhp bmep Btu °C cc CCA CEC cfh cfm CID cm cmm co. cont’d. C.S.A. cu. in. cyl. dBA DC DCR deg. dept. dia.
Abbreviation m3 max. MCM mi. mil min. mJ MJ mm m3/min MPa mph MS mW MW N/A NEC NEMA NFPA Nm no., nos. NPT N/R OC OD OEM OS OV oz. Description cubic meter, cubic meters maximum one thousand circular mils.
Section 1. Specifications Introduction The craft is equipped with a dependable 110 volt (reconnectable to 110/220 volt), 50 Hz; or 120 volt (reconnectable to 120/240 volt), 60 Hz single-phase alternating current marine generator set. Service requirements are minimal but are very important to the safe and efficient operation of the generator set; therefore, inspect associated parts often.
Generator Rated kW Frequency--Hz Rated Voltage Rated Amps (110 Volt) Rated Amps (220 Volt) Rotor Resistance (cold) (ohms) Stator Resistance (cold) (ohms)* Leads: 1--2, 3--4 55--66 B1--B2 Rated kW Frequency--Hz Rated Voltage Rated Amps (120 Volt) Rated Amps (240 Volt) Rotor Resistance (cold) (ohms) Stator Resistance (cold) (ohms)* Leads: 1--2, 3--4 55--66 B1--B2 3.5CFZ 5CFZ 3.5 5 50 50 110 Volt, 2&3 Wire, Single Phase or 110/220 Volt, 3 Wire, Single Phase 31.8 45.5 15.9 22.7 4--5 4--5 0.8 0.8 4.2 4.2 0.
DERATING: All units are rated 1.0 power factor. Derate approximately 3.5% per 1000 ft. (300 m) above 500 ft. (150 m) above sea level. 3.5CFZ, 50 Hz: 3.5 kW at 77°F (25°C) and 3.5 kW at 122°F (50°C). 4CFZ, 60 Hz: 4 kW at 77°F (25°C) and 3.5 kW at 122°F (50°C). 5CFZ, 50 Hz: 5 kW at 77°F (25°C) and 4.85 kW at 122°F (50°C). 6.5CZ, 60 Hz: 6.5 kW at 77°F (25°C) and 6 kW at 122°F (50°C). Engine Some general engine specifications are listed below.
Engine (Continued) Spark Plug Type Spark Plug Gap--in. (mm) Spark Plug Tightening Torque-ft. lbs. (Nm) Ignition System Starter Motor Cooling System Cooling System Capacity--U.S. qts. (L) Coolant Recovery Tank--U.S. qts. (L) Thermostat Pressure Cap Rating Engine Firing Order Ignition Timing B.T.D.C.
Accessories Several accessories are available to finalize the installation or to add convenience to operation and service. All the most current information can be obtained by contacting the local authorized Kohler dealer/distributor. Available accessories at the time of print of this publication are as follows. Sound Shield (Optional on 3.5CFZ/4CZ; Standard on 5CFZ/6.
Service Views 5 4 6 7 3 8 1 E 9 2 10 32 31 11 12 INPUT 13 14 15 16 18 STOP START 10A FUSE 19 0 0 0 0 0 1/10 TOTAL HOURS 30 17 BATT. CHRG. 36 20 33 21 22 35 34 29 28 27 26 25 24 23 258000-D Figure 1-1. Service Views (typical) 1. 2. 3. 4. 5. 6. 7. 8. 9. 10. 11. 12. 13. 14. 15. 16. 17. 18.
Section 2. Operation Prestart Checks To insure continued satisfactory operation, the following items should be checked before each start-up. BACKFIRE FLAME ARRESTOR: Air cleaner must be clean and properly installed to prevent unfiltered air from entering engine. See Maintenance--Air Cleaner. BATTERY: Remove caps and check the electrolyte level of each cell (batteries with filler caps only); add distilled water if necessary. Check to make sure it is connected correctly.
Controller 2 1 For identification and location of controller operating features, refer to the text below and Figure 2-1. 3 1. Battery Charging Fuse protects battery charging circuitry from short circuits. 2. Input (Controller) Fuse protects circuitry from short circuits. controller 3. Start/Stop Switch is used to stop and start generator set. Rock to start or stop position and hold to start or stop engine. Switch automatically returns to neutral center position when released. 6 4 4.
Starting WARNING If the engine fails to start after the first attempt, close the seacock before a second start-up attempt. This action will help prevent seawater from entering the engine cylinders through the exhaust valve. Once the engine starts, the seacock must be re-opened to allow passage of cooling water. NOTE Explosion. Gasoline vapors can cause explosion and severe injury or death. Before starting generator set, operate blower 4 minutes and check engine compartment for gasoline vapors.
Circuit Protection AC Circuit Breaker (Optional) The optional AC circuit breaker(s) located on the front panel of the controller protect the generator output windings. If a load circuit loses power, the cause may be a tripped AC circuit breaker. If a tripped circuit breaker is reset and then trips again, find and correct the short in the load circuit that is causing the problem. Input (Controller) Fuse (10 Amp) The input fuse protects the controller circuitry.
High Water Temperature Shutdown Switch High Exhaust Temperature Shutdown Switches The high water temperature shutdown switch protects the engine against internal damage if the cooling water temperature in the engine block is too high due to cooling water or coolant circulation problems. The switch is set to trip at 248--266°F (120--130°C). The location of the high water temperature shutdown switch is shown in Figure 2-3.
Remote Panels (Optional) 1 Remote Start Panel Remote start panel allows starting-stopping from a location remote of the generator set. Generator sets are equipped with a 6-pin connector on controller bottom for connection of the kit. See Figure 2-5. 2 KOHLER GENERATOR START 2 4 3 1-762 1. Engine Oil Pressure 2. Water Temperature 3. Start/Stop Switch 4. “On”Light 1 STOP Figure 2-6. Remote Start and Two-Meter Panel Features 1-656 1. “ON”Light 2. Start/Stop Switch Figure 2-5.
Remote Start and Four-Meter Panel Kit Allows starting-stopping from a location remote of the generator set. The illuminated gauges include a DC voltmeter, engine oil pressure gauge, water temperature gauge, and generator running time hourmeter. Generator sets come equipped with a 6-pin connector on controller bottom for connection of the kit. See Figure 2-7 for remote start and four-meter panel features. Start/Stop Switch is a rocker-type switch with “ON” light used to start and stop the generator set.
Section 3. Scheduled Maintenance Use the following service schedule and the hourmeter on the controller to schedule routine maintenance. In addition to the routine services listed in this manual, there are other important steps that should be taken to keep a generator set in top condition. Usually tools and instruments required for these additional steps are not available to the generator set owner.
Service Schedule Before Starting After 20 Hrs. or One Month Every 50 Hrs. or 3 Months Every 100 Hrs. or 6 Months Every 200 Hrs. or Yearly Every 300 Hrs.
Service Schedule (Continued) Before Starting After 20 Hrs. or One Month Every 50 Hrs. or 3 Months Every 100 Hrs. or 6 Months Every 200 Hrs. or Yearly Every 300 Hrs.
Lubrication System Specifications Oil Check Use high quality detergent oil of API (American Petroleum Institute) service class SF, SF/CC, or SF/CD. This information can be found on most oil containers, see Figure 3-1. The symbol illustrated identifies the API service class in the upper portion. The center indicates the SAE (Society of Automotive Engineers) viscosity grade. The bottom portion (when used) signifies the oil is intended to improve fuel economy and displays the phrase “Energy Conserving.
Adding Oil It is normal to add some oil between oil changes. The amount will vary with the usage. Open fill cap and pour a small amount of oil using a funnel or other suitable pouring device. See Figure 3-4. Wait a few minutes and check level. If necessary, add more oil and then check again. Each time be sure to add small quantities and check to prevent overfilling. 1. Place oil drain hose in a proper container. Remove oil drain cap.
Fuel System Specifications For best results, use only clean fresh, regular grade unleaded gasoline. Use fuel with a minimum octane rating as designated by the following: Antiknock Index (Average of Research Octane Number and Motor Octane Number) 86 Unleaded fuel is recommended since it leaves less combustion chamber deposits. Oil must not be mixed with fuel. If using a gasoline containing alcohol (gasohol), be sure the octane rating is at least 86 (Antiknock Index).
Fuel Pump Screen 3. Remove the three nuts that secure the electric fuel pump to the mounting bracket. 4. Remove the three mounting studs from the electric fuel pump. WARNING Explosive fuel vapors. Can cause severe injury or death. Use extreme care when handling, storing, and using fuels. Explosive fuel vapors can cause severe injury or death. All fuels are highly explosive in a vapor state. Use extreme care when handling, storing, and using fuels.
Carburetor/Choke Lubrication WARNING The only maintenance required is to lubricate carburetor and choke linkage at the specified interval using white lithium grease or lubriplate. Carburetor Adjustments The carburetor is a single-barrel, horizontal design and uses an electric choke. Lack of power usually indicates that the fuel mixture is too rich. An overrich mixture may also be caused by a clogged air intake (backfire flame arrestor)— check this before readjusting carburetor.
Ignition System Ignition System Service NOTE Do not sandblast, wire brush, scrape, or otherwise service spark plug in poor condition. Best results are obtained with a new plug. The ignition system is transistorized and breakerless. Under normal conditions, only the spark plugs need service on a regular basis. The electronic ignition module requires no maintenance and should give years of trouble-free service.
Problem Normal Gap bridged Oil fouled Means of Identification Light tan or gray deposit on the firing tip. Deposits built-up and closing gap between electrodes. Wet black deposits on the insulator shell bore electrode. Carbon fouled Black, dry fluffy carbon deposits on insulator tips, exposed shell surfaces, and electrodes. Lead fouled Dark gray, black, yellow, or tan deposits; or a glazed coating on the insulator tip. Melted electrodes and possibly blistered insulator.
1 2 1-514 1. 0.028--0.031 in. (0.7--0.8 mm) Gap 1-511 2. Spark Plug Electrodes Figure 3-13. Adjusting Spark Plug Gap Figure 3-12.
Cooling Systems— Closed/Heat Exchanger In a closed cooling system, the seawater does not circulate through the engine but circulates through separate chambers within the heat exchanger to cool the engine coolant. The seawater is then mixed with engine exhaust and ejected out the exhaust outlet. The coolant is circulated through cooling passages to cool the engine. All models make use of a coolant thermostat and a coolant recovery tank. The coolant capacity of the engine with heat exchanger is 0.72 U.S. qts.
1 1 INPUT STOP START 10A FUSE 00 0 0 0 1/10 TOTAL HOURS BATT. CHRG. 1-828 1. Air-Bleed Screw; Use 12 mm Wrench 2 258000-D 1. MAX. Mark Figure 3-14. Air-Bleed Screw 2. MIN. Mark Figure 3-16. Checking Coolant Level 1 2 INPUT STOP 3 START 10A FUSE 00 0 0 0 1/10 TOTAL HOURS BATT. CHRG. 258000-D 1. Coolant Recovery Tank 2. Overflow Hose 3. Coolant Pressure Cap Figure 3-15.
Flushing and Cleaning If required, flush coolant from generator set. To properly flush coolant, obtain Kit #267999 and use the following procedure: 4. Connect a garden hose to the female connector of large kit hose. Place the free end of the small kit hose in a 1--2 gal. (min.) bucket. NOTE Heat exchanger pressure cap MUST be installed. 5. Turn on water supply to flush coolant from engine block. Turn off water supply when clean water is observed coming from hose in bucket. WARNING Accidental starting.
13. Reconnect battery, negative lead last. 14. Start generator set and allow the set to run for about 20--30 seconds. Stop generator set and recheck coolant level by removing heat exchanger pressure cap. Add straight coolant, if necessary, until level is just below the overflow tube opening, then reinstall pressure cap. Repeat this step until coolant can no longer be added. This procedure should give an approximate mixture of 50% ethylene glycol and 50% water. TP-5695 12/93 15.
Anticorrosion Zinc An anticorrosion zinc anode is installed in the heat exchanger to prevent electrolytic corrosion by seawater. When different metals, such as iron and copper, are placed in a highly conductive liquid (seawater), the iron gradually rusts. The zinc has chemical properties which cause the seawater to react to it rather than the engine components. The anticorrosion zinc anode should be checked every 100 hours or three months and replaced every 200 hours or yearly.
Pressure Cap valve downward into the mounting base. Install retaining cap and tighten finger-tight only. Do NOT overtighten. Closed-loop cooling systems incorporate a pressurized cap to raise the boiling point of the coolant and make use of higher operating temperatures. If leakage or malfunction occurs, replace the pressurized cap with one supplied by Kohler Co. part number 229958. Air Cleaner and Mixing Elbow Servicing Air Cleaner 1 The engine is equipped with a dry-type air cleaner.
Battery Cleaning The starting battery should be a 12-volt unit with a minimum 250 CCA (cold cranking Amps) at 0_F (--18_ C). When using a maintenance-free battery it is not necessary to check the specific gravity or electrolyte level. Otherwise, these procedures should be done at the intervals specified in the Service Schedule. Keep battery clean by wiping it with a damp cloth. Keep all electrical connections dry and tight.
each cell should not exceed ±0.01. The battery should be charged if the specific gravity is below 1.215 at an electrolyte temperature of 80_F (26.7_C). °C 71.1 Correction °F 160 + .032 150 60.0 140 + .028 + .026 54.4 130 48.9 120 Temperature below 80°F (26.7°C) + .022 Hydrometer Reading 1.250 + .018 + .016 + .014 43.3 110 Four Beads Floating— Fully Charged EXAMPLE NO. 1— + .024 + .020 Acid Temperature 20°F (--6.7°C) Subtract .024 Specific Gravity Corrected Specific Gravity is 1.
Valve Adjustment With overhead cam engines, each valve is spring-held in the closed position until forced open by the action of the rocker arm in contact with the camshaft. Rocker arms have adjusting screws and locknuts for adjusting valve stem-to-rocker arm clearance. Check clearance with the engine cold. See Specifications— Engine for intake and exhaust valve clearances. WARNING Rotating parts. Can cause severe injury or death.
1 1 2 2 3 1-831 1-827 1. “Y ”Mark 2. “T”Mark Figure 3-22. Determining Top Dead Center TP-5695 12/93 1. Feeler Gauge 2. Adjusting Screw 3 mm Square Head 3. Locknut; Use 9 mm Wrench Figure 3-23.
Governor The gear-driven centrifugal type governor serves to keep engine speed constant by automatically adjusting the amount of fuel supplied to the engine according to changes in load. 2. Move the governor arm end fully in the direction shown (toward the electric choke solenoid) and readjust governor screw. Tighten locking nut. 3. Start engine temperature. and run to reach operating Lubrication 4.
Wattage Requirements Generator Service If the rated capacity of the generator set is exceeded, the circuit breaker located on the controller will trip to protect the generator against damage. Tripping could be caused by a short in the AC circuit in the craft or simply by having too many appliances on at the same time resulting in an overload condition. If the circuit breaker trips, the set may continue running but there will be no AC output to the protected circuit.
Storage Procedure It is recommended that the craft be afloat when the generator set is prepared for storage since the engine must be started. 1. Add fuel stabilizer to fuel tank. Use recommendations of fuel stabilizer manufacturer. 2. Start generator set and run until operating temperature is reached or about 15 minutes. Stop generator set. Drain oil from crankcase while engine is still warm. Replace oil filter. Refill crankcase with specified weight oil. NOTE 4.
Section 4. Troubleshooting When troubles occur, do not overlook simple causes. A starting problem, for example, could be caused by improper fuel or an empty fuel tank. The following charts list some common problems. If procedures in this manual do not explain how to correct the problem, take the generator set to an authorized service dealer/distributor. Tell the dealer exactly what happened when the problem occurred and of any adjustments made to the set.
Engine (Continued) Problem Stops suddenly Lacks power Operates erratically 4-2 Troubleshooting Possible Cause Out of fuel Air intake clogged Fuse blown in controller Defective seawater pump impeller Clogged seawater strainer Ignition coil failure Fuel line restriction Fuel vapor lock Defective electric fuel pump Dirty fuel screen Faulty spark plug(s) No/low oil pressure Defective low oil pressure (LOP) safety shutdown switch High temperature shutdown Defective high exhaust temp.
Engine (Continued) Problem Overheats Unit is noisy Possible Cause Improper cooling Thermostat defective Sea strainer clogged Carburetor adjustment too lean Engine ignition timing incorrect Exhaust system leak Exhaust system not securely installed Broken or damaged vibromounts No installation clearance (unit hits craft structure or compartment) No compartment sound insulation Excessive vibration engine/ generator (internal imbalance) Loose or vibrating sheet metal Corrective Action Check intake and outle
Generator Problem No AC output Low output or excessive drop in voltage High generator output voltage Will not crank 4-4 Troubleshooting Possible Cause Corrective Action Circuit breaker in OFF position Reset breaker to ON position Circuit breaker tripped due to overload on generator set Reduce load. See Wattage Requirements. Reset breaker to ON position.
Section 5.
246482-D Figure 5-2. Point-to-Point Wiring Diagram--3.5CFZ, 4CZ, 5CFZ, and 6.
Electro Switch 2-Wire Generator Sets L1 To Generator 2 Set L2 1 6 5 3-Wire Generator Sets 3 4 To Shore Power 7 8 L1 L2 To Generator Set L0 2 1 3 4 6 5 7 8 To Shore Power 11 12 10 9 To Load To Load Kraus Naimler/American Solenoid (Early Rectangular Design) 2-Wire Generator Sets L1 To Generator 1 Set L2 3 2 4 6 3-Wire Generator Sets 5 To Shore Power 8 L1 L2 7 To Generator Set L0 1 2 3 4 6 8 5 7 To Shore Power 9 10 14 13 To Load To Load Kraus Naimler/American
Four-Lead Reconnectable (Single-Phase) Generator Sets Where Generator Output Can Be Reconnected For 120 volt or 120/240 volt, 60 Hz, 110 volt or 110/220 volt, 50 Hz NOTE When a generator set is reconnected to a voltage different than nameplate voltage, notice should be placed on the unit indicating this change. Decals for this purpose are available from authorized Kohler dealers/distributors.
120/240- or 110/220-Volt Configuration--Figure 5-6 Jumper lead not used. If unit was originally wired for straight 120 or 110 volt, be sure jumper lead is removed (see Figure 5-6 for location). Leads L1 and L2 are different phases and must never be connected together. LO (Neutral) Ground LO GRD. L2 L1 Load Side Circuit Breaker Line Side 4 3 2 1 Stator Leads L0--L1 L0--L2 L1--L3 60 Hz 120 volt 120 volt 240 volt 50 Hz 110 volt 110 volt 220 volt Figure 5-6.
6
Section 6. Installation Introduction Lighting Load Use this section as a guide when installing the Marine generator set, then refer to Section 2. Operation for specific service instructions. Reliable and safe generator set operation depends largely upon proper installation. Remember that the generator set will probably be the craft’s sole source of electrical power. The lighting load is usually easiest to calculate. In most cases, simply add the wattage of each lamp to be operated off the generator set.
Capabilities will vary according to Kilowatt Derating following. 3.5CFZ, 50 Hz: 3.5 kW at 77_F (25_C) and 3.5 kW at 122_F (50_C). Starting (In-Rush) Watts 4CZ, 60 Hz: 4 kW at 77_F (25_C) and 3.5 kW at 122_F (50_C). Motor Requirements (HP) Running Watts 1/4 750 330 1/3 1000 400 1/2 1500 600 3/4 2000 750 1 3300 1100 2 4000 2000 3 5000 3000 Figure 6-1.
2 4 3 1 INPUT STOP/START 10A FUSE 00000 1/10 TOTAL HOURS *5 BATT. CHRG. *14 12 6 *9 11 7 10 13 NOTE 8 Use two hose clamps on each end of all flexible exhaust hose connections. *Indicated components must conform to U.S.C.G. Regulations. 1. Heat Exchanger 2. Siphon Break (See Instruction Sheet TT-927 for Proper Installation.) 3. Exhaust Mixer 4. Engine-Driven Seawater Pump 5. Exhaust Hose 6. Seawater Strainer 7. Raw Waterline 8. 9. 10. 11. 12. 13. 14.
Location General Consider the following in selecting or constructing a generator set location. Compartment/location must allow adequate space for ventilation, cooling and exhaust system installation, service access to the engine and generator, and proper fuel system installation. Engine stringers or other available structural members must provide adequate support for the generator set weight. A generator set compartment must be sealed to prevent exhaust gases and fuel vapors from entering cabins.
Fuel Systems NOTE Fuel systems must conform to U.S.C.G Regulations and tests. Fuel Supply Generator sets, in most cases, must draw fuel from the same tank as the propulsion engines. If the tank’s fuel pickup opening allows, a multiple dip tube arrangement (Figure 6-6) may be used. An alternate tank, if used, should have a smaller separate pickup opening allowing a single dip tube (Figure 6-7). WARNING Explosive fuel vapors. Can cause severe injury or death.
Anti-Siphon Provisions Anti-siphon devices must be installed if any section of fuel line lies below the highest point of the fuel tank. The anti-siphon device should be either a spring-loaded check valve (tested to function with the particular installation’s siphon head), or an electrically operated shutoff valve (UL ignition-protected, tested to U.S.C.G. Regulations) which may be operated manually.
Cooling Systems 2 General 1 The following features are necessary in the cooling system. 4 An intake thru-hull strainer (seacock cover) must be screened to prevent entry of foreign objects and must not be aligned (in relation to direction of travel) with the propulsion engine intake. See Figure 6-11. The recommended thru-hull strainer should be flush mounted. Strainers with slotted holes must be installed with their slots parallel to the direction of vessel movement.
A seawater strainer of sufficient capacity should be mounted to the seacock or permanent structure at a point not higher than the seawater pump. The strainer should be accessible for servicing. See Figure 6-13 for a typical installation. The optional Kohler seawater strainer is threaded for 1/2 NPT fittings. NOTE A 5/8 in. (16 mm) waterline hose can be substituted for the recommended 3/4 in. waterline hose. Piping should be kept straight and as short as possible.
1 INPUT 3 2 STOP/START 10A FUSE 4 00 0 0 0 1/10 TOTAL HOURS BATT. CHRG. 11 10 NOTE Use two hose clamps on each end of all flexible exhaust hose connections. 1. Exhaust Manifold 2. 3 ft. (1 m) Max. 3. Engine-Driven Seawater Pump 4. Heat Exchanger 5. Waterline 5 6 8 9 7 258000-D 6. 7. 8. 9. 10. 11. Seawater Strainer Intake Strainer Engine Coolant Seawater Seacock Coolant Recovery Tank Figure 6-15.
Locate the exhaust outlet at least 4 in. (10 cm) above the waterline when the craft is loaded to maximum capacity. Usually a flapper is installed at exhaust (transom) outlet to prevent water backup in following seas or when going astern (backward). WARNING Carbon monoxide. Can cause severe nausea, fainting, or death. The exhaust system must be leakproof and routinely inspected. Carbon monoxide can cause severe nausea, fainting, or death.
Above Waterline 1 In addition to considerations described earlier, a customer-supplied silencer should be installed with its outlet at a maximum of 10 horizontal ft. (3 m) from the center of the engine’s exhaust outlet (see Figure 6-17). A typical silencer should be mounted with the inlet and outlet level and with the drain plug down. The silencer may require two supporting brackets or hanger straps for installation to stringers or other suitable structure.
A typical silencer should be mounted no more than 4 ft. (1.2 m) below the highest point in the exhaust line. Attach a separate wood mounting base to hull stringers or other suitable structure. Then secure the silencer to hull using silencer manufacturer’s recommendation. Be sure the silencer outlet is not more than 10 horizontal ft. (3 m) from the engine exhaust manifold outlet. UL marine exhaust hose should be used. Electrical Systems AC Voltage Connections WARNING Explosion.
isolator or isolation transformer is referenced in ABYC E-8.20 and ABYC E-8.11. Generator sets installed in commercial vessels are governed by U.S. Coast Guard Regulations, Title 46, the American Bureau of Shipping, and Lloyd’s Register of Shipping. Grounding of equipment is covered in ABS 35.9.6 and Lloyd’s Part 6, Chapter 2-1, Section 1.3. The types of permissible neutral grounding of generating equipment are referenced in ABS 35.125 and 35.95.1 and in Lloyd’s Part 6, Chapter 2-1, Section 14.4.
Remote Start Switch Connection elects to use just a start-stop switch or separate lights and hourmeter. See Figure 6-22. Kohler offers several remote panels for connection to the generator set. See Accessories for further detailed description. A wiring harness with a connector keyed to the controller box connector is available to connect these panels to the generator set.
GROUND LUG VIEW A--A 1.65 (42) 5/16 STUD FOR BATTERY CONNECTION (NEGATIVE). 1/4 STUD FOR BATTERY CONNECTION (POSITIVE) 16.60 (422) REMOTE CONNECTION FUEL INLET 1/4 N.P.T. 5.89 (150) 15.50 (394) 1.0 (25) A A 1.0 (25) TP-5695 12/93 2.69 (68) .62 (16) 9.13 (232) .44 (11) 26.44 (672) 27.87 (708) NOTE: DIMENSIONS IN ( ) ARE MILLIMETER EQUIVALENT. ENGINE COOLANT CHECK AND FILL START/STOP SWITCH CIRCUIT BREAKERS (OPTIONAL) MOUNTING PATTERN 24.44 (621) C ENGINE L 21.20 (538) 14.19 (360) 6.
Figure 7-2. Sound Shield--Optional on 3.5CFZ and 4CZ; Standard on 5CFZ and 6.5CZ 18.10 (460) OPENING FOR A.C. LOAD LEADS 2.12 (54) .50 R. (13) 1.65 (42) 2 PLACES 1.75 (44) OPENING FOR FUEL INLET HOSE AND BATTERY CONNECTIONS 2.75 (70) 5.45 (138) 4.00 (102) CLEARANCE REQ’D FOR LATCH OPENING .51 TYP. (13) 1.57 (40) MOUNTING LOCATION FOR SIPHON BREAK ASSEMBLY. DRILL (2) 1.00”DIA. HOLES USING INDENTATIONS FOR LOCATION. (OPTIONAL) A 30.06 (764) 26.76 (680) 31.
Section 8. Parts Ordering Instructions For service or information, check the yellow pages of the telephone directory under the heading GENERATORS--ELECTRIC or contact the local marina for the authorized Kohler service dealer/distributor in the area. KOHLER CO. KOHLER, WISCONSIN 53044 PHONE 414-565-3381 FAX 414-459-1646 (North American Sales), 414-459-1614 (International) FOR SALES & SERVICE IN U.S.A.
Section 9. Operating Hour Service Log The following is provided to help you keep a cumulative record of operating hours on your generator set and the dates required services were performed. Enter hours to the nearest quarter hour.
TP-5695 12/93 PRINTED IN U.S.A. KOHLER CO. KOHLER, WISCONSIN 53044 PHONE 414-565-3381 FAX 414-459-1646 (North American Sales), 414-459-1614 (International) FOR SALES & SERVICE IN U.S.A.