
Installation Guide


4. Complete the Installation
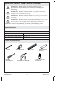
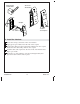
IMPORTANT! Make drip loops in all cables.
Press a split boot onto each interface cable.
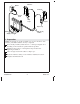
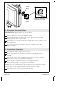
Connect the interface cable to the valve. Ensure that the cable
fully clicks into the valve socket.
Press the boot over the connector and into the valve socket to seal
the connection.
If you only install one interface, insert a solid boot into the
unused socket.
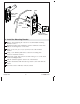
5. Installation Checkout
Turn ON the water supply to the valve.
Check all connections for leaks and make any adjustments as
needed.
Plug in the valve. You should hear the valve power-up and the
power icon on the user interface will be lit.
If not already completed, refer to the digital interface
homeowners guide to set up the user interface.
NOTE: For more information about using the user interface and its
menus, refer to the ″Digital Interface Homeowners Guide.″
Press the power icon to turn ON the shower.
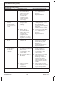
Slide the split boot onto
the interface cable.
Split
Boot
Solid
Boot
Kohler Co. 7 1143086-2-G