
Installation Guide


Product Information (cont.)
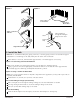
NOTICE: Keep the area around the blower motor clean and free of sawdust, insulation, dirt, or other
small loose debris. Such material could plug the blower motor air intake and reduce the air flow through
the blower.
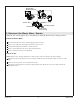
Features
Factory assembled components include a blower motor, air harness, control, butterfly valves, chromatherapy
lights (certain models), electrical harnesses, an illuminated user keypad, a heated surface component, user
keypad, and keypad cable. Other than power wiring and plumbing connections, no assembly is required.
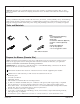
Tools and Materials
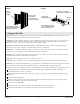
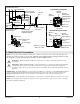
Prepare the Blower (Remote Site)
NOTE: This bath can be installed as received or with the blower motor relocated to another location.
Refer to the appropriate sections throughout this manual for instructions related to your particular
installation. Read this section before relocating your blower.
IMPORTANT! Do not relocate or alter the PVC tee or coiled flexible tubing connected to the blower.
Follow the blower relocation instructions exactly.
All material needed for the relocation of the blower motor must be supplied by the installer.
Additional tools and materials you will need to relocate the blower motor:
•
Electrician pliers
•
Assorted screwdrivers
•
Adjustable wrench
•
Drill and bits to install the blower mounting fasteners
•
18 AWG non-metallic sheathed cable, two conductors with ground, with support clips, as required
•
One 4″ (102 mm) x 2″ (51 mm) electrical junction box with cover, gasket, and mounting screws
•
Three strain reliefs - one must fit the blower motor cover with standard National Pipe Thread (NPT)
threads. The other two must fit the holes in the new junction box.
•
Six wire connectors (wire nuts or equivalent)
•
1-1/2″ PVC or other rigid pipe with fittings, unions, PVC cement (or equivalent fastening method),
and support clips, as required
•
Four fasteners (such as flathead wood screws or concrete anchors) to secure the blower motor
100% Silicone Sealant
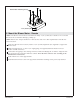
Plus:
• Conventional Woodworking
Tools and Materials
• Drop Cloth
• Construction Adhesive (Optional)
• Cement* or Mortar (Optional)
• 2x4s
• Plastic Film (Optional)
• 1/8" (3 mm) Spacers
* Do not use gypsum cement.
Kohler Co. 3 1204120-2-D