
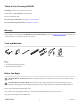
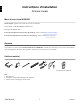
Installation Guide

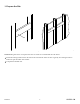


5. Remove/Adjust the Door
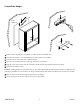
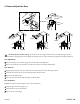
Latch
Slide
Bracket
Hinge
Depth
Latch
Height
Cup
Bracket
Pin
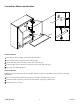
CAUTION: Risk of product damage. Do not leav
e the door supported with only one hinge during removal or
installation. Disengage the boom hinge rst during removal, and reaach the top hinge rst during installation.
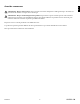
Door Adjustment
Adjust the hinges as needed for proper door functionality and alignment.
Refer to the illustration and note the screwdriver location for the desired adjustment.
Door Removal
Apply slight leverage to the door with one hand to keep the door in the full open position.
With the other hand, release the lower hinge latch from the bracket.
Repeat for the upper hinge.
Move the door forward to slide the hinges o the brackets.
Kohler Co. 7
1384740-2-A
Align the pin with the top hinge cup.
Snap the latch onto the top bracket.
Repeat for the lower hinge.
Door Installation
NOTE: Get assistance supporting the door to ease installation.