
Installation Guide
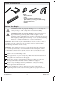

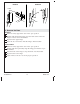


Tools and Materials
Before You Begin
CAUTION: Risk of property damage. Do not modify the
vanity. Doing so will compromise structural stability.
CAUTION: Risk of property damage. Select 250 lb (113.4
kg) load bearing 5/16″ lag bolts with a length to clear
obstacles in the wall and 5/16″ washers. Calculate proper lag
bolt length by adding the following: 1-1/2″ (38 mm) backing
material + wallboard thickness + back rail thickness.
NOTICE: Siliconized acrylic caulk must be used to secure a sink or
countertop to the vanity. Do not use 100% silicone sealant which
will damage the finish of the vanity.
NOTICE: Any electrical accessory components must be connected
to a circuit protected by a Ground-Fault Circuit-Interrupter (GFCI)
or Residual Current Device (RCD). Follow all local electrical codes.
Observe all local building codes.
The appearance of your vanity may differ from the illustrations in
this guide. The instructions still apply.
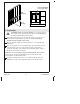
Secure the vanity to stud framing. When possible, provide 2x6
bracing behind the finished wall for additional support.
Remove any moldings that may inhibit the vanity from being
flush against the finished wall.
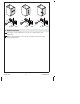
To ease installation, remove drawers from the vanity before
beginning. Refer to the section in this guide for proper removal.
Plus:
• Wood Screws
• 2x6s
• 5/16" Lag Bolts and Washers
[Min 250 lb (113.4 kg) Load Bearing]
• Socket Wrenches
• Shims
1216534-2-C 2 Kohler Co.