
Installation Guide


5. Install the Faceplate and Handle
CAUTION: Risk of product damage to the K-306-KS valve
assembly. When using this valve in a fiberglass or acrylic
installation, use the Thin Wall Installation Kit (88526).
For installation over a tiled wall, apply a bead of silicone sealant
around the back edges of the faceplate.
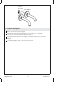
Break off the tab at the lower right on the backing plate. Fit the
backing plate over the valve so the large hole is on the bottom
and secure with two screws. Do not overtighten.
Rotate the valve stem fully counterclockwise.
Position the faceplate over the backing plate and thread the collar
into the backing plate. Do not cross thread.
Insert the sleeve into the notches of the collar and hand tighten. If
the collar does not thread into the backing plate, thread the
backing plate screws 1/2 turn back.
Insert the stem extension through the sleeve and collar with the
flat sections of the stem extension facing up.
Attach the stem extension to the valve stem with the flat head
screw.
Insert the handle screw through the handle stem.
Place the handle over the handle stem.
Securely tighten the handle screw to the handle.
Attach the handle stem with the attached handle to the stem
extension.
Screws
Setscrew
Handles
Handle Stem
Notch
Sleeve
Stem
Stem Extension
Tab
Handle Screw
Faceplate
Collar
Valve Stem
Flat Head
Screw
Backing
Plate
1031692-2-D 8 Kohler Co.