
Installation Instructions


Preparación (cont.)
Nivele de la taza del lavabo añadiendo tantos empaques autoadhesivos como sea
necesario.
PRECAUCIÓN: Existe el riesgo de lesiones personales o daños al producto. El
producto puede romperse, despostillarse o causar lesiones si no se manipula con
cuidado. El pedestal y la taza no están sujetos; haga que alguien sujete la taza
mientras usted marca los orificios de montaje.
Ubique los dos orificios de montaje de la taza del lavabo y márquelos en la pared
acabada.
Marque la posición del orificio del pedestal en el piso.
Separe cuidadosamente la taza del pedestal.
Retire la taza y el pedestal del área de instalación.
2. Install the Lavatory
CAUTION: Risk of product damage. Do not overtighten connections.
Overtightening may break or chip the lavatory or pedestal.
Drill 1/4” mounting holes at the marked locations on the finished wall and the
floor.
NOTE: You may also use other fastening devices of sufficient size and strength.
Install the hanger bolts to the backing material so they extend 1-1/4” (3.2 cm)
from the finished wall.
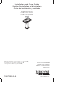
Install cap nuts and
washers to the
hanger bolts.
Installer les écrous
borgnes et les
rondelles sur les
boulons d'ancrage.
Instale los tapones
roscados y las
arandelas en los
pernos de sujeción.
Basin/Bassin/Lavabo
Pedestal
Colonne
Pedestal
Finished Wall
Mur fini
Pared acabada
Back of Pedestal
Arrière de la colonne
Parte posterior del pedestal
Install hanger bolts.
Installer les boulons d'ancrage.
Instale los pernos de sujeción.
Secure pedestal with lag bolt and washer.
Sécuriser la colonne avec le tire-fond et
la rondelle.
Fije el pedestal con el perno de fijación y
la arandela.
1087255-2-A 8 Kohler Co.