
Installation Guide
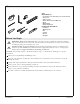


1. Prepare the Framing
NOTICE: Measure your product for site preparation. Visit the product page at www.kohler.com for more
information.
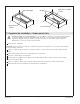
Framing Considerations
CAUTION: Risk of property damage. When planning the framing for the height of the bath, take
into consideration the height of the bath with the feet. Do not support the bath by the framing or
bath rim.
When planning the framing, take into consideration the thickness of the water-resistant deck
material and finished material.
If a deck-mount faucet and valving are planned, ensure that adequate space is available for their
installation.
An access panel is recommended to simplify future maintenance to plumbing.
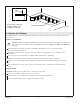
NOTICE: To ensure the bath rim running the length of the bath will be used as intended:
Ensure a 1/16″ (2 mm) gap will exist between the finished material and the underside of the bath
rim.
Allow a minimum of 2″ (51 mm) of clearance between the edge of the bath rim and the finished
wall.
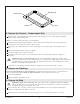
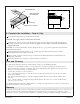
Prepare the Site
NOTICE: Install to a level subfloor that is adequately supported.
Install a level subfloor. Adjust for level, if necessary.
Construct 2x4 or 2x6 stud framing designed for your particular installation.
Position the plumbing. Cap the supplies and check for leaks.
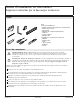
18-3/4" (476 mm) Max
1/16"
(2 mm) Gap
Construct 2x4 or 2x6 stud
framing according to the
roughing-in information.
Kohler Co. 3 1207305-2-A