Mira Azora Thermostatic Electric Shower Installation & User Guide These instructions are to be left with the user
Contents Introduction................................................................................................. 3 Important Safety Information...................................................................... 4 Pack Contents Checklist............................................................................ 6 Specifications............................................................................................. 8 Installation Requirements.....................................................
Introduction Thank you for purchasing a quality Mira product. To enjoy the full potential of your new product, please take time to read this guide thoroughly. Having done so, keep it handy for future reference. The Mira Azora is a thermostatic electric shower with separate controls for power selection and temperature/flow adjustment. A unique thermostatic valve stabilizes temperature changes caused by water pressure fluctuations. These can result from taps being turned on or off, or a toilet being flushed.
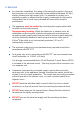
Important Safety Information Installation must be carried out in accordance with these instructions, and must be conducted by designated, qualified and competent personnel. Warning! Follow all warnings, cautions and instructions contained in this guide, and on or inside the appliance. 1. 2. 3. 4. 5. 6. 7. 8. 9. 10. 11. 12. 13.
Caution! 1. 2. 3. 4. 5. 6. 7. Read all of these instructions and retain this guide for later use. The electrical installation must comply to “BS 7671 - Requirements for Electrical Installations”, commonly referred to as the IEE Wiring Regulations - Part 7, or any particular regulations and practices, specified by the local electricity supply company.
Pack Contents Checklist Mira Azora Tick the appropriate boxes to familiarise yourself with the part names and to confirm that the parts are included.
Mira Energise Electric Shower Fittings Tick the appropriate boxes to familiarise yourself with the part names and to confirm that the parts are included.
Specifications 1. Plumbing Minimum maintained inlet pressure 70 kPa (0.7 bar). 100 kPa (1.0 bar) recommended for satisfactory operation. Maximum static inlet pressure 1000 kPa (10 bar). Minimum static pressure 20 kPa (0.2 bar) to keep the inlet valve closed. 2. Electrical The Mira Azora 9.8 kW requires a 45 Amp fuse. The terminal block will accept cable up to 16 mm2 . 3. Standards and Approvals The Mira Azora complies with all relevant directives for CE marking. Installation Requirements 1.
Avoid layouts where the shower hose will be sharply kinked. This may reduce the life of the hose. A Hose Retaining Ring is supplied to prevent the handset from dropping below the spill-over level of the bath or shower tray, which could lead to contamination from back-siphoning. The supplied Hose Retaining Ring should meet the majority of user requirements for shower installations with flexible outlet fittings. However, there will be occasions when it will not provide a suitable solution.
2. Electrical In a domestic installation, the rating of the electricity supplier’s fuse and the consumer unit must be adequate for the additional demand. All Mira electric showers are high power units, it is essential to contact your electricity supplier to ensure that the supply is adequate for the product. Voltage drop due to local heavy demand will reduce the shower’s performance. The appliance must be earthed by connecting the supply-cable earth conductor to the earth terminal.
Consumer Unit Double-pole Isolating Switch Installation 1 Installation of Mira Azora Warning! Turn off the electrical and water supplies before proceeding with the installation of the Mira Azora. The electricity must be turned off at the mains and the appropriate circuit fuse removed, if applicable. Note! An installation template is supplied to help you install the Mira Azora. Cover Retaining Screw Remove the three cover retaining screws and the cover. Caution! Handle glass cover assembly with care.
Determine the direction of the inlet water supply: top (falling), bottom (rising), or back inlet . Note! Make sure that the back inlet does not go directly back into the wall. Use a soldered elbow. Swivel the inlet connector assembly to suit. Remove the inlet blanking cap. Avoid trapping the green earth bonding wire. Before fitting the Cover, make sure that the appropriate cutouts have been removed to suit the supply entering the product. Thoroughly flush the mains-fed cold water supply pipe.
Feed cable into Case. Fit Earth sleeve (not supplied) and then strip insulation. Do not twist cable cores. L = BROWN E = GREEN/YELLOW Firmly connect the conductors. Do not exert strain on the terminal block. N = BLUE Cover Retaining Screw Refit the Cover, making sure it is correctly located. Do not overtighten screws. Caution! Handle glass cover assembly with care. Do not use alternative screws to secure the Cover. This can cause internal damage to the appliance.
Holes For Cover Retaining Screws Fixing Screw Terminal Block Heater Tank Electrical Supply Cable Inlet Connector Assembly Cold Water Supply Pipe (Bottom Entry) 14
2 Installation of Shower Fittings Decide on a suitable position for the slide bar avoiding buried cables and pipes. Drill the two 7.0 mm fixing holes for the slidebar at 600 mm centres and insert the wall plugs. Assemble the clamp bracket components. Push the plastic slidebar ends into the slidebar. Push the slidebar through the clamp bracket assembly, soapdish and hose retaining ring. Fit the bottom end support loosely to the wall. This will make aligning the top support easier.
End Support Slidebar End Fixing Screw Handset Clamp Bracket Assembly 600 mm Slidebar Soap Dish Hose Retaining Ring End Support Cap 16
Commissioning If you are unsure how an electric shower works, please read through the section “User Instructions” before continuing. 1. 2. Electrical supply is turned off at the mains. 4. 3. Turn control to full cold. 5. 6. Set control to ‘I’. Check for water leaks. 7. Turn the water supply fully on. 8. Switch on electrical supply. 9. 0 - 5 Secs Water will be at full force Press the ‘Start/Stop’ button. and at a cool temperature. 10. 11. 12. Turn the control slowly.
13. 14. 5 - 10 Secs Set control to ‘III’. 15. The temperature will rise further. 16. Adjust temperature as required. Flow rate will adjust automatically. 17. Press STOP and isolate power. 18. 0 - 5 Secs The shower will purge from its tank for a few seconds. Residual water may drain over a few minutes. Note! A slight hissing sound may be heard from the appliance during operation. High mains water pressure and high shower temperatures will affect the tone. This is quite normal in use.
User Instructions Read the section “Important Safety Information” first. 1. 3. 2. Switch on electrical supply. Set to desired position. 5. Press the ‘Start/Stop’ button. 4. Check water temperature before entering shower. Allow 10 - 15 seconds for any temperature adjustments to reach the handset. 7. 6. Residual water may drain over a few minutes. Press STOP button. Shower will continue to run for a few seconds before stopping.
Spray Action The handset spray head has four different spray actions:- Eco, Start, Soothe and Force. The handset operation is described below. 1. Eco To access the eco setting, turn the spray plate fully clockwise. Water will flow from the outer set of holes at a reduced flow rate. 2. Start To access the start setting turn the spray plate anticlockwise until it ‘clicks’ (one click from the eco setting). Water will flow from the outer set of holes. 3.
Fault Diagnosis The trouble shooting information tabled below gives details on probable causes and remedies should difficulties be encountered whilst the shower is in operation. Warning! There are no user serviceable components beneath the cover of the appliance. ONLY A COMPETENT TRADESPERSON SHOULD REMOVE THE FRONT COVER! Symptom Appliance fails to operate. Shower cycles from hot to cold. Unable to select a cool enough shower.
Symptom Power Light Low or No flow Operation of Temperature Control has little or no effect on water temperature. Heater Setting Probable Cause Possible Remedy Low/Medium/ High ON Any Water supply pipework or Flush supply pipe. Clean Inlet inlet filter restricted by a Filter. blockage or partial blockage. ON Any Insufficient water supply pressure/flow for operation. Contact local water company. Supply pressure must be a minimum of 0.7 bar.
Symptom Power Light Heater Setting Probable Cause Possible Remedy Low/Medium/ High No change in temperature between Low/ Medium/High setting. ON Any Insufficient mains water pressure. Contact local water company. ON Any Possible failure of Flow Valve, Microswitch, or Heater Tank. Use a suitable continuity device to check the continuity of the Microswitch or Heater Tank and replace parts as necessary. Water will not turn off. ON Any Inlet Valve, Solenoid, or Start/Stop switch faulty.
Inlet Filter - Cleaning/Renewing Cover Retaining Screw Read the section “Important Safety Information” first Make sure that the electrical supply is turned off at the mains and that the water supply is fully turned off. Remove the three screws and the cover. Caution! Handle glass cover assembly with care. Cover Hold a wrench across the flats of the metal connector. Unscrew the filter using another wrench as shown. Clean or renew the Filter as necessary.
Spare Parts List 25
Mira Azora Spare Parts List 405.58 406.27 416.38 416.41 416.48 416.51 872.01 872.28 1563.519 1563.533 1563.534 1563.537 1563.538 1563.539 1563.540 1563.551 1634.009 1634.015 1634.026 Inlet Connector Assembly Inlet Filter (with ‘O’ seal fitted) Clamp Bracket (Inlet) Thermal Switch Latching Switch Solenoid Coil Microswitch N/O - 2 pin Microswitch C/O - 3 pin Terminal Block Assembly Thermostatic Valve/Heater Tank 9.
Mira Azora Spare Parts Diagram B A A A B B 416.41 1563.519 1563.539 872.01 B 1563.533 A 1563.538 A A 872.28 1563.540 406.27 416.48 A A 416.51 1563.507 1563.537 B 405.58 416.38 A 1563.534 A 1634.015 1634.
Mira Energise Shower Fittings Spare Parts List 126.65 Slidebar Ends 449.02 Slidebar 449.01 Clamp Bracket Assembly 449.04 Soap Dish 450.36 Spray Plate Pack 632.73 Hose Seal (x2) 1563.593 Adjuster Ring 449.05 Hose 1563.594 Hose Retaining Ring 449.03 Slidebar Wall Fixing Assembly 28 1563.
Dimensions 77 mm 100 mm 233 mm 367 mm 69 mm 600 mm 660 mm 29
Wiring Diagram Thermal Cutout Dual Disc L Pressure/Power Selector Switch Solenoid Valve Power On L.E.D.
Customer Services Guarantee of Quality Spare Parts Mira Showers guarantee your product against any defect in materials or workmanship for the period shown in the Guarantee Registration Document included with your shower. Alternatively, to confirm the applicable guarantee period please contact Customer Services. To validate the guarantee, please return your completed registration card.
Mira Showers Kohler Mira Ltd Cromwell Road, Cheltenham GL52 5EP. Mira is a registered trade mark of Kohler Mira Limited. The company reserves the right to alter product specifications without notice. www.mirashowers.