
User's Manual
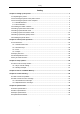
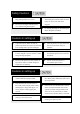
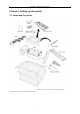
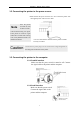
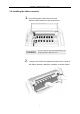
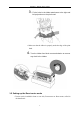
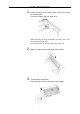
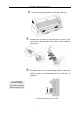
Table Of Contents
- Chapter 1 Setting up the printer
- 1.1 Unpacking the printer
- 1.2 Connecting the printer to the power source
- 1.3 Connecting the printer to the computer
- 1.4 Installing the ribbon cassette
- 1.5 Setting up the Rear tractor mode
- 1.6 Setting up the Manual mode
- 1.7 Setting up the Front tractor mode
- 1.8 Setting up the CSF (option) mode
- 1.9 Installing the printer driver
- Chapter 2 Control panel operation
- Chapter 3 Setup options
- Chapter 4 How to use SETUP Memory
- Chapter 5 Troubleshooting
- Chapter 6 Specifications

Chapter 1 Setting up the printer
5
1. Attach the paper rack holders (right / left) to the printer
as shown below.
Press the holders until you hear click.
When removing the paper rack holder, use there move lever,
screwed on the paper rack.
See the instruction on the rear side of the paper rack.
2. Attach the paper rack to the paper rack holders.
3.
Put the paper rack down.
Press the paper rack on the paper rack holders.