
Printer/Fax/Scanner/Copier User's Guide


6.4 Erasing Sections of Copies
6
bizhub 180 6-17
Advanced Copy Operations Chapter 6
To make copies using an Erase setting
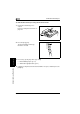
1 Load the document to be copied.
❍ Refer to “Loading the Document” on page 3-9.
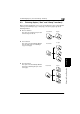
2 Press the [Erase] key.
The “Erase” indicator lights up.
3 Using the and keys, select
“LEFT”, “UPPER” or “FRAME” to
specify the area that will be erased.
?
Do you know how large an area is
erased?
➜ The width of the erased area for
the “LEFT”, “UPPER” and
“FRAME” settings can be set
between 3/16 inch (5 mm) and 13/
16 inch (20 mm), in Approx.1/16
inch (1 mm) increments. The
manufacturer’s default setting is 3/8 inch (10 mm).
➜ The width of the erased area for the “LEFT”, “UPPER” and “FRAME”
settings can be changed using the “ERASE SETTING” function in the Utility
mode (“To specify the erased width (“ERASE SETTING” function)” on
page 7-46).
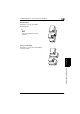
4 Press the [Yes] key.
The main screen appears.
5 If necessary, specify any other copy settings.
❍ Before Making Copies (p. 5-1)
❍ Advanced Copy Operations (p. 6-1)
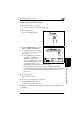
6 Using the 10-Key Pad, enter the desired number of copies, and then press the
[Start] key.