
Users Manual


1
2
3
4
5
6
7
8
9
10
11
12
Operation of DR Detector
67
HINT
• Repeat the same procedure to delete the exposure failure
indicator or the divider.
3�2�4 Serial exposure
IMPORTANT
• DR Detectors capable of serial exposure are: AeroDR 3
1417HD, AeroDR 3 1717HD, AeroDR 3 1417HD2, and
AeroDR 3 1717HD2.
• I/F cables capable of serial exposure are: I/F Cable4 1.5mD,
I/F Cable4 8mD, and I/F Cable4 8mU.
• Intelligent Grid cannot be used.
• Please use an X-ray generator and a wall stand/table dedi-
cated for serial exposure.
• Because the serial exposure images are exposed with low
dosage, it is not guaranteed that these images have the
same image quality as the images exposed in other method
than serial exposure.
• The DR Detector is precision equipment, and therefore im-
pact or vibration during radiography or image transfer may
aect the image quality. Be careful when handling the DR
Detector during and immediately after the exposure.
1
Perform examination registration with the
image processing controller�
2
Check that this device is ready to expose
images,andthenpreparefortheexpo-
sure�
3
PushtheexposureswitchoftheX-rayde-
vice to perform the exposure�
• By pressing and holding the exposure switch,
serial exposure is performed. Also, by releasing
the exposure switch, X-ray exposure nishes to
exit serial exposure.
• When the exposure is completed, images are
stored in the DR Detector and will then be con-
verted to digital data and sent to the image pro-
cessing controller sequentially.
4
Check that the exposed image is dis-
played on the image processing control-
ler�
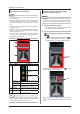
3�2�5 DR Detector orientation
Change the orientation of the DR Detector according
to the exposure body part.
Expose with the triangular mark upward when expos-
ing in portrait, and with the triangular mark to the side
when exposing in landscape.
When exposing in portrait
X-ray
X-raydevice
The triangular mark is upward
When exposing in landscape
X-ray
X-raydevice
The triangular
mark is to the left
or right