
Service Manual


I ADJUSTMENT
36 MODE
1-51
11. Press the [RETURN] key to return to the “Timing
adjustment menu screen”.
(3) Platen vertical magnification adjustment
Adjust the vertical magnification of the scanner
system.
a. Procedure
1. Enter the 36 mode.
2. “36 mode menu screen”
Press the [2. Timing adj.] key.
3. “Timing adjustment menu screen”
Press the [1. Drum clock adj.] key.
4. “Vertical/horizontal magnification (drum clock)
adjustment screen”
Press the arrow key until “Vertical magnification-
platen” appears in the message display area.
5. Press the [COPY] key.
6. “Basic screen”
Set the new test chart on the original glass and
select A3 or 11 x 17 size paper. Then press the
START button.
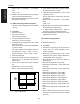
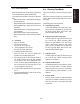
7. Use a ruler to measure the vertical magnifica-
tion.
• Standard value: ± 0.5% max (life size)
Within ± 1mm with respect to 200mm
8. If it is not within specification, press the # button
while holding down the
∗ button.
9. “Vertical/horizontal magnification (drum clock)
adjustment screen”
Enter a value from the numeric keys, then press
the [SET] key.
• Setting range: -20 (reduction) ~ +20 (enlarge-
ment)
1 step = 0.05%
10. Repeat steps 5 to 9 until the vertical magnifica-
tion becomes the standard value.
11. Press the [RETURN] key to return to the “Timing
adjustment menu screen”.
(4) Platen horizontal magnification adjustment
Adjust the horizontal magnification of the copy
system.
Note:
• The result of the platen horizontal magnification
will be reflected all the images read by scanner
(RADF, platen).
a. Procedure
1. Enter the 36 mode.
2. “36 mode menu screen”
Press the [2. Timing adj.] key.
3. “Timing adjustment menu screen”
Press the [1. Drum clock adj.] key.
4. “Vertical/horizontal magnification (drum clock)
adjustment screen”
Press the arrow key until “Horizontal magnifica-
tion-platen” appears in the message display
area.
5. Press the [COPY] key.
6. “Basic screen”
Set the new test chart on the original glass and
select A3 or 11 x 17 size paper. Then press the
START button.
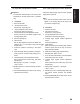
7. Use a ruler to measure the horizontal magnifica-
tion.
• Standard value: ± 0.5% max (life size)
Within ± 1mm with respect to 200mm
8. Press the # button while pressing the
∗ button to
return to the “Vertical/horizontal magnification
(drum clock) adjustment screen”.
9. “Vertical/horizontal magnification (drum clock)
adjustment screen”
Enter a value from the numeric keys, then press
the [SET] key.
200
200