
Electronic Keyboard User Manual
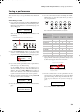
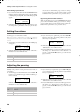
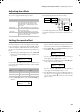
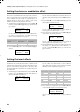

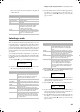


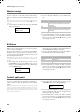
Table Of Contents
- Introduction
- Main features
- Wide range of sounds
- Performances
- Four zones keyboard
- Touch control
- Pedal effects
- Piano eXperience
- One-hundred eighty-five songs
- SongBook included
- Onboard recorder
- Metronome
- Data transfer via USB
- MIDI capabilities
- MIDI over USB
- Temperaments
- Adjustable pitch
- Effects
- Powerful integrated amplification
- Two sets of headphones
- Main features
- Control panel
- Connections
- Before you begin
- Basic functions
- Using performances
- The metronome
- Playing back a song
- Recording a song
- Quick recording procedure
- Step 1: Entering the Record mode
- Step 2: Selecting sounds
- Step 3: Setting the record options
- Step 4: Setting the time signature and tempo
- Step 5: Recording
- Step 6: Second-pass recording
- Changing sounds to a recorded song
- Changing tempo to a recorded song
- Pedal Punch recording
- Auto Punch recording
- Saving the song
- Editing a song
- Editing sounds and performances
- Accessing the Sound edit mode
- Exit from the Sound edit mode
- Saving a sound
- Saving a performance
- Setting the volume
- Adjusting the panning
- Adjusting the effects
- Setting the reverb effect
- Setting the chorus or modulation effect
- Setting the insert effects
- Setting the octave transposition
- Adjusting the fine tune
- Programming the pedals
- Selecting a scale
- Resetting the current sound and performance
- Global settings
- Accessing Global edit
- Exit from the Global edit mode
- Touch settings
- Turning the internal speakers on or off
- Master tuning
- Brilliance
- Default split point
- Assigning functions to the pedals
- Quarter Tone (SubScale realtime programming)
- Fast Play
- Mute Level
- Turning the keyboard on or off (Local Control)
- MIDI Clock
- MIDI IN Channels
- MIDI OUT Channels
- MIDI Filters
- Data transfer via the USB port
- Erasing songs from the User Song album
- General Reset
- System version number
- MIDI
- Installing the Korg USB MIDI Driver
- Assembling the stand
- Appendix
- Sounds
- Performances
- Effects
- Songs
- Error messages
- Write Protect
- Out of Memoy
- Maximum song length reached
- Loading Song Error
- USB Working Wait please
- Memory Full
- Invalid Name
- Song Exists Execute
- Record Mode Not Allowed
- Song Modified Save?
- Sound Modified Save?
- Perf. Modified Save?
- Globals Modified Save?
- Save Global Failure
- Save Preset Failure
- Save Midi Failure
- General Reset Wait Please
- General Reset / nn%
- Troubleshooting
- Polyphony
- Technical specifications
- MIDI Implementation Chart
Editing sounds and performances > Saving a performance
39
Saving a performance
There are three ways to save a performance. Please find them
below.
After editing a sound
1. If you entered Sound edit mode with the PERFORMANCE
indicator turned off (Sound mode), after modifying some-
thing and pressing EXIT, the Sound Modified page (seen
above) will appear:
While in this page, the PERFORMANCE indicator will
start flashing.
2. Press the PERFORMANCE button to save the current
sound or sound combination into a performance. After
you press the button, the Performance Name page appears:
3. If you want, edit the performance name. A performance’s
name can be up to 10 characters long.
Use the SCROLL buttons to select the character to be
edited (it is flashing). Use the +/YES and -/NO buttons to
change it. Press the SCROLL
/
buttons together to
insert a new character, or the +/YES and -/NO buttons
together to delete the character at the cursor’s position.
4. When you reach the end of the name, pressing SCROLL
moves the cursor to the To command:
5. Press the +/YES button to go to the Save To Performance
page:
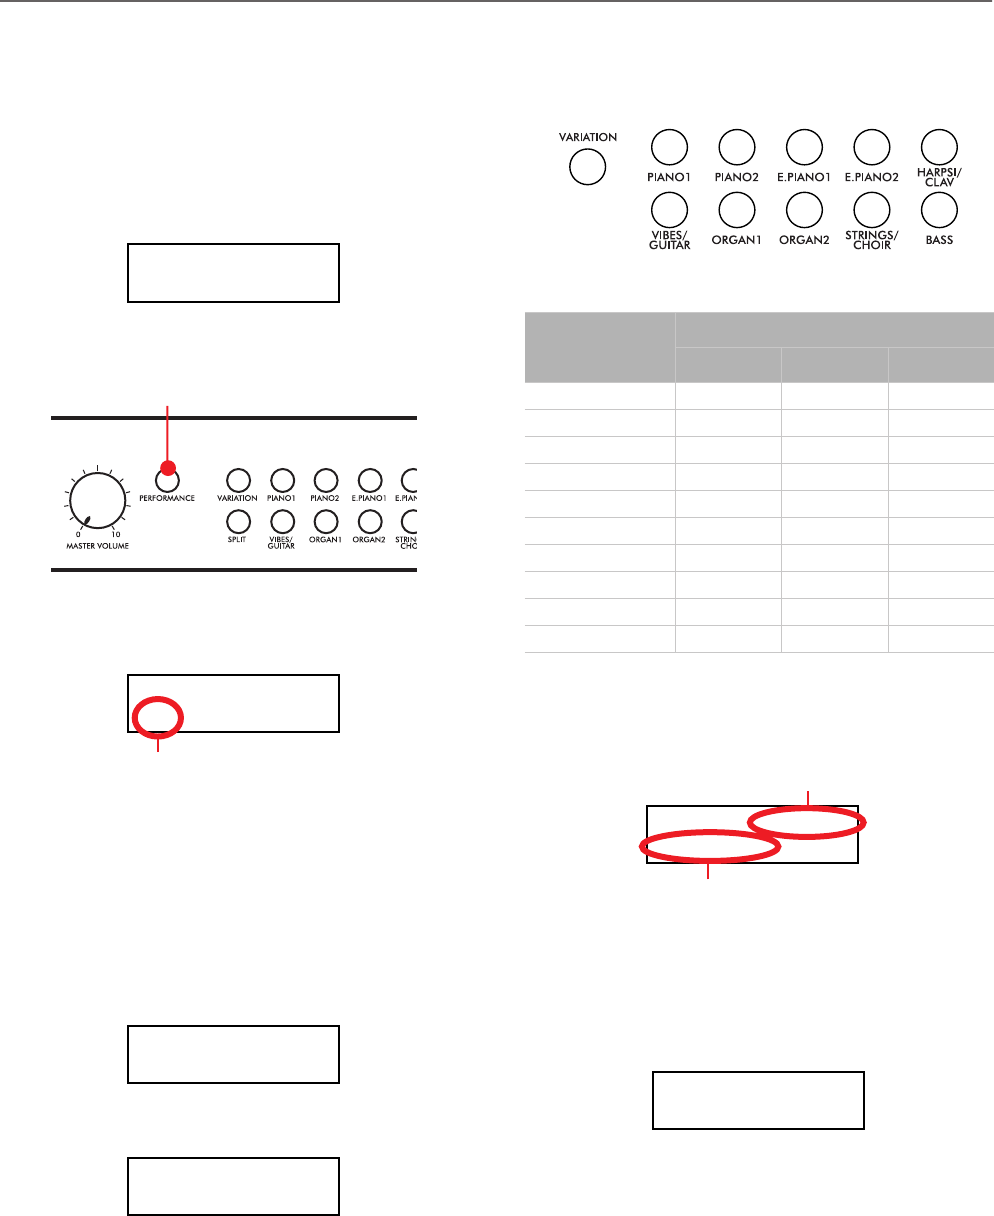
6. Use the sound selection buttons (including the VARIA-
TION button) to select the location where you want to
save your performance.
Here is the table of the Performance’s locations:
7. The location number appears in the top right corner of the
display, while the name of the performance already stored
at that location appears in the lower left corner:
8. Press the +/YES button to save the performance into the
selected location, or the EXIT button to return to the Main
page without saving, with the last performance still select-
ed. If you press +/YES, the “Are you sure?” message ap-
pears.
Press +/YES to confirm, -/NO to cancel.
Sound Modified
Save? (Yes/No)
PERFORMANCE button and LED indicator
Performance Name
JazzCombo To
Flashing character
Performance Name
JazzCombo
To
Save To: Perf 01
JazzCombo
Save?
Button
Performance #
Bank 1 Bank 2 Bank 3
1 (PIANO 1) 01 11 21
2 (PIANO 2) 02 12 22
3 (E.PIANO 1) 03 13 23
4 (E.PIANO 2) 04 14 24
5 (HARPSI/CLAV) 05 15 25
6 (VIBES/GUITAR) 06 16 26
7 (ORGAN1) 07 17 27
8 (ORGAN2) 08 18 28
9 (STRINGS/CHOIR) 09 19 29
10 (BASS) 10 20 30
12345
678910
Save To: Perf.01
Split&Lay
Save?
Name of the performance at the
target location
Target location number
Are you sure?
C720_English.fm Page 39 Tuesday, October 10, 2006 4:14 PM