
user manual


Your RC-1616 Remote Control
13
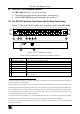
6.2.1 Setting the Dipswitches
You need to set the dipswitches when using more than one RC-1616 remote
panel. Configure the RC-1616 unit by setting the dipswitches, as Table 9 and
Table 10 define:
Table 9: Dipswitch Definitions S2-1 to S2-8
DIP Set as follows:
S2-1 ON for Single bus operation, OFF for “XY” operation
S2-2, S2-3, and S2-4 OFF (not in use)
S2-5, S2-6, S2-7, and S2-8 Select the levels controlled by the panel (see Table 10)
Table 10: Dipswitch Settings (Levels controlled by the Panel)
S2-5 S2-6 S2-7 S2-8 Levels controlled by the Panel
OFF OFF OFF OFF Not a valid situation
ON OFF OFF OFF This panel only controls Level 1
1
OFF ON OFF OFF This panel only controls Level 2
1
OFF OFF ON OFF This panel only controls Level 3
1
OFF OFF OFF ON This panel only controls Level 4
1
ON ON OFF OFF ‘Video’ controls Level 1. ‘Audio’ controls Level 2
OFF ON ON OFF ‘Video’ controls Level 2. ‘Audio’ controls Level 3
OFF OFF ON ON ‘Video’ controls Level 3. ‘Audio’ controls Level 4
ON OFF ON OFF ‘Video’ controls Level 1. ‘Audio’ controls Level 3
ON OFF OFF ON ‘Video’ controls Level 1. ‘Audio’ controls Level 4
OFF ON OFF ON ‘Video’ controls Level 2. ‘Audio’ controls Level 4
ON ON ON OFF ‘Video’ controls Level 1 and 2. ‘Audio’ controls Level 3
ON ON OFF ON ‘Video’ controls Level 1 and 2. ‘Audio’ controls Level 4
OFF ON ON ON ‘Video’ controls Level 2. ‘Audio’ controls Level 3 and 4
ON OFF ON ON ‘Video’ controls Level 1. ‘Audio’ controls Level 3 and 4
ON ON ON ON ‘Video’ controls Level 1 and 2. ‘Audio’ controls Level 3 and 4
1 Any ‘Audio’, ‘Video Only’, ‘Audio Only’, ‘AFV’ or separate ‘Audio IN’ buttons in this situation do not function. When a
user wants to designate one of the above levels as audio, the legend in the switch (switches) may be changed accordingly