USER MANUAL MODEL: PA-240Z 240W Power Amplifier PA-120Z 120W Power Amplifier P/N: 2900-300802 Rev 5 www.kramerAV.
Kramer Electronics Ltd.
Kramer Electronics Ltd. Introduction Welcome to Kramer Electronics! Since 1981, Kramer Electronics has been providing a world of unique, creative, and affordable solutions to the vast range of problems that confront the video, audio, presentation, and broadcasting professional on a daily basis.
Kramer Electronics Ltd. costs of treatment, recycling and recovery of waste Kramer Electronics branded equipment on arrival at the EARN facility. For details of Kramer’s recycling arrangements in your particular country go to our recycling pages at www.kramerav.com/support/recycling. Overview Congratulations on purchasing your Kramer PA-240Z 240W Power Amplifier and/or PA-120Z 120W Power Amplifier.
Kramer Electronics Ltd. Typical Applications The PA-240Z is ideal for the following typical applications: • Medium to large meeting rooms. • Auditoriums and lecture halls. • Court rooms. • Retail stores and shopping centers. • Hotel lobbies. • Transportation hubs.
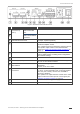
Kramer Electronics Ltd. Defining the PA-240Z 240W Power Amplifier This section defines the PA-240Z. Figure 1: PA-240Z 240W Power Amplifier Front Panel Figure 2: PA-120Z 120W Power Amplifier Front Panel # Feature ON LED Function Lights green when powered on and orange when in standby. INPUT 1 LED Lights green when a signal is present on input 1. INPUT 2 LED Lights green when a signal is present on input 2. MUTE Lights red when the output is muted, off when unmuted.
Kramer Electronics Ltd. Figure 3: PA-240Z and PA-120Z Rear Panel # Feature AUDIO IN Connectors (1 and 2) Unbalanced Stereo Audio 3.5mm Mini Jack Balanced Stereo Audio Terminal Block Connector LINE OUT Balanced Stereo Audio Terminal Block Connector VOLUME Control Trimmer FACTORY DEFAULT Button ETHERNET RJ-45 Connector RS-232 (G, Tx, Rx) Port Function Connect to an unbalanced stereo audio source. Connect to a line-level, balanced, stereo audio source.
Kramer Electronics Ltd. Connecting the PA-240Z Always switch off the power to each device before connecting it to your PA-240Z. After connecting your PA-240Z, connect its power and then switch on the power to each device. To connect the PA-240Z as illustrated in the example in Figure 4: 1. Connect the audio sources. For example: ▪ An unbalanced stereo audio source to the AUDIO IN 1 3.5mm mini jack example, an MP3 player).
Kramer Electronics Ltd.
Kramer Electronics Ltd. Connecting a Balanced/Unbalanced Stereo Audio Source to the Balanced Input The following are the pinouts for connecting a balanced or unbalanced stereo audio source to the balanced input: Figure 7: Connecting a Balanced Stereo Audio Source to the Balanced Input Figure 8: Connecting an Unbalanced Stereo Audio Source to the Balanced Input Connecting to PA-240Z via RS-232 You can connect to the PA-240Z via an RS-232 connection using, for example, a PC.
Kramer Electronics Ltd. Connecting PA-240Z via the Ethernet Port You can connect to the PA-240Z via Ethernet using either of the following methods: • Directly to the PC using a crossover cable (see Connecting the Ethernet Port Directly to a PC on page 9). • Via a network hub, switch, or router, using a straight-through cable (see Connecting the Ethernet Port via a Network Hub or Switch on page 11).
Kramer Electronics Ltd. 5. Click Properties. The Internet Protocol Properties window relevant to your IT system appears as shown in Figure 10 or Figure 11.
Kramer Electronics Ltd. 6. Select Use the following IP Address for static IP addressing and fill in the details as shown in Figure 12. For TCP/IPv4 you can use any IP address in the range 192.168.1.1 to 192.168.1.255 (excluding 192.168.1.39) that is provided by your IT department. Figure 12: Internet Protocol Properties Window 7. Click OK. 8. Click Close.
Kramer Electronics Ltd. Operating the PA-240Z This section describes the following operations: • Setting the DIP-Switches on page 12. • Adjusting the Master Volume on page 12. Setting the DIP-Switches By default, the DIP-switches are set to Hi-Z and 100V. DIPSwitch # 1 2 Setting Note Set to Hi-Z for high impedance configurations. Set to Lo-Z for low impedance configurations. When in Hi-Z, set either to 70V or 100V according to your requirements. Use when connecting mono speakers in daisychain.
Kramer Electronics Ltd. Using the Embedded Web Pages Control the PA-240Z via the web pages which are accessed using a Web browser and an Ethernet connection. Before attempting to connect: • Perform the procedures described in Connecting PA-240Z via the Ethernet Port on page 9. • Ensure that your browser is supported.
Kramer Electronics Ltd. To browse the PA-240Z web pages: 1. Open your Internet browser. 2. Type the IP address of the device in the address bar of your browser. For example, the default IP address: The Authentication window appears (if security is enabled): Figure 13: Using the Embedded Web Pages – Authentication Window 3. Enter the User Name (Admin, by default) and Password (Admin, by default) and click OK.
Kramer Electronics Ltd. Setting the Speaker Output Parameters Use the Speaker Output page to set the speaker input signals mixing and the output parameters. PA-240Z enables automatically setting the line level output parameters according to the speaker output parameters (see Setting the Line Level Output Parameters on page 17). The Speaker Output Mixer enables performing the following operations: • Mixing the Input Signal Levels on page 15. • Setting Equalization Levels on page 16.
Kramer Electronics Ltd. Setting Equalization Levels We recommend that you first set the frequencies, then the Q and finally the gain for the Bass Mid and Treble ranges. To set EQ levels: 1. In the navigation pane click Speaker Output. The Speaker Output page appears. 2. In the EQ column set the following: ▪ Set the Bass [60Hz, 80Hz, 100Hz or 200Hz] Mid [500Hz, 1kHz, 1.5kHz or 2.5kHz] and Treble [10kHz, 12.5kHz, 15kHz or 17.5kHz] frequency. ▪ Set the Bass, Mid and Treble Q-Factor [0.1 to 16].
Kramer Electronics Ltd. Setting the Line Level Output Parameters PA-240Z enables automatically setting the line level output parameters according to the speaker output parameters see Setting the Speaker Output Parameters on page 15 or setting them manually via the Line Level Output page. To set the line level output parameters independently (unlinked to speaker output parameters): 1. In the Navigation pane, click Speaker Output. The Speaker Output page appears. 2. Click Unlinked. 3.
Kramer Electronics Ltd. Selecting Hi-Z Mono Settings To select Hi-Z mono settings: 1. In the Navigation pane, click Audio Settings. The Audio Settings page appears. 2. Set the Hi-Z reduction to mono to one of the following: ▪ Select Left only to use left audio in connectors ▪ Select Stereo Down Mix to reduce the stereo input to mono.
Kramer Electronics Ltd. Changing Standby Settings To change standby settings: 1. In the Navigation pane, click Audio Settings. The Audio Settings page appears (Figure 17). 2. Define the Standby Settings: ▪ Set auto standby to ON or OFF. ▪ Type the audio threshold to initiate auto standby. ▪ Set the standby timeout to 5, 10 or 15 minutes. Entering Standby The device goes into standby when both of the following conditions are met: • Auto Standby is set to ON in the webpage.
Kramer Electronics Ltd. Changing the Ethernet Settings To change the Ethernet settings, if required: 1. In the Navigation pane, click Device Settings. The Device Settings page appears: Figure 18: Device Settings Page 2. Set DHCP to ON or OFF. 3. If DHCP is set to OFF, change any of the parameters (IP Address, Netmask and/or Gateway). 4. Click Set. After changing the IP number, reload the web page with the new IP address. After changing the Subnet mask you need to restart the PA-240Z.
Kramer Electronics Ltd. Saving and Loading Settings To save a configuration: 1. In the Navigation pane, click Device Settings. The Device Settings page appears (Figure 18). 2. Click Save. The following message appears: Figure 19: Device Settings Page – Download File Message 3. Right-click the link (right-click here) and click Save link as. The configuration is downloaded to your PC. To load a configuration: 1. In the Navigation pane, click Device Settings. The Device Settings page appears (Figure 18). 2.
Kramer Electronics Ltd. 3. Click Open. The configuration loads and the Load Configuration message is displayed. This process may take a few minutes to complete: Once complete, the following message appears: Figure 21: Device Settings Page – Configuration Uploaded Performing a Factory Reset To reset the device to its factory default values: 1. In the Navigation pane, click Device Settings. The Device Settings page appears (Figure 18). 2. Click Factory reset.
Kramer Electronics Ltd. Managing Web Page Security Use the Authentication page to set Web access permission. To access Web pages without using the password: 1. In the Navigation pane, click Security. The Authentication page appears (Figure 18). Figure 23: Authentication Page 2. Set Activate Security to Disabled. The following message appears: Figure 24: Password Settings Page – Deactivating the Security 3. Type the current password (Admin by-default) and click OK.
Kramer Electronics Ltd. To access Web pages using the password: 1. In the Navigation pane, click Security. The Authentication page appears (Figure 18). Figure 26: Password Settings Page – Security Deactivated 2. Set Activate Security to Enabled for Web page password protection. The following message appears: Figure 27: Password Settings Page – Security Activation Message 3. Click OK. The connection is interrupted, and authentication is required to access web pages.
Kramer Electronics Ltd. 6. Select Security from the Navigation pane. Figure 29: Password Settings Page – Changing the Authentication Password 7. Type the new authentication password twice in both New and Retype New text boxes. Figure 30: Password Settings Page – Entering the Admin Password 8. Click Change. The following message appears: Figure 31: Password Settings Page – Password Warning 9. Click OK. The following message appears. Figure 32: Password Settings Page – Password Change Message 10.
Kramer Electronics Ltd. The web pages are locked . Viewing the About Page The About page lets you view the web page version and Kramer Electronics Ltd details.
Kramer Electronics Ltd. Technical Specifications Input Outputs 1 Unbalanced Stereo Audio 1 Balanced Stereo Audio 1 Balanced Stereo Line Level 1 Stereo or 1 Mono Speaker On a 3.5mm mini jack On a 5-pin terminal block (up to +4dBu/10kΩ) On a 5-pin terminal block connector On a 4-pin large terminal block Input Sensitivity Amplifier Full power @ 0.
Kramer Electronics Ltd. Default Communication Parameters RS-232 Protocol 3000 Baud Rate: Data Bits: Stop Bits: Parity: Change the volume of input 2 to -10 DB TCP/IP Parameters IP Address: Subnet mask: Default gateway: Maximum UDP Connections: Maximum TCP Connections: UDP Port #: TCP Port #: Default Username / Password: 115,200 8 1 None #X-AUD-LVL 1,2,-10 192.168.1.39 255.255.000.000 192.168.0.
Kramer Electronics Ltd. Protocol 3000 The PA-240Z 240W Power Amplifier can be operated using the Kramer Protocol 3000 serial commands. The command framing varies according to how you interface with the PA-240Z. Generally, a basic video input switching command that routes a layer 1 video signal to HDMI™ out 1 from HDMI input 2 (ROUTE 1,1,2), is entered as follows: • Terminal communication software, such as Hercules: The framing of the command varies according to the terminal communication software.
Kramer Electronics Ltd. For more information about Protocol 3000 commands, see: • Understanding Protocol 3000 on page 30. • Kramer Protocol 3000 Syntax on page 31. • Protocol 3000 Commands on page 32. Understanding Protocol 3000 Protocol 3000 commands are structured according to the following: • Command – A sequence of ASCII letters (A-Z, a-z and -). A command and its parameters must be separated by at least one space.
Kramer Electronics Ltd. Kramer Protocol 3000 Syntax The Kramer Protocol 3000 syntax uses the following delimiters: • CR = Carriage return (ASCII 13 = 0x0D) • LF = Line feed (ASCII 10 = 0x0A) • SP = Space (ASCII 32 = 0x20) Some commands have short name syntax in addition to long name syntax to enable faster typing. The response is always in long syntax.
Kramer Electronics Ltd. Protocol 3000 Commands This section includes the following commands: • System Commands on page 32. • Audio Commands on page 36. • Communication Commands on page 44.
Kramer Electronics Ltd.
Kramer Electronics Ltd. MODEL Functions Set: MODEL? Get: Permission End User Description Set: Get: Get device model Response ~nn@MODELSPmodel_nameCR LF Syntax - Transparency Public #MODEL?CR Parameters model_name – String of up to 16 printable ASCII chars Notes This command identifies equipment connected to Step-in master products and notifies of identity changes to the connected equipment.
Kramer Electronics Ltd.
Kramer Electronics Ltd.
Kramer Electronics Ltd.
Kramer Electronics Ltd. AUD-HI-Z Functions Set: AUD-HI-Z Get AUD-HI-Z? Description Set: Set High Z state Permission Transparency End User Public End User Public Syntax #AUD-HI-ZCRChannelSPHiZState,HiZVoltCR Get: Get High Z status #AUD-HI-Z?CR Response ~nn@AUD-HI-ZSPChannel,HiZState,HiZVoltCR LF Parameters Channel – 1 (Speaker Output), 2 (Line Level Output) HiZState – 1 (Hi-Z state high), 0 (Hi-Z state low) HiZVolt – Hi-Z volt level: 0 (70 Volt), 1 (100 Volt), 0xff (Ignore).
Kramer Electronics Ltd.
Kramer Electronics Ltd.
Kramer Electronics Ltd.
Kramer Electronics Ltd.
Kramer Electronics Ltd.
Kramer Electronics Ltd.
Kramer Electronics Ltd. NET-DHCP Functions NET-DHCP Set: NET-DHCP? Get: Description Set: Set DHCP mode Permission Administrator End User Syntax #NET-DHCPSPmodeCR Get: Get DHCP mode #NET-DHCP?CR Transparency Public Public Response ~nn@NET-DHCPSPmodeCR LF Parameters mode – 0 (do not use DHCP. Use the IP address set by the factory or the NET-IP command), 1 (try to use DHCP.
Kramer Electronics Ltd. NET-IP Functions NET-IP Set: NET-IP? Get: Description Set: Set IP address Permission Administrator End User Syntax #NET-IPSPip_addressCR Get: Get IP address #NET-IP?CR Transparency Public Public Response ~nn@NET-IPSPip_addressCR LF Parameters ip_address – IP address, in the following format: xxx.xxx.xxx.xxx Notes Consult your network administrator for correct settings. K-Config Example Set the IP address to 192.168.1.39: “#NET-IP 192.168.001.
The warranty obligations of Kramer Electronics Inc. (“Kramer Electronics”) for this product are limited to the terms set forth below: What is Covered This limited warranty covers defects in materials and workmanship in this product.
P/N: 2900- 300802 Rev: 5 SAFETY WARNING Disconnect the unit from the power supply before opening and servicing For the latest information on our products and a list of Kramer distributors, visit our Web site where updates to this user manual may be found. We welcome your questions, comments, and feedback. www.KramerAV.com info@KramerAV.