K R A ME R E LE CT R O N IC S L TD .
Contents 1 Introduction 1 2 2.1 2.2 Getting Started Achieving the Best Performance Recycling Kramer Products 2 2 3 3 3.1 4 4.1 4.2 4.3 4.4 4.
1 Introduction Welcome to Kramer Electronics! Since 1981, Kramer Electronics has been providing a world of unique, creative, and affordable solutions to the vast range of problems that confront video, audio, presentation, and broadcasting professionals on a daily basis.
2 Getting Started We recommend that you: Unpack the equipment carefully and save the original box and packaging materials for possible future shipment Review the contents of this user manual i 2.1 Go to http://www.kramerelectronics.com/support/product_downloads.asp to check for up-to-date user manuals, application programs, and to check if firmware upgrades are available (where appropriate).
2.2 Recycling Kramer Products The Waste Electrical and Electronic Equipment (WEEE) Directive 2002/96/EC aims to reduce the amount of WEEE sent for disposal to landfill or incineration by requiring it to be collected and recycled. To comply with the WEEE Directive, Kramer Electronics has made arrangements with the European Advanced Recycling Network (EARN) and will cover any costs of treatment, recycling and recovery of waste Kramer Electronics branded equipment on arrival at the EARN facility.
3 Overview The Yarden 6-ID is a high performance in-wall speaker that features: A Mono/Stereo selector switch A Music/Speech selector switch to toggle between Music mode (full range) to Speech mode (cuts low frequencies and clears up speech frequencies to enhance intelligibility) A double looping Kevlar driver with two pivoting titanium tweeters and two transformers, letting you use the speaker in the mono or stereo mode A multi tap power transformer for selecting 8Ω (bypassing the transform
3.
# Feature Function 1 Tap Selector Adjust each speaker to the appropriate tap setting: For 70V: 3.7W, 7.5W, 15W or 30W For 100V: 7.5W, 15W or 30W Or select 8 (to bypass the transformer when connecting directly to an amplifier without using the 70/100V array option), see Figure 4 2 Tweeters 2 pivoting tweeters, reproduce the higher frequency sounds 3 Woofer Driver Reproduces low frequencies 4 Speaker Grille Protects the internal components of the speaker from foreign objects.
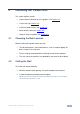
4 Installing the Yarden 6-ID This section explains how to: 4.1 Choose the best location for your speakers (see Section 4.1) Cut the wall (see Section 4.2) Install the speaker wires (see Section 4.3) Mount onto the wall (see Section 4.4) Setup an array installation (see Section 4.5) Choosing the Best Location Before installing the speaker make sure that: The desired location is free of obstructions, such as electrical piping, AC ducts or water lines, and so on 4.
Figure 3: Yarden 6-ID Cut-out Template 4.3 Installing the Speaker Wires To install the speaker, do the following: 1. Prepare the wires for the speaker: Cut the wires to similar lengths For achieving high quality sound Measure the length from each speaker to the receiver, and cut the wires accordingly, adding some access wire length to let you easily remove the speakers from the bracket without having to disconnect the input wires 2.
Figure 4: Adjust Tap Selector Stereo Mode (see Figure 2) Mono Mode (see Figure 8) 5. Set the selector switch to STEREO. Set the selector switch to MONO. 6. Push the grille firmly in place. Push the grille firmly in place. 7.
4.4 Mount onto the Wall To mount the speaker to the wall: 1. Insert the speaker into the opening in the wall. 2. Tighten the mounting tabs (6) by turning the screws counter clockwise (see Figure 5). Turning one quarter of a circle rotates the tab outwards; after that the screw is turned to tighten the tabs to the rear side of the wall surface When tightening the mounting tabs, the tabs automatically turn outward, thus clamping the speaker to the wall from its rear side. i Do not over-tighten the screws.
Figure 6: Square Layout Figure 7: Hexagonal Layout You can set the power on each speaker to get the desired power level in different installation areas. i We recommend that you set the Mode switch to MONO for an array installation.
Figure 8 shows an example of parallel wiring in a square array installation: Figure 8: Square Layout Parallel Wiring 12 Yarden 6-ID - Installing the Yarden 6-ID
5 Technical Specifications DESCRIPTION: Audio and Power 2-way in-wall speaker FREQUENCY RESPONSE: 40Hz to 20kHz @ -10dB 60Hz to 20kHz @ ±3dB WOOFER: 6.5” (166mm) Kevlar(R) with rubber surround TWEETER: 2 pivoting 1” (25mm) titanium IMPEDANCE: 8 (transformer tap in off position) TRANSFORMER TAPS: 70V – 30W / 15W / 7.5W / 3.7W / Off (Lo-Z) 100V – 30W / 15W / 7.
For the latest information on our products and a list of Kramer distributors, visit our Web site where updates to this user manual may be found. We welcome your questions, comments, and feedback. Web site: www.kramerelectronics.com E-mail: info@kramerel.