INSTALLATION GUIDE Single Lever Pull-Down Kitchen Faucet KPF-1630 www.kraususa.com I Toll Free: 1.800.775.0703 I © 2017 Kraus USA Inc. I REV.
Congratulations on the purchase of your new Kraus plumbing fixture! Please keep teh box and packaging materials until your product is completely installed. If you have any questions, require technical assistance, or have any problems with your product: DO NOT RETURN TO STORE Please contact our Customer Service Team 1-800-775-0703 / customerservice@kraususa.com Have the model number available, and retain a copy of your receipt with purchase date for reference.
1 5/8” (42.5 mm Max) 7/8” (22mm) 19.7º 8 5/16” (21mm) 10 1/8” (257mm) ∅ 1 15/16” (∅ 50mm) 1 3/8” (35mm) ∅ 1 3/4” (∅ 45mm) Prior to Installation: 9/16”-18UNEF ∅ 1 15/16” (∅ 50mm) Make sure you have all necessary parts by checking the diagram and parts list.
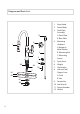
Diagram and Parts List 1. 2. 3. 12 6 1 5 2 9 11 8B 8A 7 3A 3B 4A 4B 4C 3 10 Spray Head Faucet Body Deck Plate Assembly A. Deck Plate B. Base Plate 4. Mounting Hardware A. Rubber & Metal Washer B. Mounting Nut C. Mounting Screws 5. Spray Hose 6. Weight 7. Check Valve 8. Hot and Cold Copper Lines A. Cold B. Hot 9. Aerator Key 10. Hex Wrench 11. Faucet Extender 12.
MAXMAX 2" 2" MAX51mm MAX51mm 5-3/8” 9-1/4” (136mm) 5-3/8” (236mm) 9-1/4” (136mm) (236mm) (4-1/2") (113mm) (4-1/2") (113mm) (233.8mm) 9-1/4” (233.8mm) (233mm) 9-1/4” 4” 4” (100.5mm) (100.5mm) 6-3/4” (170.5mm) 2-7/8” 6-3/4” (73mm) (170.5mm) 2-7/8” (73mm) 4-7/8” (125mm) 4-7/8” (125mm) 5º 5º 18-5/8” (472.3mm) 18-5/8” (472.3mm) (472mm) Faucet Installation Procedure 8-3/8” 8-3/8” (211.4mm) (211.
STEP1 Step 1: Remove mounting hardware STEP 2A STEP 2B Remove the mounting screws (4C), mounting nut (4B), and rubber & metal washer (4A) from the mounting pipe 4A 3A 3B 4B 4C 1 STEP 2A STEP 2B STE Step 2A: Faucet installation - with deck plate For three-hole installation: STEP 5 (3A), base plate Deck plate (3B), and silicone sealant (optional) are required STEP 4 4B 4C 4A 4B 4C 5 3A 3B 7 5 6
STEP 2B STEP 3 Step 2B: Faucet installation - without deck plate For single-hole installation: Deck plate (3A), base plate (3B), and silicone sealant are NOT required STEP 3 3A Step 3B 3: Install faucet and mounting hardware STEP 6 4A 4B 4C into Insert faucet body (2) hole in countertop or deck plate assembly (3).
STEP 4 STEP 5 Step 4: Secure mounting hardware 4B 4C A B C 3A 3B Adjust direction of faucet body (2) so that handle is on right side of faucet. Tighten mounting nut (4B) until snug. Tighten mounting screws (4C) to nut with a Phillips screwdriver until snug STEP 5 Step 5: Attach spray hose and counterweight STEP 6 Connect spray hose7(5) to 5 to check valve (7) attached supply line.
STEP 6 Step 6: Connect waterlines STEP 7 5 4A 4B 4C 4A 8 4B 4C STEP 4 6 1 Connect waterlines (not included) to hot and cold copper lines (8). Connect waterlines (not included) to angle stops. Tighten both 3A 3B ends of waterlines with a wrench until snug. Turn on hot and cold angle stops STEP 5and check for leaks STEP 6 STEP 7 Step 7: Flush spray hose Remove spray head (1) from spray hose (5). Hold tip of spray hose (5).
Replacement Parts 1. 24 3 4 2 1B 5 6 1A 7 11 10 9 8 19 20 12 21 13 22 23 14 15 17 16 18 2. 3. 4. 5. 6. 7. 8. 9. 10. 11. 12. 13. 14. 15. 16. 17. 18. 19. 20. 21. 22. 23. 24. a. Aerator b.
Trouble - Shooting If you have followed the instructions carefully and your faucet still does not work properly, take the following corrective steps: PROBLEM CAUSE ACTION Leakage under faucet handle Locking nut has come loose or cartridge needs to be reseated Remove button located at top of handle. Loosen set screw with hex wrench. Remove handle and unscrew cartridge cover by hand.
8 Maintenance - Cartridge Replacement 5 1 Step 1: Remove button located at the top of the handle. Loosen the set screw with a hex wrench. Remove the handle and unscrew cartridge cover by hand Step 2: Unscrew the locking nut with an adjustable wrench. Remove ceramic disc cartridge Step 3: Place the new cartridge in the handle seat.
Codes/Standards Applicable: GREEN LEAD FREE IA P NSF/ANSI Standard 61 certified by IAPMO NSF/ANSI Standard 372 certified by IAPMO MO Meets ASME A112.18.1M/A112.18.1 R& T 1.75gpm 6.6L/min maximum TM Water Efficiency FAUCET WARRANTY Kraus products are manufactured and tested to the highest quality standards by Kraus USA Inc. (“Kraus”). Kraus extends this warranty to the original purchaser for personal household use of the “Faucet” in its original location. The warranty is non-transferable.
the first (1) year of the warranted replacement part or product (HI, AK, and Puerto Rico shipping charges may apply). International shipping fees are not included. COMMERCIAL WARRANTY Kraus extends the above warranty for a period of one (1) year to purchasers of products for industrial, commercial, and business use. All incidental or consequential damages are specifically excluded.
IMPORTANT Register Your Kraus Product Activate Your Warranty Access Premium Customer Support Get Product Information REGISTER TODAY http://www.kraususa.com/registration www.kraususa.