R INSTALLATION MANUAL Artec Pro 2 Function Commercial Style Kitchen Faucet TM KPF-1603 www.kraususa.com I Toll Free: 1.800.775.0703 I © 2018 Kraus USA Inc. I REV.
Congratulations on the purchase of your new Kraus plumbing fixture! Please keep the box and packaging materials until your product is completely installed. If you have any questions, require technical assistance or have any problems with your product: STOP DO NOT RETURN TO STORE Please contact our Customer Service Team 1-800-775-0703 / customerservice@kraususa.com Have the model number available and retain a copy of your receipt with purchase date for reference.
Prior to Installation: · Make sure you have all necessary parts by checking the diagram and parts list. If any part is missing or damaged, please contact Kraus Customer Service at 800-775-0703 for a replacement. · Turn off the hot and cold water supply at the angle stops and turn on the old faucet to release any built up pressure. Remove existing faucet. Clean sink or countertop to remove any debris, plumber’s putty, or silicone. · Flush angle stops to release any debris prior to installation.
Diagram and Parts List A. B1. B2. B3. B4. B5. C.
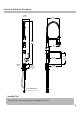
Faucet Installation Procedure 4 1/8" (106.5mm) 7 1/8" 24 3/4" (628.7mm) (182.6mm) 6" (60.8mm) (60mm) MAX. 2 3/8" 2 3/8" 6 5/8" 7 5/8" (198.2mm) (173.3mm) (153.2mm) 9 3/4" (248.2mm) 3/8" Compression Installer Tip: Shut off main water supply before installing new faucet.
Step 1. Remove washer and lock nut Shut off the water supply. Remove the old faucet. Clean the mounting surface. Remove mounting hardware (B) from faucet body (A). A B Step 2. Install faucet Insert faucet through hole in sink or countertop.From underneath sink, attach the seat (B1), rubber washer (B2), metal washer (B3), and nut (B4). Lock nut (B4) into position by tightening screws (B5).
Step 3. Making the water supply connections Push the quick connector (2) firmly upward and attach it to the receiving block (1). Pull down moderately to ensure the connection has been made. If it is necessary to remove the quick connector (2), squeeze the tabs on the hose and then pull down to disconnect. 1 2 Step 4. Making the water supply connections 1 Thread the nut (1) on the supply line onto the outlet of the water supply valve and tighten with a wrench. Do not overtighten.
Step 5. Flushing and checking for leaks Pull the hose assembly out of the spout and remove the spray head by unscrewing it from the hose in a counterclockwise direction. Be sure to hold the end of the hose down into the sink and turn the faucet on to the warm position where it mixes hot and cold water. Flush the water lines for one minute. This flushes away any debris that could cause damage to internal parts. Check for leaks. Reinstall the spray head by hand tightening it back onto the spray hose.
Step 6. Flush faucet To activate the spray mode, simply press the handle (1) located under the spray head.
Replacement Parts Replacement Parts List 1. Spray Head Finish/Color CH,SFS,SBBG,SFSB,SFACB, Part # KP27060 MBSB,BG,SFSMB,BGMB** 2. Magnet 4 5 3. Spray Hose 6 3 Assembly GRCH,GRSFS,BLSFSB** 4. Spring CH,SFS,BG,SB,SFACB,SFSB** 5. Inverter 7 CH,SFS,SBBG,SB,BG, Assembly SFSMB,BGMB,SFACB,SFSB** 7. Spout Nut 8 CH,SFS,BG, KP27064 KP27065 CH,SFS,SB,BG,MB, KP27066 SFACB,SFSB** 9. Diverter 1112 13 18 19 20 KP27063 MB,SB,SFACB,SFSB** 8. Spout 9 10 KP27062* KP27080 6.
Troubleshooting If you have followed the instructions carefully and your faucet still does not work properly, take the following corrective steps: PROBLEM CAUSE ACTION Leakage under the handle Bonnet nut (12) has come loose Remove the index (14.3). Loosen set screw (14.2) with hex wrench (14). Remove the handle (14.1). Unscrew cap (13) (by hand only).
Codes/Standards Applicable: NSF/ANSI 372 UP C NSF/ANSI 61-9 UP C R C ASME A112.18.1 1.8GPM 6.8L/min maximum C R FAUCET WARRANTY Kraus products are manufactured and tested to the highest quality standards by Kraus USA Inc. ("Kraus"). Kraus extends this warranty to the original purchaser for personal household use of the "Faucet" in its original location. The warranty is non-transferable.
Except as otherwise provided above, Kraus makes no warranties, expressed or implied, including warranties of merchantability and fitness for a particular purpose, or compliance with any code. Shipping charges will be covered for the first (1) year of the warranted replacement part or product (HI, AK, and Puerto Rico shipping charges may apply). International shipping fees are not included.
IMPORTANT Register Your Kraus Product Activate Your Warranty Access Premium Customer Support Get Product Information REGISTER TODAY http://www.kraususa.com/registration R www.kraususa.