THE LEADER IN AUDIO ENGINEERING Showcase DVD Player Instructions for Use Owner’s Reference
Showcase DVD Instructions for Use v 03.0 CONTACT INFORMATION Krell Industries, Inc. 45 Connair Road Orange, CT 06477-3650 USA TEL 203-799-9954 FAX 203-891-2028 E-MAIL krell@krellonline.com WEB SITE http://www.krellonline.com This product complies with the EMC directive (89/336/EEC) and the low-voltage directive (73/23/EEC). WARNINGS Do not place the Showcase DVD where it could be exposed to dripping or splashing. Do not remove or bypass the ground pin on the end of the AC cord.
Contents INTRODUCTION / 1 DEFINITION OF TERMS / 2 UNPACKING / 4 PLACEMENT / 5 AC Power Guidelines / 5 QUICK START / 6 FRONT PANEL DESCRIPTION / 9 REMOTE CONTROL DESCRIPTION / 16 Battery Installation and Removal / 12 Remote Control-Only Functions / 12 BACK PANEL DESCRIPTION / 15 SHOWCASE DVD CONNECTIONS TO YOUR SYSTEM / 18 SHOWCASE DVD OPERATION / 20 Compatible Discs / 20 To Play a DVD or VCD / 20 To Play an Audio CD / 24 MP3 Disc Formats / 26 To Play MP3 Discs / 27 Interpreting Temporary Feedback Field Icon
Illustrations iv FIGURE 1 The Showcase DVD Front Panel / 8 FIGURE 2 The Showcase DVD Remote Control / 8 FIGURE 3 The Showcase DVD Back Panel / 14 Krell Showcase DVD
Introduction Thank you for your purchase of the Krell Showcase DVD. The Showcase DVD produces a brilliant video image through the use of the high bandwidth circuit architecture, pioneered by Krell in the DVD Standard, and is at the forefront of DVD video technology with HDMI, an optional scalable output stage. A carefully regulated power supply results in picture stability, even during line fluctuations while the proprietary Krell Digital Video Filter enhances DAC performance.
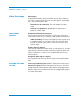
Definition of Terms Following are the definitions of key terms used in your owner’s reference manual. Hardware Button Front panel selection device on the Showcase DVD. Key Remote control selection device on the Showcase DVD. Video Monitor Video screen without a receiver. Television Video screen with a receiver. The term “television” in this document stands for a video screen with or without a receiver.
Definition of Terms, continued Video Technology Video Signal A signal which includes all the information present in the video picture. There are three basic elements in a video picture: color, brightness, and synchronization data. Chrominance (C or Chroma). The color portion of a video signal. Luminance (Y, Brightness, or Luma). The monochrome portion of a video signal.
Unpacking Follow these steps to safely unpack your Showcase DVD: 1. Open the shipping box and remove the top layer of foam. You see these items: 1 1 1 1 1 1 Krell Showcase DVD AC power cord 12 VDC (12 V trigger) cable remote control CR2025 lithium battery Quick Setup Guide 2. Grasp the underside of the foam end-caps that encase the Showcase DVD and lift it straight out of the shipping box. 3. Place the Showcase DVD in a safe location and remove the endcaps and protective plastic wrapping.
Placement Before you install the Showcase DVD into your system, review the following guidelines to choose the location for the component. This will facilitate a clean, trouble-free installation. The Showcase DVD does not require any type of special rack or cabinet for installation. Place the Showcase DVD on a firm, level surface, away from excessive heat, humidity, or moisture. The Showcase DVD requires at least one inch (2.5 cm) of clearance on each side and at least one inch (2.
Quick Start READ THIS FIRST The Showcase DVD is shipped ready to play from the factory. The player automatically switches to NTSC or PAL, depending on the disc format. The default standard is preset, and not selectable by the user. To get started, Krell recommends the following routine: Step 1 Connect the Showcase DVD to AC Power Plug the AC cord into the wall outlet. The red stand-by LED (3) illuminates.
Quick Start, continued Step 3 Connect the Showcase DVD Audio Outputs to Your Home Theater System Connect the left and right balanced or single-ended analog audio outputs to the left and right audio inputs of your amplifier or receiver. Step 4 Configure the Showcase DVD to Match Your Television Use this section of you want to change the picture view on the video screen, and you already have a good working knowledge of the Showcase DVD setup menu.
Figure 1 The Showcase DVD Front Panel 4 11 3 1 2 Power 1 2 3 4 5 14 13 6 7 Power Button or Key Power LED Stand-by LED Front Infrared Sensor Disc Functions 5 Repeat Button or Key 6 Pause Button or Key 7 Stop Button or Key 8 Play Button or Key 9 Track Forward and Track Back Button or Key 10 Search Forward and Search Back Button or Key 11 Open/Close Button or Key 14 Directional Buttons or Keys 15 Enter Button or Key 16 Menu Button or Key 17 Setup Button or Key 18 HDMI Button 19 HDMI LEDs 8 9 10 19
Front Panel Description See Figure 1 on page 8 Power Disc Functions 1 Power Button or Key Use this button or key to switch the Showcase DVD from the stand-by to the operational mode. 2 Power LED The blue power LED illuminates when the Showcase DVD is in the operational mode. 3 Stand-by LED The red stand-by LED illuminates when the Showcase DVD is plugged into AC power and is in the stand-by mode.
Front Panel Description, continued DISC FUNCTIONS, continued 9 Track Forward Button or Key, continued Track Back. Use this button or key to move back one title, chapter, or track. The mode selected appears in a status window in the upper left corner of the television screen. The front panel display shows the currently playing title and chapter, or track number. See also: To Play a DVD or VCD, page 20; To Play an Audio CD, page 24; To Play an MP3 Disc, page 27.
Front Panel Description, continued DISC FUNCTIONS, continued 16 Menu Button or Key Use this button or key to access the DVD disc menu. Disc playback pauses automatically when you enter the menu. Use the directional buttons or keys (14) to move through the menu. Press enter to select the desired menu item. 17 Setup Button or Key Use this button or key to access the Showcase DVD setup menu.
Remote Control Description See Figure 2 on page 8 Battery Installation and Removal The Showcase DVD remote control uses one CR2025 lithium battery, which is included with the shipment. To open the battery compartment on the back of the remote control: 1. Place the remote face down on the table. 2.
Remote Control Functions, continued ADVANCED DISC FUNCTIONS, continued 21 Subtitle Key Press this key to access the subtitle icon in the multiple-toolbar menu. Use the down directional button or key (14) to cycle between OFF or the subtitle languages available on the disc soundtrack. The last subtitle language scrolled to is automatically selected, and becomes active after the transport (12) is opened and closed.
Figure 1 The Showcase DVD Back Panel 40 27 32 41 28 30 29 35 31 33 34 36 37 38 39 Analog Audio Outputs 27 Left and Right Balanced Audio Outputs 28 Left and Right Single-ended Audio Outputs Interlaced Video Outputs 29 Composite Video Output 30 S-Video Video Output 31 Component Video Output (Y, Pb, Pr) Progressive Scan Video Output 32 Progressive Scan Video Output, (Pr, Pb,Y) Digital Audio Outputs 33 Optics Digital Output 34 Coaxial Digital Output Remote Back Panel Connections 35 RS-232 Communic
Back Panel Description See Figure 3 on page 14 Analog Audio Outputs 27 Left and Right Balanced Audio Outputs The Showcase DVD is equipped with one pair of left and right balanced analog audio outputs via XLR connectors. 28 Left and Right Single-ended Audio Outputs The Showcase DVD is equipped with one pair of left and right single-ended analog audio outputs via RCA connectors.
Back Panel Description, continued Digital Audio Outputs 33 Optics Digital Output The Showcase DVD is equipped with one EIAJ optics digital audio output via a TosLink connector. 34 Coaxial Digital Output The Showcase DVD is equipped with one S/PDIF coaxial digital audio output via an RCA connector.
Back Panel Description, continued BACK PANEL REMOTE CONNECTIONS, continued 38 Back Infrared Sensor This sensor receives commands from the Showcase DVD remote control when the IR select switch (37) is in the down position. Power 39 IEC Connector The Showcase DVD is equipped with a standard female IEC power connector, for use with the AC power cord. HDMI Connection 40 AUDIO SYNC SWITCH Use this switch to synchronize audio and video when using the HDMI output (41).
Showcase DVD Connections to Your System Using Balanced Connections Connection Steps Krell recommends using balanced interconnect cables. Balanced interconnect cables not only can minimize sonic loss but are also less sensitive to induced noise, especially with installations using long cables. Balanced connections have 6 dB more gain than singleended connections. When level matching is critical, keep this gain value in mind.
Showcase DVD Connections to Your System, continued 4. Connect the balanced (27) or single-ended (28) analog audio outputs to your loudspeakers. 5. Connect the optics digital audio (33) or coaxial audio (34) digital output to your loudspeakers. Note DTS audio playback is available only from the digital outputs. 6. Plug the AC power cord into the IEC connector (39) on the back panel, then plug the AC power cord into the wall socket. The red stand-by LED (3) on the front panel illuminates.
Showcase DVD Operation This section provides information about operating the Showcase DVD. The Showcase DVD is shipped ready to play. After the player is connected to the television and other system components, and plugged into AC power, it is ready for operation. Compatible Discs The Showcase DVD is a Region 2 player which plays the following disc formats: DVD, DVD-R, CDDA, CD-R, CD-RW, DVD+RW, MP3, and VCD. Notes Krell recommends leaving the Showcase DVD in the stand-by mode when not playing a disc.
Showcase DVD Operation, continued To Play a DVD or VCD, continued 2. Press the open/close button or key (11) to open the disc transport. 3. Place the disc on the transport. 4. Press the open/close button or key again to close the disc transport. Playback begins from the first title or track. The front panel window displays READING and INFO. 5. The phrase INFO remains on the front panel display window until you press the enter (15) or play button or key. 6.
Showcase DVD Operation, continued DVD AND VCD FUNCTIONS All functions listed under Front Panel Description, on pages 9-11 and under Remote-only, on pages 12-13 are available when you play a DVD or VCD. 5 Repeat Button or Key Press this button or key to repeat a title or chapter, or an entire disk: CHAPTER REPEAT Press once to repeat the currently playing chapter. TITLE REPEAT Press twice to repeat all chapters in current title. REPEAT Press three times to repeat the entire disc.
Showcase DVD Operation, continued DVD AND VCD FUNCTIONS, continued 10 Search Forward and Back Buttons or Keys Press this button or key to search forward or backward through the disc at an advanced speed. There are two fast-forward playback modes: x 4 and x 32. Press once and the phrase X4 appears in the status window in the upper left corner of the television screen. Press again and the phrase X32 appears in the status window in the upper left corner of the television screen.
Showcase DVD Operation, continued To Play an Audio CD 1-3.Follow the first three steps under To Play a DVD or VCD on pages 20-21. 4. Press the open/close button or key again to close the disc transport. The front panel window displays READING and the television screen displays the audio CD menu. Playback begins from the first track. Audio Mode Menu on Screen 5.
Showcase DVD Operation, continued AUDIO CD FUNCTIONS The following functions are available when you play an audio CD: 5 Repeat Button or Key Press this button or key to repeat a track selection, or an entire disc. REPEAT TRACK Press once to repeat the currently playing track. REPEAT TRACK appears in the audio CD menu on the television screen. REPEAT DISC Press twice to repeat an entire disc. REPEAT DISC appears in the audio CD menu on the video screen.
Showcase DVD Operation, continued AUDIO CD FUNCTIONS, continued 10 Search Forward and Search Back Button or Key Press this button or key to search forward or backward through the disc at an advanced speed. Speed and direction are displayed on the front panel display window (13), or in a status window on the television screen. When the search begins, the sound is partially muted. To end a search, press play (8) to resume playback or press stop (7) to stop playback.
Showcase DVD Operation, continued MP3 Disc Formats, continued Only digital audio music will play, due to the recording nature of Digital Audio MP3 (DAM). Disc reading time may exceed ten seconds, if there are a large number of songs compiled on one disc. Only the first session of multi-session discs is supported. To Play MP3 Discs 1-3.Follow the first three steps under To Play a DVD or VCD above, on pages 20-21. 4. Press the open/close button or key again to close the disc transport.
Showcase DVD Operation, continued MP3 DISC FUNCTIONS The following functions are available when you play an MP3 disc: 5 Repeat Button or Key Press this button or key to repeat a track or an album. REPEAT TRACK Press once to repeat the current track. REPEAT appears on the television screen. TRACK REPEAT ALBUM Press the repeat button or key again to repeat an album. REPEAT ALBUM appears in the MP3 menu on the television screen.
Showcase DVD Operation, continued Temporary Feedback Field Icon on Screen Temporary feedback field icon Interpreting Temporary Feedback Field Icons The temporary feedback field icon appears in the upper left portion of the television screen, displaying information about the status of the disc. If the setup menu multiple-toolbar is displayed, the icon is integrated in the toolbar (not shown).
Showcase DVD Operation, continued Interpreting Temporary Feedback Field Icons, continued ACTION PROHIBITED A box containing an X appears on the television screen, when a selected command is not permitted by the player or the disc. The gray area in the action prohibited box displays the specific action requested. Some discs only allow limited function operation during playback. RESUME The resume feature applies to the disc currently in the transport well as the last four discs played.
Setup Menu Overview This section explains how to access and navigate the setup menu and how to select functions.
Showcase DVD Setup Menu To Access the Setup Menu Follow these steps to access the setup menu, after the Showcase DVD is connected to your system, and in the operational mode. See Connecting the Showcase DVD to Your System, on page 18. 1. Pause (6) or stop (7) the disc, or make sure that it is not in the transport (12). A status window appears on the television screen.
Showcase DVD Setup Menu, continued To Access the Setup Menu, continued Multiple-Toolbar Menu Screen 2. Press the setup button or key (17). The setup menu appears, including the multiple-toolbar, the cursor arrows, and the help-text bar. The status window continues to be displayed.
Showcase DVD Setup Menu, continued Navigation Conventions MENU COLOR Color indicates selection status in the setup menu. An active menu item is highlighted in black and available items are blue. Unavailable items are either white or do not appear on the screen. HELP-TEXT BAR The help-text bar describes the active toolbar icon. The factory default is ON. To turn the help-text bar off, see page 39. CURSOR ARROWS On screen cursor arrows select all functions and their options.
Showcase DVD Setup Menu, continued On Screen Display (OSD) Menus After you access the setup menu, navigate to the OSD multipletoolbar icon. Press the down directional button or key (14) and the OSD main menu appears.
Showcase DVD Setup Menu, continued On Screen Display (OSD) Menus, continued A description of the OSD menu functions follows: TV SHAPE TV Category: Adjusts the picture view Change the aspect ratio of the video output to match your monitor. The choices are: LETTERBOX A widescreen picture with black bars at the top and bottom of the screen. Use with a 4:3 TV. PAN SCAN A full-height picture with the sides trimmed. Use with a 4:3 TV. 16:9 A widescreen picture. Use with a 16.9 TV.
Showcase DVD Setup Menu, continued On Screen Display (OSD) Menus, continued TV Category: Adjusts the picture view, continued DIGITAL CRYSTAL CLEAR Adjust the appearance of the picture. Navigate to adjust: SETTINGS and CHROMA DELAY Adjusts the difference between signals, affecting hue and saturation. GAMMA Adjusts the brightness, changing the contrast between light and dark. SHARPNESS Values rang from +3 (very sharp) to -3 (soft).
Showcase DVD Setup Menu, continued On Screen Display (OSD) Menus, continued Audio Category: Adjusts the Sound, continued Audio Mode Category: Adjusts the Language PCM OUTPUT Adjust the sampling rate of the PCM (pulse code modulation) output. The choices are: 48 kHz and 98 kHz. AUDIO LANGUAGE Select a language from the list provided. If available on the disc, audio will play in the selected language. If the selected language is unavailable, audio will be in the first spoken language on the disc.
Showcase DVD Setup Menu, continued On Screen Display (OSD) Menus, continued Special Functions Category: continued LOW POWER STANDBY Dims the television screen when the pause selection is active. The function starts automatically after the Showcase DVD is in the pause mode for 15 minutes. BIT RATE INDICATOR Displays bit rate information for video and audio during playback of DVD and SVCD discs. The choices are ON and OFF.
Showcase DVD Setup Menu, continued Example: To Change the TV Shape The example below describes how to access a function and change it, using the the OSD main menu and TV SHAPE function and sub menus as an example. After accessing the setup menu: 1. Select the toolbar menu icon OSD. 2. Press the down directional button or key (14). The OSD main menu appears. The main menu has three columns: left, center, and right. The cursor arrows are in the left column, highlighting the TV category.
Showcase DVD Setup Menu, continued Example: To Change the TV Shape, continued Sub Menu Screen Left column, main menu Center column, main menu Sub menu 5. Choose a picture view. The video screen will show the picture you select, if the television supports the format. 6. After selecting the picture view, you may wish to navigate through the main menu to select other OSD functions. 7. Exit the setup menu by pressing the setup button or key.
Showcase DVD Setup Menu, continued Multiple-toolbar Icons Located near the top of the video screen, the multiple-tool bar in the setup menu uses a set of icons to quickly access and change functions the Showcase DVD performs, if the disc you are playing has been programmed to allow access.
Showcase DVD Setup Menu, continued Multiple-toolbar Icons, OSD continued SUBTITLE AUDIO LANGUAGE SMART COLOR SOUND Toolbar 1 on Screen TOOLBAR 1 ON SCREEN DISPLAY (OSD) The user preferences settings in the setup menu. The on screen display (OSD) enables you to adjust picture, sound, language and access control functions. See page 35 for more information. SUBTITLE The current subtitle language. Scroll through the list of available subtitles.
Showcase DVD Setup Menu, continued Multiple-Tool bar Icons, SLOW MOTION continued View a DVD OR VCD in slow motion, either forward or backward on the disc. Press the down directional button or key (14) to access the slow motion settings selection box: -1/8, -1/2, -1/4, 0,1/4, 1/2, 1/8. The selected speed is highlighted in black. When you exit the selection box, the disc plays at the speed you selected.
Showcase DVD Setup Menu, continued Multiple-Tool bar Icons, TITLE continued CHAPTER TIME SEARCH FTS Toolbar 3 on Screen USE CURSOR ARROW TO RETURN TO PREVIOUS TOOLBAR ICONS TOOLBAR 3 TITLE Select a title on a DVD or VCD, and the disc plays the title selected. Discs containing only one title will restart from the beginning of TITLE 1 when you activate this function. CHAPTER Select a chapter on a DVD. The chapter number appears at the top of the screen, and the disc plays the chapter selected.
Special Operations How to Write a Title/Chapter Program for a DVD or VCD When you play a DVD or VCD, you can write a program, if the disc allows this function: Navigate to the favorite track selection (FTS) check box at the far right of the third toolbar. ON or OFF is displayed below the icon: ON Titles or chapters are programmed. OFF Titles or chapters are not programmed. Notes When a disc does not offer the FTS feature, there is no FTS check box icon in the toolbar and you cannot write a program.
Special Operations, continued Favorite Track Selection (FTS) Setup Menu on Screen 5. Exit the FTS program screen by pressing the up directional arrow. The phrase in the FTS toolbar icon changes to ON. 6. When you have finished selecting program titles and chapters, press the play button or key (8) to begin playback of the program sequence. To clear a program: 1. The phrase in the FTS toolbar icon is ON, and the box in the toolbar menu is checked.
Special Operations, continued How to Write a Track Program for an Audio CD FAVORITE TRACK SELECTION FTS The FTS program allows you to store your favorite tracks for a particular disc in the Showcase DVD memory. Each FTS program contains up to 20 tracks. 1. Place an audio disc in the disc transport (12) and press the stop button or key (7). The audio mode menu appears on the video screen. 2. Use the down directional button or key (14) to navigate to the list of available tracks. 3.
Special Operations, continued How to Create an A-B Loop for a DVD, VCD, or Audio CD 1. When you see or hear the selection that you want as the beginning of the loop, press the A-B key (25) to insert the start position. REPEAT A appears on the video screen. 2. When you see or hear the selection you want as the end of the loop, press the A-B key again to insert the finish position. REPEAT A-B appears on the television screen. 3.
Special Operations, continued Child Lock/Unlock When child lock is inactive, the CHILD SAFE temporary feedback field icon appears in the upper left hand corner of the television screen, at the start of playback. When child lock is active, the CHILD LOCK ON temporary feedback field icon appears instead, at the start of playback. To activate or deactivate CHILD LOCK: 1. If a disc is playing, stop disc playback (7). 2. Navigate to the OSD icon on the toolbar and press the down directional arrow or key (14).
Special Operations, continued To Authorize a Disc When child lock is active, the child protection dialog box appears on screen each time a new DVD or VCD is played. Child Protection Dialog Box on Screen 1. Enter your secret code and select PLAYBACK ONCE. The disc can be played as long as it is in the Showcase DVD transport, and the player is ON. or Enter your secret code and select PLAYBACK ALWAYS.
Special Operations, continued To Unauthorize a Disc 1. Place the disc in the transport (12). Playback starts immediately. 2. Press the stop button or key (7) when the CHILD SAFE temporary field feedback icon is visible. 3. The CHILD LOCK ON temporary field feedback icon replaces the child safe icon. The disc is now unauthorized.
Special Operations, continued To Change the Country 1. Open the setup menu (17). 2. Navigate to the OSD main menu. 3. Select the SPECIAL FEATURES category. 4. Select ACCESS CONTROL. 5. Select ENTER CODE. The enter code dialog box appears. 6. Enter your 4-digit code. The access control dialog box appears. 7. Navigate to CHANGE COUNTRY. 8. Press the right directional button or key (14). The country sub menu appears. 9. Use the up and down directional buttons or keys to select a country. 10.
Special Operations, continued Did You Forget the 4-digit Code? 1. Press the stop button or key to exit the child protect screen. 2. Open the setup menu (17). 3. Navigate to the OSD main menu. 4. Select the SPECIAL FEATURES category. 5. Select ACCESS CONTROL. 6. Select ENTER CODE. The enter code dialog box appears. 7. Cancel the 4-digit code by pressing the stop button or key (7) 4 times in the access control dialog box. 8. Enter the new code. The confirm code dialog box appears 9.
Warranty To register your product for warranty benefits, please complete and return the Warranty Registration Card enclosed in the shipping box within 15 days of purchase. Thank you. This Krell product has a limited warranty of five years for parts and labor on circuitry and three years for parts and labor on all mechanical components. Should this product fail to perform at any time during the warranty, Krell will repair it at no cost to the owner, except as set forth in this warranty.
Return Authorization Procedure HOW TO EXPEDITE SERVICE If you believe there is a problem with your component, please contact your dealer, distributor, or the Krell factory to discuss the problem before you return the component for repair. To expedite service, you may wish to complete and e-mail the Service Request Form in the Service section of our website at: http://www.krellonline.
Krell Industries, Inc. 45 Connair Road Orange, CT 06477-3650 USA TEL 203-799-9954, FAX 203-891-2028 E-MAIL krell@krellonline.com WEB SITE www.krellonline.com Showcase DVD v 03.
Krell Technical Bulletin Showcase DVD withHDMI/October 2004 HDMI Operation for the Showcase DVD Power on the Showcase DVD and turn on your HDCP compatible display device. In most cases, you see one of the resolution lights illuminate, indicating the default resolution of your monitor. This resolution is detected automatically by the Showcase DVD circuitry. The resolution you prefer may or may not be the same as the detected resolution.
Krell Technical Bulletin Showcase DVD withHDMI/September 2004 HDMI Upgrade Now Available for the Showcase DVD The HDMI Digital Video Output Stage for the Krell Showcase DVD combines high definition video and multi-channel audio in a single digital interface, and is fully backward compatible with the Digital Visual Interface (DVI) standard.
Showcase DVD Placement Note The Showcase DVD has an advanced suspension system and does not require additional mass coupling or isolation. Experiment with feet or cones as long as they are not permanently affixed to the unit. Any unauthorized modifications to the unit or electronics void the warranty. Connecting the Showcase DVD to Your System Digital Video Disc Player Place the Showcase DVD on a firm, level surface, away from excessive heat, humidity, or moisture.
Figure 1 The SHOWCASE DVD Front Panel 4 11 3 1 2 5 14 13 6 Front Panel and Remote POWER 1 Power Button and Key Switches the Showcase DVD between stand-by and operational modes. 2 Power LED The blue power LED illuminates when the Showcase DVD is in the operational mode. 3 Stand-by LED The red stand-by LED illuminates when the Showcase DVD is plugged into a standard AC wall receptacle, indicating that the Showcase DVD is in the stand-by mode and ready to be switched to the operational mode.
THE LEADER IN AUDIO ENGINEERING HDMI Upgrade for the Showcase DVD INSTALLATION AND SETUP GUIDE Getting Started Thank you for your purchase of the HDMI Digital Video Output Stage for the Krell Showcase DVD. HDMI combines high definition video and multi-channel audio in a single digital interface, and is fully backward compatible with the Digital Visual Interface (DVI) standard.
HDMI Upgrade Procedure Follow steps A – Z to install the HDMI board and related components into the Krell Showcase DVD. You will need the following tools, not provided in the installation kit: one 3/32 Allen wrench one 1/4-inch nut driver one T-15 Torx wrench one T-10 Torx wrench Make sure that the Showcase DVD is unplugged from AC power. Steps A–D. Prepare the Showcase DVD For Installation A. Remove the 12 T-15 Torx screws from the top cover of the Showcase DVD. B. Set the cover aside.
Progressive output PCB 4 3 Analog output PCB 5 Position the HDMI power PCB here. (See pages 4-5.) Figure 2 Showcase DVD Interior, Before HDMI Upgrade Installation 3 4 5 22-pin, 7-inch flat digital video cable Locking socket 4-40 x 7/16-inch hex screw. The pin standoff is below this screw. Figure 2 Inset Analog Output PCB, Left Front Corner 5 4-40 x 7/16-inch hex screw. The pin standoff is below this screw. 5 Lift the cables to expose the through hole at MT1 on the analog output PCB.
Steps J– M. Install the HDMI Adapter PCB J. Locate the HDMI connector on the back edge of the supplied HDMI adapter PCB (not illustrated) and slide it into the HDMI connector through hole (6) on the back panel (see Figure 3) of the Showcase DVD. K. Secure the HDMI adapter PCB to the back panel using two supplied 4-40 x 1/4inch SHSC (7) (see Figure 3). L. Position the left front through hole on the HDMI adapter PCB over the standoff protruding up from the analog output board (not illustrated). M.
HDMI adapter PCB 28 8 8 HDMI power PCB 9 10 8 8 Regulator Figure 4 Showcase DVD Interior, With HDMI Adapter PCB and HDMI Power PCB Installed 8 9 10 28 4-40 x 1/2-inch SHCS 4-40 x 3/8-inch FHTS (below Kepnut) 4-40 Kepnut 4-40 x 1/4-inch SHSC Showcase DVD / HDMI Upgrade 5
HDMI Upgrade Procedure, continued Note Remove the plastic tags from the supplied cables and wires, before continuing the installation. Add the Ty-Wrap plastic tags to cables, if needed, to keep them neatly positioned inside the chassis. IMPORTANT To unplug a transformer wire, pull the female fast-on connector at the end of the wire. If you pull the wire itself, instead of the connector, the wire may detach from the connector. Steps Q–Y. Connect the Cables Q.
Progressive output PCB 12 4 Main power PCB 11 14 20 HDMI adapter PCB 27 26 HDMI power PCB 16 22 3 16 18 24 25 Drive PCB 17 23 15 13 19 21 Front panel PCB Figure 5 Showcase DVD Interior, With HDMI Upgrade Completed 3 4 11 12 13 14 15 16 17 18 19 20 22-pin, 7-inch flat cable Connector J1002 22-pin, 2-inch flat cable Connector J4 6-pin JST cable Connector J7 Connector J3 2 white transformer wires Connector J1 Connector J2 8-pin JST cable Connector J12 21 22 23 24 25 26 27 Connector J6 22-p
Connections Follow these steps to connect the Showcase DVD with HDMI to your system. 1. Make sure all power sources and components are off before connecting inputs and outputs. 2. Neatly organize the wiring between the Showcase DVD and all system components. Separate AC wires from audio cables to prevent hum or other unwanted noises from being introduced into the system. 3.