KAV-250cd/2 Front Loading CompactDisc Player The Leader in Audio Engineering Instructions for Use Owner’s Reference
KAV-250cd/2 Front LoadingCompactDisc Player Instructions for Use CONTACT INFORMATION KrellIndustries, Inc. 45 ConnairRoad Orange, CT 06477-3650USA TEL203-799-9954 FAX203-891-2028 E-MAIL krell @krellonline.com WEB SITEhttpE/www.krellonline.com This product complieswith the EMC directive (89/336/EEC)and the low-voltage directive (73/23/EEC). WARNINGS Donot place the compactdisc player whereit could be exposedto dripping or splashing. Do not removeor bypassthe groundpin on the end of the ACcord.
Contents Page INTRODUCTION 1 ReadThis First 1 DEFINITION OF TERMS 2 UNPACKING 3 PLACEMENT 4 ACPower Guidelines 4 FRONT PANEL DESCRIPTION 6 BACK PANEL DESCRIPTION 9 REMOTECONTROLDESCRIPTION Battery Installation and Removal RemoteControl Functions CONNECTINGTHE KAV-250cd/2 Connection Steps TO YOURSYSTEM OPERATINGYOURKAV-250cd/2 Power On Howto Play a CompactDisc HOWTO PROGRAMA TRACK SEQUENCE Howto Changea ProgrammedTrack Sequence Howto Clear a Programmed Track Sequence 12 12 14 14 15 15 15 1
Illustrations Page FIGURE1 The KAV-250cd/2Front Panel 5 FIGURE 2 The KAV-250cd/2Back Panel 8 FIGURE 3 The KAV-250cd/2RemoteControl iv 11 Krell KAV-250cd/2
Introduction Thankyou for your purchaseof the Krell KAV-250cd/2 Front Loading CompactDisc Player. The KAV-250cd/2features a high precision disc transport mechanism and high performanceanalog circuitry that provide Krell soundquality at an exceptional value. TheHDCD® decodingcapability addsfurther dimensionto the KAV-250cd/2’s superbresolution andclarity.
Definition of Terms Followingare the definitions of key termsusedin your owner’sreference manual. INPUT AND OUTPUT CONNECTIONS Balanced A symmetricalinput or output circuit that has equal impedance from both input terminals to a common groundreference point. Theindustry standardfor professionalandsoundrecordinginstallations, balancedconnections have 6 dB moregain than single-ended connections andallow the use of long interconnect cables.
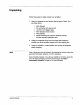
Unpacking Followthese steps to safely unpackyour amplifier: Openthe shipping box and removethe top layer of foam. You see these items: 1 1 1 1 2 1 KAV-250cd/2 IEC connector (AC power) cord 12 VDC(12 V trigger) cable KAV-250cd/2remote control AAAbatteries packet containing the owner’s reference manual andthe warrantyregistration card Graspthe underside of the foam end-capsthat encasethe amplifier andlift the amplifier straight outof the shippingbox.
Placement Before you install the KAV-250cd/2 into your system,review the following guidelines to choosethe location for the KAV-250cd/2. This will facilitate a clean, trouble-free installation. TheKAV-250cd/2 does not require anytype of special rack or cabinetfor installation. For the dimensionsof the KAV-250cd/2,see Specifications, on the back cover. Place the KAV-250cd/2 on a firm, level surface, awayfrom excessive heat, humidity, or moisture.
2 POWER 3 7 4 5 8 6 Figure 1 The KAV-250ccY2Front Panel TransportFunctions 4 Stop Button 5 Play Button 6 PauseButton 7 Open/CloseButton 8 Track Backand ForwardButtons 9 CompactDisc Transport 2 Power LED 3 Stand-by LED 1 Power Button Power 9 Display 10 Front PanelDisplay 11 Infrared Sensor e LED 12 HDCD 11 10 KAV-250cd/2 12
Front PanelDescription See Figure I on page5 POWER 1 Power Button Usethis button to switch the KAV-250cd/2 betweenthe stand-by and the operational modes. 2 Power LED The blue powerLEDilluminates whenthe KAV-250cd/2 is in the operational mode.The powerLEDalso flashes whenany remote control key is pressed.
FrontPanelDescription continued DISPLAY 10 Front Panel Display Thefront paneldisplay showsthe track numberof the currently playing compactdisc as well as programming status. 11 Infrared Sensor The infrared sensor receives commands from the KAV-250cd/2 remotecontrol. For proper remotecontrol operation, makesure the infrared sensoris clear of anyobstructions. 12 HDCD®LED The HDCD® LEDilluminates whena high definition compactdisc is playing, indicating that HDCD decodingis functioning.
20 21 ~ O Q 5W60Hz 17 18 19 RC-5 j~12VDC’~ IOUT IN IN Figure 2 The KAV-250ccY2BackPanel 14 o r Power 20 IEC Connector 21 Line Fuse RemoteConnections 17 RC-5In 18 12 VDCOut 19 12 VDCIn KRELt~ INDUSTRIES, INC, 45 CONNAIR ROAO ORANGE, CT06477-3650 USA AnalogOutputs 15 Left and Right Balanced AnalogOutputs 16 Left and Right Single-Ended AnalogOutputs Digital Outputs 13 OpticsDigital Output 14 Coax(ial)Digital Output 13 ~ ~ DIGITAL OUI~PUTS ~ KAV-250cd/2 CompactDisc Player 15 RIGHT RIGLEHT~
BackPanel Description SeeFigure 2 on page8 DIGITAL OUTPUTS 13 Optics Digital Output TheKAV-250cd/2 is equippedwith an EIAJ fiber optic digital output with a TosLinkconnector. 14 Coax(ial) Digital Output TheKAV-250cd/2 is equippedwith an S/PDIFcoaxial digital output with an RCAconnector. ANALOG OUTPUTS 15 Left and Right BalancedAnalogOutputs The KAV-250cd/2 is equippedwith one pair of balancedanalog outputs with XLRconnectors.
BackPanelDescription continued POWER 20 IEC Connector The connectoris for use with the provided IEC standard 15 amp powercord.
Figure 3 The KA V-250ccY2 RemoteControl Power 22 Pwr (Power) Key CompactDisc Transport Functions 23 CD Key 24 Display Key 25 Direct NumberAccess Keypad 26 Pause Key 27 Play Key 28 Stop Key 29 Open Key 30 Track Back and Forward Keys 31 Search Back and Forward Keys Pwr CD Display Dim B-1 B-2 S-1 S-2 S-3 S-4 T,~r Mere Gain ~ Store Intro HFB Volume Track Pause Play Search Open Stop L Bal Krell KAV-250cd/2 Tape Phase ¯ Tume Scan Amp/Pre DigIn . _FM__ _ .btorY~t ......
RemoteControl Description SeeFigure 3 on page11 Battery Installation and Removal The KAV-250cd/2remote control uses two AAA-sizebatteries, which are included with the shipment. 1. Remove the backplate, by sliding it off the remotecontrol. 2. Install the batteries, following the battery position diagramon the plastic battery receptacle. 3. Replacethe backplate. Theremotecontrol is ready for operation. Notes Replace batteries whenremotecontrol function becomes intermittent.
Remote Control Functionscontinued COMPACT DISC TRANSPORT FUNCTIONS continued Note 25 Direct Track AccessKeypad Usethe direct track accesskeypadto select a compactdisc track. Tracksconsisting of two digits mustbe pressedwithin eight seconds of each other. See also Howto Programa Track Sequence,on page 16. The+ 10 keyis not functionalon the KAV-250cd/2. 26 Pause Key Usethis key to temporarily suspendplaybackof the current compact disc track. To resumeplayback, press the pausekey again.
Connecting the KAV-250cd/2 to Your System USING BALANCED CONNECTIONS Krell recommends using balancedinterconnect cables. Balanced interconnectcables not only canminimizesonic loss but are also immune to inducednoise, especially with installations using long cables. Balancedconnectionshave6 dB moregain than singleendedconnections.Whenlevel matchingis critical, keepthis gain value in mind. Connection Steps Follow these steps to connect the KAV-250cd/2 to your system. 1.
Operating Your KAV-250cd/2 This section providesdetailed information about operatingthe KAV-250cd/2. Power On After the KAV-250cd/2 is connectedto ACpowerand is in the standby mode,use the powerbutton or key to switch the componentto the operational mode.The blue powerLEDilluminates. The compact disc transportis active. IMPORTANT Thefirst time the KAV-250cd/2 is plugged in, thereis a 30-second delay beforeyoucanswitchto the operationalmode.
Howto Program a Track Sequence This short term programming lets you store a maximum of twenty tracks in a programsequence. 1. Usethe direct numberaccesskeypador the track forward and backkeysto select a track. 2. Pressthe programkey to store the selectedtrack. Thefront panel display showsPROGRAM 1 for the programmed track and the total track length. 3. Usethe direct numberaccesskeypador the track forward and backkeys to select the next track.
Howto Program a TrackSequence continued Howto Clear a Programmed Track Sequence Press the powerkey. This places the KAV-250cd/2 in the stand-by modeand erases the programmedsequence. Note Youcanalso clear the programmed sequence by openingandclosing the compact disc transport.
Warranty To register your product for warranty benefits, please complete and return the Warranty Registration Card enclosed in the shipping box within 15 days of purchase. Thank you. ThisKrell producthasa limitedwarranty of five yearsfor partsandlaboroncimuitryandthree yearsfor partsandlabor onall mechanical components. Should this productfail to performat anytimeduringthewarranty, Krell will repairit at nocostto the owner, exceptasset forth in this warranty.
Return Authorization Procedure HOWTOEXPEDITE SERVICE If youbelieve there is a problemwith your component,please contact your dealer, distributor, or the Krell factory to discussthe problem before you retumthe component for repair. To expedite service, you maywish to completeand e-mail the Service RequestFormin the Servicesection of our websiteat: http://www.krellonline.
KAV-250cd/2 KrellIndustries, Inc. 45 ConnairRoad Orange,CT06477-3650 USA Front Loading TEL203-799-9954,FAX203-891-2028 E-MAIL krell@krellonline.com WEB SITEwww.krellonline.com CompactDisc Player v 00.0 Specifications All operational features, functions, specifications, andpolicies are subject to changewithout notification. FREQUENCYRESPONSE 20 Hz-20 kHz +0.0,-0.