
Tus neeg siv phau ntawv
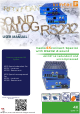


Table Of Contents
- 1.1 Intended Use
- 2.1 Unpacking and checking the contents
- 1. Introduction
- 2.1 Unpacking and checking the content
- 1.5 About the status LED
- 1.4 Product elements
- 1.3 Technical specifications
- 1.2 Safety intructions
- 3. Using on screen menu
- 2.8 Best practice for Windows 10
- 2.7 Removing a fiber cable
- 2.6 Replacing the SFP module
- 2.5 Start up
- 2.4 media4Kconnect in the Matrix Vario System
- 2.3 Installing the extender
- 2.2 Mounting kit
- 4.1 Menu Features
- 3.4 Settings
- 3.3 Update menu
- 3.2. Features menu
- 3.1. System status
- 5.2. Disposal
- 5.1 Extender Care
- 4.1.2 Matrix Switching System
- 6. Support & First Aid
- 8.1 Switches
- 9.1 extended warranty
- 10. Address & phone / emails
- 11. Notes

16 | kvm-tec kvm-tec | 17
Misprints, errors and technical changes reserved Misprints, errors and technical changes reserved
2. EXTENDER INSTALLATION 2. EXTENDER INSTALLATION
Please note that the recommended length of the display port cable should be max.
1.8m,5.9 ft otherwise interference-free 4K transmission may not be guaranteed.
QUICK INSTALLATION media4Kconnect Special redundant
1. Connect the CON/Remote and the CPU/Local Unit with the supplied 12V 2A power supply.
2. Now connect the USB cable to a USB socket of your PC and connect the other end of the USB cable to the
Local Unit. Connect the keyboard and mouse to the Remote Unit.
3. Connect the Local and the Remote Unit with a network ber cable.
4. Connect the DP cable to the DP socket of the PC to the DP socket DP/in of the Local device and connect the
screen on the remote side with the DP cable.
5. Connect the Audio cable from PC to Local Extender and connect the Audio cable from Remote Extender to
Speaker
6. Connect the Audio Cable from Microphone to Remote Extender and connect the Audio cable from Local
Extender to PC.
HAVE FUN - Your kvm-tec Extender is now in use for many years (MTBF approx. 10 years)!
DP out
to Monitor
USB from
keyboard and mouse
power supply
for 12V 2A
Duplex multimode OM4-ber cable (LC) up to 300m/984 ft main link 1
Duplex multimode OM4-ber cable (LC) up to 300m/984 ft redundant
Audio out
to Speaker
power supply
for 12V 2A
DP in
from PC
USB to PC
Audio in
from PC
Audio out
to PC
Audio in
from Microphne
RS232
plug
RS232
plug
DP out
to Monitor
USB from
keyboard and mouse
power supply
for 12V 2A
Duplex multimode OM4-ber cable (LC) up to 300m/984 ft main link 1
Duplex multimode OM4-ber cable (LC) up to 300m/984 ft main link 2
Audio out
to Speaker
power supply
for 12V 2A
DP in
from PC
USB to PC
Audio in
from PC
Audio out
to PC
Audio in
from Microphne
RS232
plug
RS232
plug
Please note that the recommended length of the display port cable should be max.
1.8m,5.9 ft otherwise interference-free 4K transmission may not be guaranteed.
QUICK INSTALLATION media4Kconnect Special uncompressed
1. Connect the CON/Remote and the CPU/Local Unit with the supplied 12V 2A power supply.
2. Now connect the USB cable to a USB socket of your PC and connect the other end of the USB cable to the Local
Unit. Connect the keyboard and mouse to the Remote Unit.
3. Connect the Local and the Remote Unit with a network ber cable.
4. Connect the DP cable to the DP socket of the PC to the DP socket DP/in of the Local device and connect the
screen on the remote side with the DP cable.
5. Connect the Audio cable from PC to Local Extender and connect the Audio cable from Remote Extender to
Speaker
6. Connect the Audio Cable from Microphone to Remote Extender and connect the Audio cable from Local Exten-
der to PC.
HAVE FUN - Your kvm-tec Extender is now in use for many years (MTBF approx. 10 years)!