Contents V1.0 ONE Simple Explanation of Operation..........................................02 1.1 Front Panel ..............................................................02 1.2 Back View ...............................................................02 1.3 Remote Control ................................................03 TWO Accessories.........................................................................04 2.1 Accessories ............................................................04 THREE Menu Guide.
2 ONE Simple Explanation of Operation 1.1 Front panel SPDIF output USB2.0 input 1.2 Back View USB2.0 USB2.
3 1.3 Remote Control Key Function Press the power button to turn on or turn off the M300 Device Press to mute audio or resume During video playback, press to show the file’s detail information. Press to select an audio track on a media file. Delete text To access the S etup Menu, that you can directly to change system settings. Select the SD or USB device To input the number Press to repeat one file Press to return to the menu Press to increase or decrease the volume.
4 TWO Accessories 2.
THREE 5 Menu Guide 3.1 Start-up Screen Turn the power of the media player ON, and immediately will display the booting screen. 3.2 Media Center Menu Press the Home button from the remote control and enter it.
6 3.3 Video Browser and watch your videos from USB or Mirco SD/MMC card attached to the Box. 3.4 Photo Browser and Watch your pictures from USB or Mirco SD/MMC card attached to the Box.
7 3.5 Music Browser and enjoy your Music from USB or Mirco SD/MMC and attached to the Box. 3.6 Bookmarks Collection of your favorite websites for next time you can open it directly.
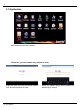
8 3.7 Application Multimedia Area for this interface. 1.Browser( you can browser any website in here) Press the enter key from the remote control it will show this picture as here; © 2011 KWorld When you made a wrong words please use delete key to move it.
9 2.Firmware update( update firmware from here) System update please copy the upgrade file to the USB root directory, and insert the USB disk, then power on the player. After the boot up. Please press the Application icon to select the firmware tab, "click UPGRADE NOW to restore full 100 % and click OK to restart the machine, the whole upgrade process will take 5 - 7 minutes, the upgrade is complete without power, the machine will automatically restart.
10 4.Shares Network Share a file on computer and select the file to play it.
11 5.
12 3.8 Setting Network Setting WIFI setting and Network setting 1.WI-FI settings 1.1 Turn On WIFI or off 1.2 Set up& wireless access points 1.3 Turn on/off Ethernet 1.4 Setting DHCP or Static IP The Wireless Network Card for USB is optional and not all wireless Network cards that can be used for this player are sold on the market. It only supports the model as RALINK RT3070. Please consult with your sale agent when you wish to make the best use of this product.
13 Sound setting There are four ways to set; 1.HDMI PCM output 2.S/PDIF PCM output 3.S/PDIF RAW DATA output 4.HDMI RAW DATA output Display setting press the right/left/up/down button from the remote control to control the brightness/ contrast/saturation/Hue/Over Scan adjust/Resolution/Aspect ratio.
14 Applications information 1.Unknown Sources: allow installation of non-market applications. (which sources not been approved by Google.) 2. Manage applications: manage and remove installed applications. 3. Development: Set options for application development Privacy information Factory data reset This will erase all data from your media player, including: 1.system and application data and setting 2.Downloaded applications It will not erase 1.Current system software and bundled applications 2.
15 Storage information for Media database It will show how much capacity storage devices and internal storage available space. Search 1. Google Search, show suggestions from Google as you type. 2. Searchable items: Web: Web Search, bookmarks and browser history.
16 Language& keyboard There are four ways to set to select the input method.
17 Date& time setting How to set up the time. 1.automatic( Is the time automatically from the network access.) 2.Set Data (press the enter key from the remote control and select current time) 3.Select time zone 4.Set time 5.Use24-hour format 6.Select data format (press the enter button to select the data format) Samba setting You can playback the multimedia files which shared on the local area.
18 About About for all information for this media box. Legal information for open source licenses Android version2.
FOUR 19 FAQ 4.1 FAQ Q1: How to use the Google search? A: when you enter Google search interface, pls move the arrow and press the Enter key from the remote control. And then you can input any website and browser it. Q2: Remote control does not work A: Check whether the distance of remote controller is too far or the deviating angle is too large. Check whether the battery of remote controller is connected properly or whether the battery capacity is lower.
20 End-user License Agreement Please read this agreement carefully before using the product: Please ensure: (1)Do not dismantle the product for improper purposes. (2)Do not read and refresh the firmware of the product by improper means. (3)Do not conduct inverse engineering and disassembling for related software and codes of the product (4)The product and this license agreement can be transferred to a third party who accepts the terms and conditions of the agreement.
21 WARNING This User’s Manual is for specific product, and all its contents are processed with due care but are not ensured fully correct. We assume no responsibility for any loss arising from use of this manual. The right to interpret all contents of this User’s Guide belongs to the company. The manual is subject to change without notice. This User’s Manual is not authorized to any party and no reproduction or copy, in part or whole, of the manual in any way is permitted. KWorld Website: www.