
Installation Guide

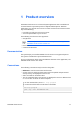

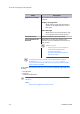
Table Of Contents

2
Installing the application
Installing the application
To ensure proper setup and to prevent the printer from
malfunctioning, installation of the application must be done by a
qualified service personnel or system administrator.
Before you begin, make sure that:
• Your HyPAS-enabled printer:
• Has sufficient storage for installing the application. For some
printers, you can install an optional hard disk, SSD, or SD card.
• Is turned on and connected to the internet. If applicable, make
sure that your printer proxy settings are correct.
• You have administrator access to your printer.
• The correct application package (*.pkg) is stored in the root
directory of an empty USB drive.
• You have a valid license key.
Menus and options may vary depending on your printer.
1
Insert the USB drive containing the application package into the USB port
of your printer.
2
In the printer operation panel, go to Home > System Menu > Add/Delete
Application.
3
In Application, select Add/Delete Application.
If necessary, enter your administrator credentials.
4
Select Add.
5
Select the correct application package, then select Install > Yes.
After the installation finishes, the application is listed on the screen, ready
for activation.
6
Select the application from the list, then select Activate.
7
Enter a valid license key, then select Official > Start.
8
After the activation finishes, go to Home.
You are now ready to configure and use the application.
If a newer version is available, you may update the application that is installed
in your printer. Follow the same steps in installing the application except for
activation.
KYOCERA Cloud Connect 2-1