
Manual
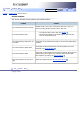


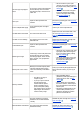


Table Of Contents
- FS-C1020MFP - User Guide
- Contents - User Guide
- Chapter contents - User Guide
- Chapter contents - User Guide
- Chapter contents - User Guide
- Chapter contents - User Guide
- Chapter contents - User Guide
- Chapter contents - User Guide
- Chapter contents - User Guide
- Chapter contents - User Guide
- Chapter contents - User Guide
- Chapter contents - User Guide
- Chapter contents - User Guide
- All titles - User Guide
- Help
- Introduction
- Trademarks
- Disclaimer
- Manuals for This Machine
- Machine Types
- How to Read This Manual
- Symbols
- Notes
- Web Browser
- Feature Highlights
- Using the Machine as a Printer
- Connecting via USB
- Connecting via a network
- Printing confidential documents
- Using the Machine as a Copier
- Making enlarged or reduced copies
- Copying multiple pages onto a single sheet of paper
- Copying both sides of an ID card onto one side of paper
- Making 2-sided copies
- Sorting the output paper
- Using the Machine as a Scanner
- Scanning from a computer
- Sending scanned files via e-mail
- Sending scanned files to an FTP server
- Sending scanned files to a computer's shared folder
- Using the Machine as a Fax Machine
- Using as a fax machine
- Using the machine with an external telephone
- Sending faxes from a computer (LAN-Fax)
- Guide to Components
- Exterior: Front View
- Exterior: Rear View
- Interior
- Control Panel
- Installing the Machine
- Where to Put the Machine
- Unpacking
- Turning the Power on
- Initial Setup
- Changing Operation Modes
- Saving Energy
- Multi-Access
- Connecting the Machine
- Connecting with USB Cable
- Connecting with Network Cable
- Reading the LED lamps
- Connecting to a Telephone Line
- Configuring the Machine
- Configuring the IP Address Settings
- Setting the machine to receive an IP address automatically
- Assigning the machine's IP address manually
- Configuring Telephone Network Settings
- Selecting the telephone line type
- Selecting the telephone network connection type
- Setting the outside line access number
- Sharing the Printer on a Network
- Installing Options
- Installing the Paper Feed Unit (Tray 2)
- Installing the Memory Unit (DDR-SDRAM Module)
- Paper and Other Media
- Supported Paper for Each Tray
- Specifications of Paper Types
- Unsupported Types of Paper
- Paper Storage Precautions
- Printable Area
- Loading Paper
- Loading Paper in Tray 1
- Loading Legal size paper
- Loading envelopes
- Loading Paper in the Optional Paper Feed Unit
- Loading Paper in the Bypass Tray
- Specifying Paper Type and Paper Size
- Specifying the paper type
- Specifying the standard paper size
- Specifying a custom paper size
- Placing Originals
- About Originals
- Recommended size of originals
- Types of originals not supported by the Auto Document Feeder
- Unscannable image area
- Placing Originals
- Placing originals on the exposure glass
- Placing originals in the Auto Document Feeder
- Entering Characters
- Value Input Mode
- Fax Number Input Mode
- Text Input Mode
- Restricting Machine Functions According to User
- Enabling the User Restriction Settings
- Modifying user entries
- Deleting user entries
- When a Message Requesting a User ID Appears
- Configuring Option Settings for the Printer
- Conditions for Bidirectional Communication
- If Bidirectional Communication is Disabled
- Windows
- Mac OS X
- Accessing the Printer Properties
- Accessing the Printer Properties from the [Printers and Faxes] Window
- Accessing the Printer Properties from an Application
- Windows
- Mac OS X
- Basic Operation in Printer Mode
- If a Paper Mismatch Occurs
- Continuing printing using mismatched paper
- Resetting the print job
- Canceling a Print Job
- Canceling a print job before printing has started
- Canceling a print job while printing
- Printing Confidential Documents
- Storing a Locked Print file
- Printing a Locked Print file
- Deleting a Locked Print file
- Checking which Locked Print File Jobs Have Been Canceled
- Using Various Print Functions
- Print Quality Functions
- Print Output Functions
- The Screen in Copier Mode
- Basic Operation in Copier Mode
- Canceling a Copy
- Making Enlarged or Reduced Copies
- Combining Multiple Pages
- Copying Two or Four Pages onto One Sheet
- Copying Both Sides of an ID Card onto One Side of Paper
- Making 2-sided Copies
- Specifying Scan Settings
- Adjusting Image Density
- Selecting the Document Type According to Original
- The Screen in Scanner Mode
- Registering Scan Destinations
- Modifying Scan Destinations
- Deleting Scan Destinations
- Scanning Using the Control Panel
- Basic Operation for Sending Scanned Files
- Specifying the scan destination
- Specifying the Scan Settings
- Specifying the scanning size according to the size of the original
- Adjusting image density
- Specifying resolution
- Scanning from a Computer
- Settings you can configure in the TWAIN dialog box
- The Screen in Fax Mode
- Setting the Date and Time
- Registering Fax Destinations
- Registering Fax Destinations Using the Control Panel
- Modifying fax destinations
- Deleting fax destinations
- Registering Fax Destinations Using Web Browser
- Modifying fax destinations
- Deleting fax destinations
- Sending a Fax
- Selecting Transmission Mode
- Basic Operation for Sending a Fax
- Canceling a fax
- Specifying the Fax Destination
- Specifying the destination using the One Touch buttons
- Specifying the destination using Speed Dial
- Specifying the destination using the broadcast function
- Specifying the destination using the redial function
- Useful Sending Functions
- Specifying the Scan Settings
- Adjusting image density
- Specifying the resolution
- Using the Fax Function from a Computer (LAN-Fax)
- Configuring the LAN-Fax Address Book
- Opening the LAN-Fax Address Book
- Registering destinations
- Modifying destinations
- Registering groups
- Modifying groups
- Deleting individual destinations or groups
- Exporting/Importing LAN-Fax Address Book data
- Basic Operation for Sending Faxes from a Computer
- Canceling a fax
- Configuring Transmission Settings
- Settings you can configure in the LAN-Fax driver's properties
- Receiving a Fax
- Selecting Reception Mode
- Receiving a Fax in Manual Mode
- Receiving a Fax in Fax Only Mode
- Receiving a Fax in FAX/TEL Mode
- Receiving a Fax in FAX/TAD Mode
- Basic Operation Using the Menu Screen
- Menu Chart
- Copy Settings
- Changing Copy Settings
- Copy Setting Parameters
- Scanner Settings
- Changing Scanner Settings
- Scanner Setting Parameters
- Fax Transmission Settings
- Changing Fax Transmission Settings
- Fax Transmission Setting Parameters
- Fax System Settings
- Changing Fax System Settings
- Fax System Setting Parameters
- Fax Directory Settings
- Registering Fax Destinations in Fax Quick Dial/Speed Dial
- Fax Directory Parameters
- Machine Settings
- Changing Machine Settings
- Machine Setting Parameters
- Network Settings
- Changing Network Settings
- Network Setting Parameters
- Reports Print
- Printing the Configuration Page
- Types of Report
- Reading the Configuration Page
- Reading the Activity Report
- Reading the Memory List
- Reading the Scan Transmission Log
- Administrator Settings
- Changing Administrator Settings
- Administrator Setting Parameters
- PDL Settings
- Changing PDL Settings
- PDL Setting Parameters
- Using Web Browser
- Displaying the Main Page
- Changing the Interface Language
- Checking the System Information
- Checking the Status Information
- Checking the Counter Information
- Checking the Machine Information
- Configuring the Machine Settings
- Configuring the Speaker Volume
- Configuring the Paper Settings
- Specifying the Size of Paper for Printing Copies
- Specifying the Tray for Printing Faxes
- Specifying the Tray Priority for the Printer Function
- Configuring Toner Saver Mode
- Registering Destinations
- Restricting Machine Functions According to User
- Printing Reports
- Configuring the Network Settings
- Checking the Network Status
- Configuring the Network Application Settings
- Configuring the DNS Settings
- Configuring the Alert Message Settings
- Configuring the SNMP Settings
- Configuring the SMTP Settings
- Configuring the Administrator Settings
- Configuring the Password
- Restoring the Default Settings
- Backing Up the Machine's Settings
- Restoring the Machine's Settings from a Backup File
- Configuring the Date and Time Settings
- Configuring the Power Saver Mode Settings
- Overview
- Common Problems
- Paper Feed Problems
- Removing Printing Jams
- If paper jams inside the fusing unit
- If paper jams inside a tray
- If paper jams inside the transfer unit
- Removing Scanning Jams
- Print Quality Problems
- Checking the Condition of the Machine
- Printer Problems
- Changing the Printer Driver Settings
- Printed Colors Do Not Match Displayed Colors
- Print Positions Do Not Match Display Positions
- Copier Problems
- Scanner Problems
- Fax Problems
- Error and Status Messages on the Screen
- Replacing Print Cartridges
- Replacing the Waste Toner Bottle
- Cleaning
- Cautions to Take When Cleaning
- Cleaning the Toner Density Sensor
- Cleaning the Friction Pad and Paper Feed Roller
- Cleaning the Registration Roller
- Cleaning the Exposure Glass
- Cleaning the Auto Document Feeder
- Moving the Machine
- Moving over a Short Distance
- Moving over a Long Distance
- Disposal
- If the Machine is Not Going to Be Used for a Long Time
- Preparing the Machine for a Long Period of Inactivity
- Using the Machine Again After It Has Been Inactive for a Long Period
- Consumables
- Print Cartridges
- Waste Toner Bottle
- Specifications of the Machine
- General Function Specifications
- Printer Function Specifications
- Copier Function Specifications
- Scanner Function Specifications
- Fax Function Specifications
- Specifications of Options
- Paper Feed Unit
- Memory Unit
- Electromagnetic Interference
- Information about Installed Software
- expat
- JPEG LIBRARY

ID Card Copy Only Support
A4/LT
ID card copy could not be performed
because the tray does not contain
the valid size paper, which are A4 or
Letter size.
● Set the machine to print copies
using the A4 or Letter size paper in
the [Paper Select] setting. See
Copy
Settings .
● Specify the A4 or Letter size paper
for the tray selected for printing
copies in the [Paper Size] setting.
See
Machine Settings .
Inner Jam
Paper has been jammed in the
machine.
Remove the jammed paper. See Removing
Printing Jams .
K toner Independent-supply
A non-supported print cartridge is
installed.
Contact your service representative.
Life End Waste Toner Bottle The waste toner bottle is full.
Replace the waste toner bottle with a new
one. See
Replacing the Waste Toner
Bottle .
Life End X Toner Cartridge
The machine has run out of the
indicated toner.
Replace the indicated print cartridge. See
Replacing Print Cartridges .
Lower Misfeed Jam
Paper has been jammed in the
machine.
Remove the jammed paper. See Removing
Printing Jams .
Media Type is illegal
2-sided copy could not be performed
because the tray does not contain
the valid type paper, which are thin,
plain, recycled, color, preprinted or
prepunched.
● Specify the tray containing the valid
type paper (other than the bypass
tray) in the [Paper Select] setting.
See
Copy Settings .
● Specify the valid paper type for the
tray selected for printing copies in
the [Paper Size] setting. See
Machine Settings .
Memory Full 1.TX 2.Cancel
Memory has reached capacity while
scanning originals when trying to
send a fax in Memory Transmission
mode.
Press [1] to send only the pages that have
been scanned in memory, or press [2] to
cancel.
Memory Overflow
● The data is too large or
complex to print.
● If you try to print a Locked
Print file stored in the
machine with the printer
driver's [Gradation] set to
[Fine] in the [Print Quality]
tab, printing may be canceled
depending on the machine's
current memory usage.
● Select [600X600 1Bit] in
[Resolution] under [PDL Settings] to
reduce the size of data. See
PDL
Settings .
● Print or delete other Locked Print
files in the machine, and then print
the Lock Print file that the machine
failed to print.
● Resend the Locked Print file to the
machine With [Gradation] set to
[Speed] or [Standard], and then
print the Locked Print file.
Misinstall Toner X
The print cartridge has not been
installed or has not been installed
correctly.
Reinstall the print cartridge. See Replacing
Print Cartridges .
Misinstall Waste Toner Bottle
The waste toner bottle has been
installed incorrectly.
Reinstall the waste toner bottle. See
Replacing the Waste Toner Bottle .