
Operation Manual


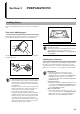
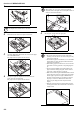
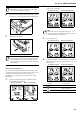
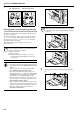


Table Of Contents
- Energy Star Program
- Please read this Operation Guide before using the copier. Keep it close to the copier for easy re...
- Section 1 IMPORTANT! PLEASE READ FIRST.
- Section 2 NAMES OF PARTS
- Section 3 PREPARATIONS
- Section 4 BASIC OPERATION
- Section 5 COPY FUNCTIONS
- Making 2-Sided copies from various types of originals
- Copying two-page originals onto separate sheets: Page Separation/Split Copy Modes
- Making a margin space on the copies
- Making copies with clean edges
- Fitting the image of either two or four originals onto a single copy page
- Automatic Sorting of copy sets
- Saving on toner use
- Memorizing frequently used settings: Program Function
- Section 6 COPIER MANAGEMENT
- Copy Management Mode
- Department Management Modes
- Department Management Code Operations Procedures
- Department Code Registration
- Deleting Department Codes
- Clearing the Department Management Count
- Outputting the Department Management List
- How to set the Department Management Mode
- Making copies when the copier is in the Department Management Mode
- Default Setting Mode
- Checking the Total Counter and Printing Out the Counter Report
- Copy Management Mode
- Section 7 OPTIONAL EQUIPMENT
- Section 8 TROUBLESHOOTING
- Section 9 MAINTENANCE AND OPERATION INFORMATION
- Appendix: Functions and Settings Combination Chart
Section 3 PREPARATIONS
3-5
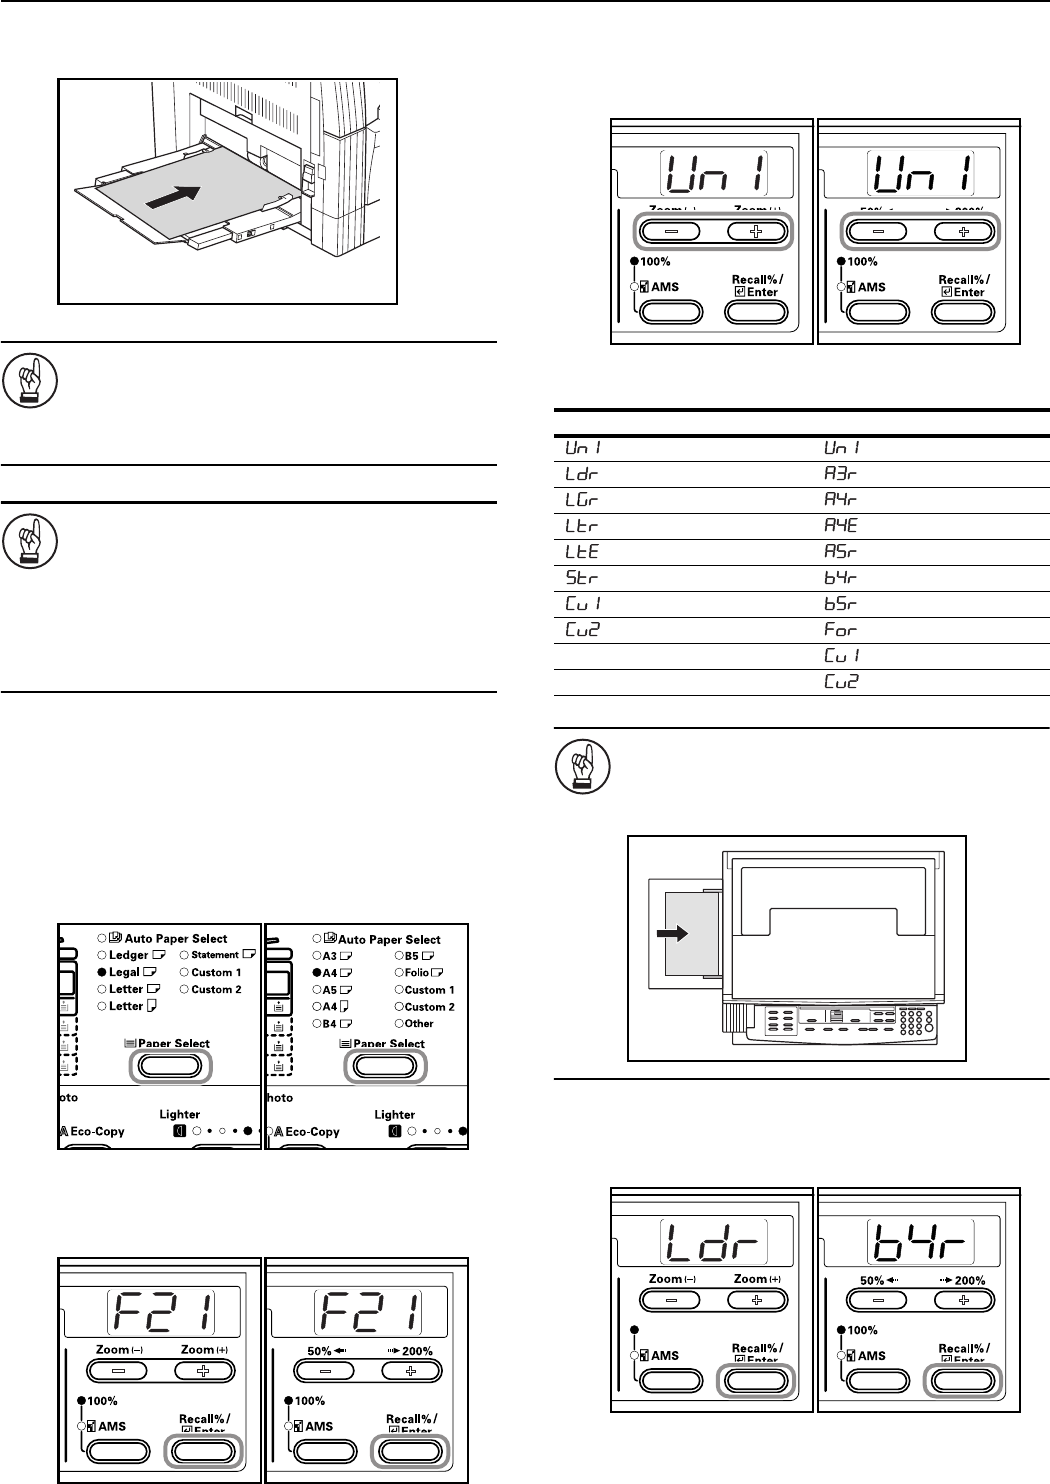
3 Use the Insert Guides to push the paper in until it reaches
the point where it stops.
IMPORTANT!
Always straighten out postcards and other types of thick
paper that are curved before using them.
There may be cases in which the feeding operation
cannot be carried out due to the quality of the paper.
IMPORTANT!
• When loading paper into the drawer, set it so that the
side which was facing upwards in its packaging faces
downwards. If the front of the paper is bent
backwards, straighten it out before setting it.
• Check to make sure there are no creases, etc. in the
paper. Creases in the paper may lead to paper
misfeeds.
Multi-bypass Tray Size Input
Adjust the paper in the Multi-bypass Tray and register the paper
size using the Operation Panel.
1 Press the [Paper Select] key for 3 seconds. The Default
Settings Mode will be displayed.
Inch specifications Metric specifications
2 Check to make sure that “F21 (Multi-bypass Tray Paper
Size)” is displayed and then press the [Enter] key.
Inch specifications Metric specifications
3 Press either the Zoom (+) key or the Zoom (–) key and select
the paper size. The paper sizes displayed are as given in the
table below.
Inch specifications Metric specifications
IMPORTANT!
Use the illustration below as a reference when setting
the paper in the “vertical direction” in the Multi-bypass
Tray.
4 Press the [Enter] key. The display will blink and copying
can begin.
Inch specifications Metric specifications
Display: Paper Sizes
Inch specifications Metric specifications
(UnI): Universal Size (UnI): Universal Size
(Ldr): Ledger Horizontal (A3r): A3 Horizontal
(LGr): Legal Horizontal (A4r): A4 Horizontal
(Ltr): Letter Horizontal (A4E): A4 Vertical
(LtE): Letter Vertical (A5r:): A5 Horizontal
(Str): Statement Horizontal (b4r): B4 Horizontal
(Cu1): Custom 1 (b5r): B5 Horizontal
(Cu2): Custom 2 (For): Folio Horizontal
(Cu1): Custom 1
(Cu2): Custom 2