
Operation Manual


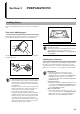
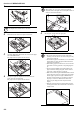
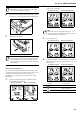
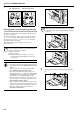
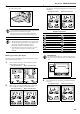
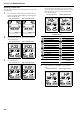


Table Of Contents
- Energy Star Program
- Please read this Operation Guide before using the copier. Keep it close to the copier for easy re...
- Section 1 IMPORTANT! PLEASE READ FIRST.
- Section 2 NAMES OF PARTS
- Section 3 PREPARATIONS
- Section 4 BASIC OPERATION
- Section 5 COPY FUNCTIONS
- Making 2-Sided copies from various types of originals
- Copying two-page originals onto separate sheets: Page Separation/Split Copy Modes
- Making a margin space on the copies
- Making copies with clean edges
- Fitting the image of either two or four originals onto a single copy page
- Automatic Sorting of copy sets
- Saving on toner use
- Memorizing frequently used settings: Program Function
- Section 6 COPIER MANAGEMENT
- Copy Management Mode
- Department Management Modes
- Department Management Code Operations Procedures
- Department Code Registration
- Deleting Department Codes
- Clearing the Department Management Count
- Outputting the Department Management List
- How to set the Department Management Mode
- Making copies when the copier is in the Department Management Mode
- Default Setting Mode
- Checking the Total Counter and Printing Out the Counter Report
- Copy Management Mode
- Section 7 OPTIONAL EQUIPMENT
- Section 8 TROUBLESHOOTING
- Section 9 MAINTENANCE AND OPERATION INFORMATION
- Appendix: Functions and Settings Combination Chart

Section 3 PREPARATIONS
3-6
Inputting Custom Sizes
Sizes that are not displayed on the Operation Panel are registered
as Custom Sizes.
1 Press the [Exposure Adjustment] keys on both sides for 3
seconds. “F00 (Default Setting Mode)” will be displayed in
the No. of Copies display.
Inch specifications Metric specifications
2 Press either the Zoom (+) or Zoom (–) key to display the
“F22 (Custom1 Size)”.
Inch specifications Metric specifications
3 Press the [Enter] key.
Inch specifications Metric specifications
4 Press either the Zoom (+) key or the Zoom (–) key and select
the size. The paper sizes displayed are as shown in the
table below. When selecting Irregular Sizes, carry out the
following procedure. In the case of the selection of other
sizes, proceed to Step 9.
Inch specifications Metric specifications
5 Press the [Enter] key. The Width can be input after 2
blinks.
Inch specifications Metric specifications
Display: Sizes
Inch specifications Metric specifications
(b5E): B5 Vertical (A3r): A3 Horizontal
(b6r): B6 Horizontal (A4r): A4 Horizontal
(A6r): A6 Horizontal (A4E): A4 Vertical
(PoS): Postcard (A5r:): A5 Horizontal
(Ldr): Ledger Horizontal (b4r): B4 Horizontal
(LGr): Legal Horizontal (b5r): B5 Horizontal
(Ltr): Letter Horizontal (b5E): B5 Vertical
(LtE): Letter Vertical (b6r): B6 Horizontal
(Str): Statement Horizontal (A6r): A6 Horizontal
(o2r): Oficio II (PoS): Postcard
(CPF): 11" × 15" Horizontal (For): Folio Horizontal
(InP): Irregular Size (o2r): Oficio II
(CPF): 11" × 15"
Horizontal
(InP): Irregular Size