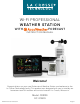
WI-FI PROFESSIONAL WEATHER STATION WITH FORECAST INSTRUCTION MANUAL Welcome! Congratulations on your new Professional Weather Station and welcome to the La Crosse Technology family! This product was designed with you in mind by our hometown team of weather enthusiasts based in La Crosse, Wisconsin.
TAB LE O F C O N TEN TS 3 Quick Setup 18 Wind Speed Readings & History 4 Quick Mounting Tips 19 Rainfall Readings & History 4 Button Functions 21 Temperature/Humidity Readings & HI/LO Records 5 Weather Station Icons 6 Connect to La Crosse View™ App 8 Benefits of Connecting to La Crosse View™ 9 Enhanced Weather Forecasts w/La Crosse View™ 23 Sensor Reception Indicators 9 Advanced Forecast & Chance Precipitation 23 Sensor ID and Search 10 AccuWeather Daily Forecasts 24 Delete Sensors
Q UI CK S ET UP 1. Insert 2 - C batteries into your LTV-W1 Wind Sensor. 2. Insert 2 - AA batteries into your LTV-R2 Rain Sensor. 3. Insert 2 - AA batteries into your LTV-TH2 Thermo-Hygro Sensor. 4. Insert the power cord into your C83100 station. Remove the red insulation tab from the CR2032 battery compartment found on the bottom of your station. 5. Insert batteries into your Bonus Station. 6. Download the La Crosse View™ App (App Store or Google Play) 7.
Q UICK MO UNT ING T IP S WIND SPEED Ensure the sensor is mounted vertically – an unobstructed rooftop is ideal. • Your wind sensor should be the tallest object in the area to avoid educed wind speed values. RA IN Mount in an open area, preferably off the ground on a level platform. • Clean out the bucket regularly to avoid debris; this can affect readings. T HE RM O -H YG R O Keep out of direct sunlight & ensure the sensor is well-ventilated.
WE ATHER STAT ION ICON S PRESSURE INHG Low Battery Indicator 12 HR MPH / KMH 12 Hour Forecast Miles or Kilometers IN / MM Sensor Reception Chance of Precipitation Inches or Millimeters INHG / HPA Temperature Trend Arrows Forecast Indicators Inches of Mercury or Hecto Pascal Fahreheit Celsius Internet Indicator Pressure Trend Arrows Percent Humidity Wi-Fi Indicator Auto Dim Indicator Wi-Fi Professional Station Page | 5
EXTRA SENSOR AREA ICONS: • The Extra Sensor area of your station will default to Pressure when you first power up. • When you choose to add additional sensors, the Sensor Reception Indicator will show in the upper left corner whether Press ure or Sensor reading is displayed. • Press and release the EXTRA SENSOR button to view all additional sensors.
• Your station’s device ID can be found on the back of the display. • Within 15 minutes after your station connects to the La Crosse View app, you should receive notifications to add your sensors. These will display in your app’s Notification Center. Station Device ID When your sensors are ready to be added, you’ll see your app’s cloud turn red. Press this Cloud Icon to begin adding your sensors.
BE N EFITS OF CONNE CT I N G TO L A C R O S S E V I EW ™ Connecting You to Your Home Anytime, Anywhere.
E NHAN CED LACROSSE V I EW C O N N EC TED F EATU R E S.
ACC U WEAT HE R DAILY F O R ECASTS Press the DAILY button on the side of your station to scroll through 7 days of future forecasts. You’ll see changing forecast icons, HI/LO Temperature readings. IMPORTANT: After viewing your Daily Forecast, the display will automatically revert back to the default 12 hour forecast after 10 seconds.
AC CU WEATHE R HI/ LO T EM PER ATU R ES TODAY Shows TODAY HI LO Internet Indicator will appear in bottom right corner when connected. • When connected, your daily AccuWeather HI/LO Temperature predictions will display in this section. • If unconnected, this section will display your Outdoor Temperature Records registered daily by your Thermo-Hygro Sensor. These will automatically reset at Midnight everyday.
Data Stream Items: Customizable Data Streams to enhance your in-home display: Wind Speed • Wind Direction • Wind Gust • UV Index • Visibility • Dew Point • Percentage of Clouds • Sunrise Time • Sunset Time • Hours of Sunlight • Moon Rise Time • Moon Set Time • Temperature/Humidity • and more! Personal Messages Enter up to 20 characters for special events or reminders, such as: • SOCCER TONIGHT • ICE CREAM IN FREEZER • GREAT JOB MATH TEST or anything you can think of! Note: Allow up to 10 minutes for new Da
STATU S MESSAGE S W HE N C O N N EC TED Quick Tip: • The Wi-Fi Icon indicates Wi-Fi connection- not necessarily app connection. • The Internet Icons by your Forecast, Wind Direction and HI/LO Temperatures will indicate connection to the La Crosse View App and Weather Server. Status Messages on you station will let you know if there are issues. Press and release the SET button to view the status of your station. ALL OK CONNECTED • Station is connected all the way through to the La Crosse View app.
FE ATU RES OF YOUR W E ATH ER STATI O N Your station provides most functionality when connected to the La Crosse View app. However it is fully functional as a standalone station.
Note: If you press the LIGHT button to manually adjust the backlight, the Auto Dim feature will resume at the next scheduled time to dim. S E T TIN GS ME NU 1. Hold the SET button for 3 seconds to enter settings menu. 2. Press and release the + or - buttons to adjust the flashing values. Hold to adjust quickly. 3. Press and release the SET button to confirm and move to the next item. Note: Press and release the LIGHT button any time to exit settings.
E XTRA S EN SOR ARE A The Extra Sensor area of your station will show Relative Pressure when you first power up. Optional Extra Sensors: Up to 4 additional Thermo-Hygro, Wind Speed, Water Leak or any combination of these sensors can read to the EXTRA SENSOR area of your display. Simply press and release the EXTRA SENSOR button to view these sensors or turn on Auto Scroll. Note: The Extra Sensor area cannot read Rain sensors.
1. Hold the EXTRA SENSOR button 2. Install batteries in the sensor 3. Press TX button Sensor Barcode ID + 5. Scan sensor bar code ID AA + AA - 4. Allow up to 3 minutes to connect Insert Batteries TX Button Station normal display-Pressure showing Water Leak sensor added Delete Extra Sensors from your station: 1. Press and release the EXTRA SENSOR button until you see the sensor and ID you wish to delete. 2. Hold the MINUS (-) button for 3 seconds to delete this sensor.
WI N D S PEE D RE AD INGS & H I STO RY Current Speed: Highest wind speed in past 31 seconds. Samples every 3 seconds Top Speed (1 HR): Highest wind speed in past 60 minute period. Wind Direction: When connected wind direction in letters will replace Top 1HR. Top 1HR will still be viewable in history. Internet Indicator will show next to the word DIRECTION. Not Connected: Current & Top Speed Connected: Current Speed & Internet Wind Direction Wind Speed History: 1.
Reset Wind Speed History: 1. Press the WIND button to view individual wind speed readings. 2. Hold the MINUS button for five seconds to reset the individual value. 3. Wind speed reading will reset to current wind speed, time and date. RA I N FALL RE AD INGS & H I STO RY 1. Simply press and release the RAIN button to cycle through the exact rain history you’d like displayed (other readings will disappear temporarily). Your station will stay on your selection. 2.
1 Year: • Current month plus past 11 months total. Current year will show. Total: • Total rainfall since station was powered on or reset. Note: As time passes without rain, the 1 hour, 24 hour, and 7 day rain totals will count down to zero. Reset Rainfall History: 1. Press and release the RAIN button to view individual rain readings. 2. Hold the MINUS button for five seconds to reset the individual value. 3. Rain reading will reset to zero.
T E MPERAT UR E / HUMIDITY R EA D I N G S & H I / LO R ECO R D S Your current Indoor and Outdoor temperature and Humidity are constantly displayed on your weather station. Your station records your HI and LO Temperature and Humidity with time and date of occurrence. 1. Press and release the TEMP button to view your HI and LO records with time and date of occurrence. 2. Any new HI or LO record will replace the existing record.
FE E LS LIKE T E MP E RAT U R E Your “Feels Like” Temperature is a combination of outdoor temperature, humidity and wind speed. It is displayed in the Outdoor Temperature area. • When outdoor temperature is higher than 80˚F, your Feels Like Temperature is showing Heat Index. • When outdoor temperature is lower than 50˚F, your Feels Like Temperature is showing Wind Chill. • When outdoor temperature is between 50˚F and 80˚F, your Feels Like Temperature will show Current Outdoor Temperature.
SE N S OR RECE P T ION IND I CATO R S There are Sensor Reception Indicators for your Temperature/Humidity Sensor, Wind Sensor and Rain Sensor. If you add Extra Sensors, There will be a Sensor Reception Indicator for them as well. • When indicator is solid, sensor is connected. • When indicator is flashing, it is searching for the individual sensor. • If there is no indicator, the sensor is not connected.
DE L ETE S E NSOR S 1. Press and release the SENSOR button to view sensor type and ID. 2. Hold the MINUS button to delete the sensor from the station. 3. Deleted sensor can no longer show on station. Batteries should be removed. 4. Station will automatically search for a replacement sensor of the same type. Example: Delete a Wind sensor, the station will search for a new Wind sensor. 5. If replacing a sensor, insert batteries into the new sensor.
DE TAILED SE T UP & M OU N TI N G LTV-W1 Wind Speed Sensor 1. Turn the battery cover of your wind sensor to the left. 2. Install fresh “C” batteries. 3. Carefully align and turn battery cover right to tighten. 4. There is a blue LED light on the sensor that will flash when transmitting. Wind Cups Screws LED Light Mounting pole Twist Left C C Battery Cover Side Mount Option Knob Mounting Bracket Mounting: • Position in an open area that will have the least amount of interference with wind speed.
LTV-R2 Rain Sensor: 1. Flip open both locking tabs on your rain sensor and lift off the funnel portion. 2. Pull up on the battery cover and remove. 3. Install 2-AA batteries according to polarity. 4. Reposition the battery cover over the battery compartment, and firmly push down to lock it back into place 5. Remove cardboard and any tape around the rocker before use. These were used to protect the sensor from unwanted movement during shipping. 6.
LTV-TH2 Thermo-Hygro Sensor 1. Install 2-AA batteries according to polarity and replace battery cover. Mounting: 1. Use the hole at the top to hang your sensor from the back using a nail. Or, insert one mounting screw through the front of your sensor. 2. Mount your sensor on a north-facing wall or in any shaded area. Under an eave or deck rail is preferred. 3. The maximum wireless transmission range to the weather station is up to 400 feet (121 meters) in open air, not including walls or floors. 4.
BO NU S STAT ION SE T UP As an added bonus, we’ve included an LTV-D1 Bonus Station to provide basic temperature and humidity readings in another room of your home. Your Bonus Station will receive its data from the included LTV-TH2 Thermo-Hygro Sensor. LTV-D1 Bonus Station: 1. Insert 2 AAA batteries into your Bonus Station according to polarity. Mounting: 1. Place your bonus station on a desk or counter top. + AAA + AAA 2. Use the mounting hole on the back to place your station on a wall.
Search for Outdoor Sensor: In the rare event your Bonus Station loses connection with the Thermo-Hygro sensor, the outdoor readings will show dashes. OUTDOOR • Simply hold the +/SEARCH button for 3 seconds to search for the sensor. • The sensor reception icon will flash while searching. Restart: 1. Remove batteries for 15 minutes. 2. Press any button 20 times. 3. Install fresh batteries. 4.
SP E CIFICAT IONS Indoor C83100 Temperature Range: 32°F to 99°F (0°C to 37°C) LTV-D1 Temperature Range: 32°F to 122°F (0°C to 50°C) Both Stations Humidity Range: 10% RH to 99%RH C83100 Relative Pressure: 23.62 to 32.48 InHg (800 to 1100 hPa) Pressure is measured every 12 minutes Thermo-hygro Sensor -40°F to 140°F (-40°C to 60°C) Note: Temperatures below -20°F (-29°C) require Lithium batteries in the outdoor sensor.
Dimensions 8.22” W x 1.18” D x 5.83” H (22.88cm W x 3.0 cm D x 14.81cm H) C83100 Station: 1.97” W x 0.75” D x 5.73” H (5.0cm L x 1.91cm W x 14.55cm H) LTV-TH2 Thermo-hygro Sensor: 7.10” W x 7.10” D x 18.57” H (18.03cm L x 18.03cm W x 47.17cm H) with mounting bracket/pole LTV-W1 Wind Speed Sensor: 7.14” W x 3.43” D x 4.94” H (18.13cm L x 8.72cm W x 12.54cm H) LTV-R2 Rain Sensor: 2.64” W x 1.32” D x 3.62” H ( 6.7 cm L x 3.35cm W x 9.
FC C STATEME NT This equipment has been tested and found to comply with the limits for a Class B digital device, pursuant to part 15 of the FCC Rules. These limits are designed to provide reasonable protection against harmful interference in a residential installation. This equipment generates, uses and can radiate radio frequency energy and, if not installed and used in accordance with the instructions, may cause harmful interference to radio communications.