WS-9032U Wireless 433 MHz Weather Station Instruction Manual FCC ID: OMO-01RX (Receiver), OMO-01TX (transmitter) FCC DISCLAIMER This device complies with part 15 of the FCC rules. Operation is subject to the following two conditions: (1) This device may not cause harmful interference. (2) This device must accept any interference received, including interference that may cause undesired operation.
TABLE OF CONTENTS Topic Inventory of Contents/ Additional Equipment About WWVB Quick Set Up Guide Detailed Set Up Guide Battery Installation Start Up Sequence Explanation of LCD Information Function Key Layout Program Mode Overview of Programming Sequence LCD Contrast Setting Time Zone Setting DST ON/OFF Setting Radio-controlled Time ON/OFF Setting 12/24-hour Time Mode Setting Setting the Time/Date Manually Temperature Measuring Units (˚F/˚C) Air Pressure Measuring Units (inHg/hPa) Relative Pressure Setting
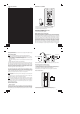
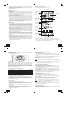
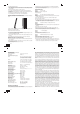
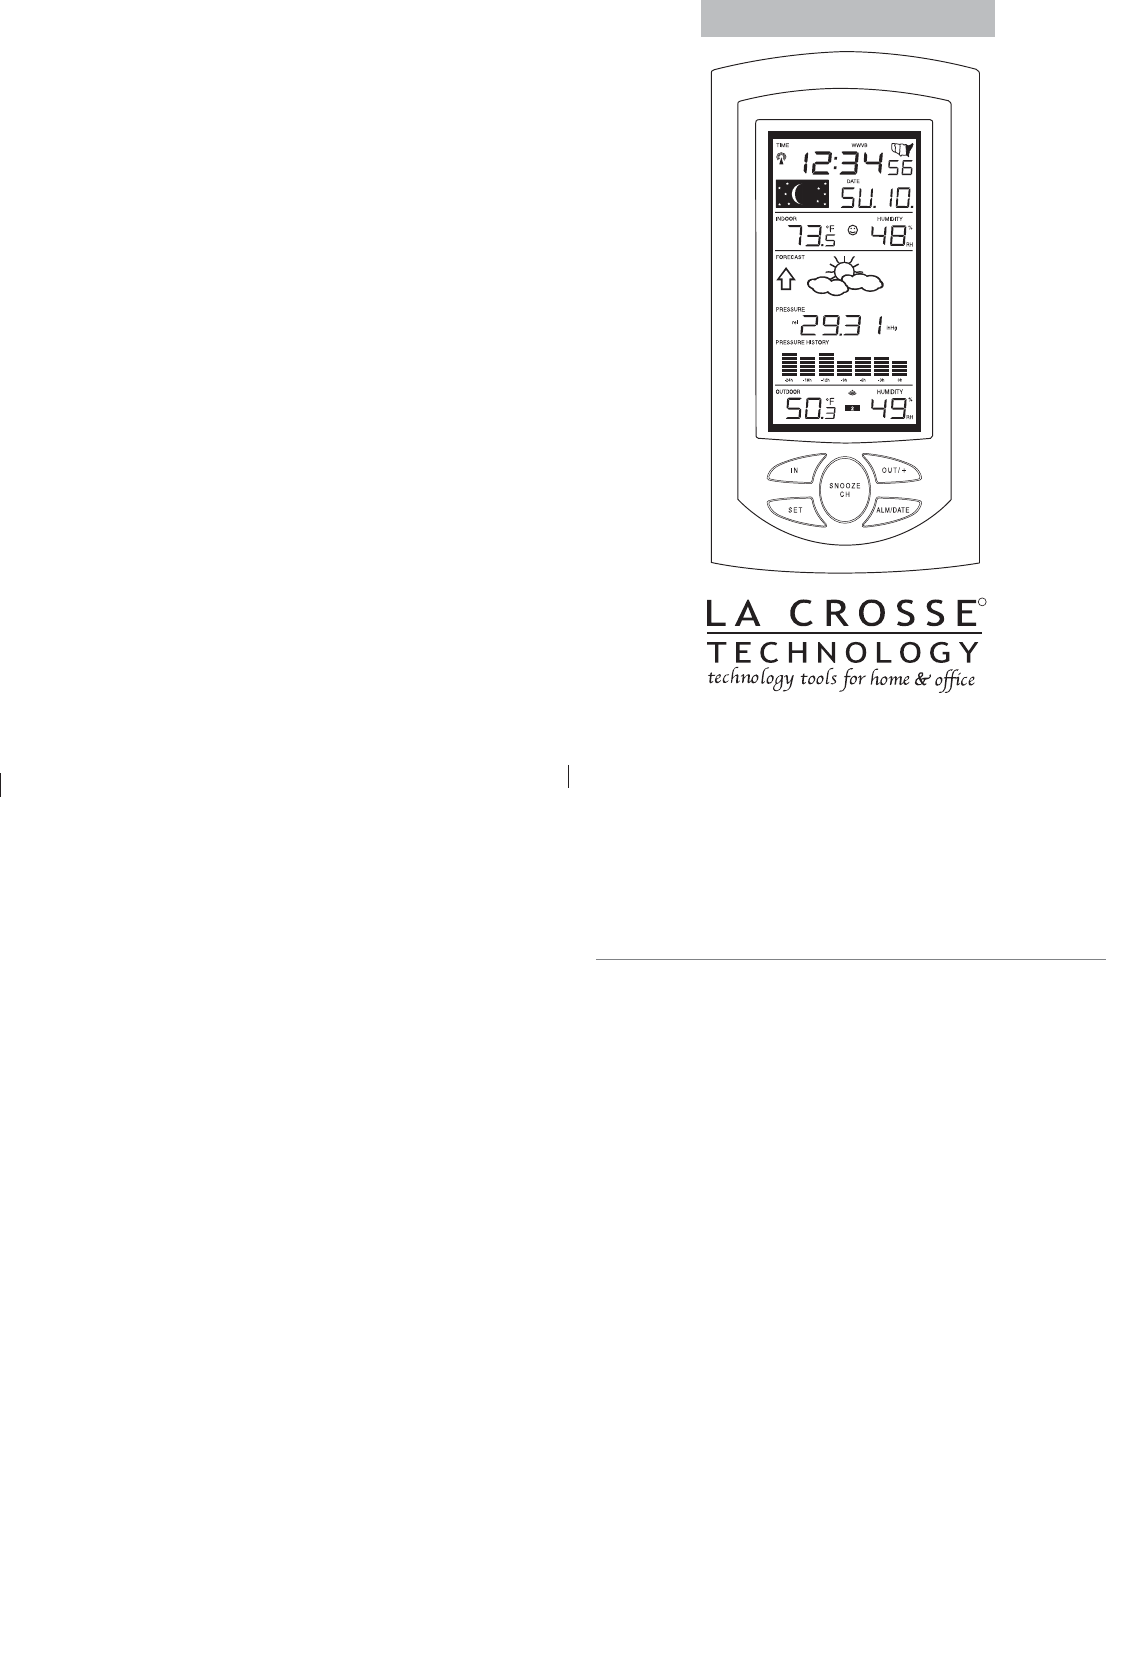
. Do not press any buttons for at least ten minutes. If a button is pressed before the indoor weather station has received information from the TX4U sensor, no data will be received from that sensor until reset. 4. Replace the battery cover. III. Explanation of LCD Information A. The below picture highlights the LCD features. Radio-controlled II. Start Up Sequence A. Initial Start 1.
1. Press and hold the “SET” button for five seconds. 2. “lcd” will appear at the top of the display and a number will flash next to it. 3. Press and release the “SET” button five more times to advance to the Manual Hour setting. 4. The hour will begin to flash at the top of the display. 5. Press and release the “OUT/+” button to select the desired hour. 6. Press and release the “SET” button to confirm the hour setting and continue to the Minute setting. H. 1. 2. 3.
a. From the normal display mode, press and release the “OUT/+” key once to view the outdoor maximum temperature and humidity (“MAX” will be displayed above the outdoor temperature and humidity). b. Press and release the “OUT/+” key again to view the outdoor minimum temperature and humidity. c. Press and release the “OUT/+” key again to return to the normal mode (timeout of viewing minimum/maximum values will occur if no keys are pressed for fifteen seconds). d.
2. Mounting with Adhesive Tape a. With a nonabrasive solution, clean and dry the back of the mounting bracket and the mounting surface to ensure a secure hold. The mounting surface should be smooth and flat. b. Remove the protective strip from one side of the tape. c. Press firmly onto the designated area on the back of the mounting bracket. d. Remove the protective strip from the other side of the tape, and situate the mounting bracket. e. Firmly press the mounting bracket onto the mounting surface. f.
WARRANTY INFORMATION La Crosse Technology, Ltd provides a 1-year limited warranty on this product against manufacturing defects in materials and workmanship. This limited warranty begins on the original date of purchase, is valid only on products purchased and used in North America and only to the original purchaser of this product. To receive warranty service, the purchaser must contact La Crosse Technology, Ltd for problem determination and service procedures.
adjustments, claims based on misrepresentation by the seller or performance variations resulting from installation-related circumstances. LA CROSSE TECHNOLOGY, LTD WILL NOT ASSUME LIABILITY FOR INCIDENTAL, CONSEQUENTIAL, PUNITIVE, OR OTHER SIMILAR DAMAGES ASSOCIATED WITH THE OPERATION OR MALFUNCTION OF THIS PRODUCT. THIS PRODUCT IS NOT TO BE USED FOR MEDICAL PURPOSES OR FOR PUBLIC INFORMATION. THIS PRODUCT IS NOT A TOY. KEEP OUT OF CHILDREN’S REACH. This warranty gives you specific legal rights.
FCC DISCLAIMER This device complies with part 15 of the FCC rules. Operation is subject to the following two conditions: (1) This device may not cause harmful interference. (2) This device must accept any interference received, including interference that may cause undesired operation. La Crosse Technology Made in China All rights reserved.