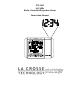
WT-5432 433 MHz Radio Controlled Projection Alarm Instruction Manual
TABLE OF CONTENTS Topic Inventory of Contents/ Additional Equipment About WWVB Quick Set-Up Guide Detailed Set-Up Guide Battery Installation Program Mode Programming Sequence Function Buttons Time Zone Setting DST (Daylight Saving Time) Setting Adjustable Snooze Time Setting Date Setting 12/24-Hour Setting/Selecting °F or °C Features & Operations Features Radio-Controlled Time Projection of time and/ or remote temperature Forecast Icon EL Backlight Indoor Temperature Remote Temperature Time Alarm Changing D
INVENTORY OF CONTENTS 1) WT-5432 projection alarm 2) TX6U remote temperature sensor 3) AC adapter/transformer (6V) 4) Instruction manual and warranty card. ADDITIONAL EQUIPMENT (not included) 1) Three fresh 1.5V AA batteries (optional for alarm clock) 2) Two fresh 1.5V AA batteries (for remote transmitter) ABOUT WWVB (Radio Controlled Time) The NIST (National Institute of Standards and Technology—Time and Frequency Division) WWVB radio station is located in Ft.
NOTE: Fog and mist will not harm your remote sensor but direct rain must be avoided. To complete the set up of your temperature station after the 10 minutes have passed please follow the steps starting on page 6. DETAILED SET-UP GUIDE Important: Insert batteries into the transmitter first, then into the alarm clock. Do not press any buttons until remote temperature is displayed. I. BATTERY INSTALLATION A. Remote Temperature Sensor 1. Remove the battery cover. 2.
the WWVB search is being conducted various numbers will appear in the time display. After 10 minutes, the projection alarm will either display the WWVB time or discontinue the search if the time is not found. If the search is cancelled “-:--” will remain in the time LCD. The projection alarm will conduct a WWVB search every hour until the first signal is found. Once the WWVB time is found, a search is automatically conducted nightly at midnight. If the signal is found at midnight the tower icon will remain.
-4h -5h -6h -7h -8h -9h -10h -11h, -12h 0h -1h, -2h, -3h 4. 5. Atlantic Time Eastern Time (default setting) Central Time Mountain Time Pacific Time Alaskan Time Hawaiian Time Next two time zones West of HAW Greenwich Mean Time Three time zones West of GMT From –5h to –8h, a US map with the highlighted time zone will also be displayed to the right of the time display. Press and release the “SET” button to confirm the time zone setting, and to advance to DST (Daylight saving time) setting. D.
Note: when setting the hour, “PM” will appear to the left of the hour display, if it is AM nothing will be displayed. 2. 3. 4. Press and release the “SET” button to confirm the hour setting and to shift to select the minutes. Press and release the “+” button to select the minutes. Press and release the “SET” button to confirm the time setting and to advance to manually set the date. G. Date Setting Note: When the WWVB signal is found that date will over-ride the manually set date. 1. 2. 3. 4. 5. 6. 7. 8.
5. 6. 7. 8. 9. Six modes of date/seconds/temperature display Indoor temperature Remote outdoor temperature Dual alarms Adjustable snooze B. Radio-Controlled Time and Date 1. The projection alarm will automatically search for the time signal upon initial set-up and every night. 2. When the signal is being received, there will be a “tower” icon flashing to the left of the time display. 3. When the time signal has been received successfully, the tower icon will remain steady until midnight. 4.
between time and remote temperature (M2) by pressing the “DISPL” button. The selected display mode will flash on the lower left as “M0”, “M1” or “M2”. 12. The direction of the display can also be rotated 360° in 90° increments by pressing the directional button. There is no display on the LCD that signifies the direction. 13. The projector case can be rotated 180° to further help orient the projected display. 14.
Clouds with Rain—indicates that the weather is expected to get worse (not that the weather will be rainy). The weather icons change when the unit detects a change in air pressure. The icons change in order, from “sunny” to “partly sunny” to “cloudy” or the reverse. It will not change from “sunny” directly to “rainy”, although it is possible for the change to occur quickly. If the symbols do not change then the weather has not changed, or the change has been slow and gradual. D. EL Backlight 1.
5. 6. 7. The transmitter should not be mounted on a metal surface. The transmitter and projection alarm should be kept away from other sources of possible interference including cordless appliances (telephones, baby monitors), microwave ovens, and other strong electrical appliances. The remote temperature is displayed in °F or °C, depending on the time format (12 or 24-hour mode). When in 12-hour format, the temperature will be in °F. When in 24-hour mode, the temperature will be in °C. G.
c. To disable the alarm for 24 hours press and release any button other than the “SNOOZE” bar or projection keys. H. Changing the Display Mode (Day, Seconds and Temperature) There are six possible display modes to view the day, seconds and temperature (remote temperature is constantly displayed). To change the display (starting at the default of day, month, date, remote temperature): 1. 2. 3. 4. 5. 6. Press and release the “MODE/+” button.
3. 4. 5. Adhere the tape to the designated area on the back of the mounting bracket. Remove the protective strip from the other side of the tape. Position the remote temperature sensor in the desired location, ensuring that the projection alarm can receive the signal. V. Maintenance and Care A. Extreme temperatures, vibrations, and shock should be avoided to prevent damage to the units. B. Clean displays and units with a soft, damp cloth.
Problem: Solution: Problem: Solution: Problem: Solution: reception. 6) If problems persist contact La Crosse Technology. Hour is incorrect (minute and date are correct). 1) Be sure correct time zone and daylight saving time are selected. “--.-” appears in outdoor temperature LCD 1) Check batteries in remote 2) If batteries are replaced in remote, the unit must be re-started. Remove all batteries, and then follow start up procedure.
WARRANTY INFORMATION La Crosse Technology provides a 1-year warranty on this projection alarm. Contact La Crosse Technology immediately upon discovery of any defects covered by this warranty. Before sending the projection alarm in for repairs, contact La Crosse Technology for a return authorization. Be sure to keep a copy of your receipt for proof of purchase and warranty. The projection alarm will be repaired or replaced with the same or similar model.
FCC ID: OMO-01RX (receiver) OMO-01TX (transmitter) THIS DEVICE COMPLIES WITH PART 15 OF THE FCC RULES. OPERATION IS SUBJECT TO THE FOLLOWING TWO CONDITIONS: 1. THIS DEVICE MAY NOT CAUSE HARMFUL INTERFERENCE, AND 2. THIS DEVICE MUST ACCEPT INTERFERENCE RECEIVED, INCLUDING INTERFERENCE THAT MAY CAUSE UNDESIRED OPERATION.