Rev. 2.2.0 Item no.
1. Important safety instructions 1. Important safety instructions Before using the device, be sure to carefully read the Safety Instructions. Keep this document with the device at all times. 1. 2. 3. 4. 5. 6. 7. 8. 9. 10. 11. 12. 13. 14. 15. 16. 17. 18. 19. 20. 21. 22. 2 Read these instructions. Keep these instructions Heed all warnings. Follow all instructions. Do not use this apparatus near water. Clean only with a dry cloth. Do not block any ventilation openings.
. Warnings To completely disconnect this equipment from the AC mains, disconnect the power supply cord plug from the AC receptacle. The mains plug of the power supply cord shall remain readily operable. Français: Pour démonter complètement l’équipement de l’alimentation générale, démonter le câble d’alimentation de son réceptacle. La prise d’alimentation restera aisément fonctionnelle. To reduce risk of fire or electric shock, do not expose this apparatus to rain or moisture.
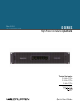
D SERIES Tesira Quick Start Guide rev 2.2.
D SERIES Tesira Quick Start Guide rev 2.2.
1. 安全に関する注意事項 1. 安全に関する注意事項 本装置を使用する前に、必ず安全のための注意事項をご一読ください。この書類は、常に装置と一緒に保管してください。 1. 2. 3. 4. 5. 6. 7. 注意事項をお読みください。 注意事項の書類は手の届くところに保管しておいてください。 全ての警告をお守りください。 全ての指示に従ってください。 本機器は水の近くで使用しないでください。 掃除には、乾いた布のみを使用してください。 22. ネットワーク・ケーブルを使用する場合、US National Differences 16.3 項は、VW-1 の難燃対応品を使用することを義務づけています。 2. 規格 換気口は塞がないようにしてください。製造者の指示に従って設置し 本機器は、EMC(European Electro-Magnetic Compatibility: EU 電磁両立性)指令 2004/108/EC および 低電圧指令 2006/95/EC の必須要求事項に準拠して います。 てください。 8.
3. 警告 機器を電源から完全に遮断するには、電源プラグをコンセントから抜いてくだ 3.4.3 電波障害 さい。 の制限事項に適合するための試験に合格しています。また、本装置は FCC 基準 さい。電源ケーブルの電源プラグは常に容易に抜き差しできるようにしてくだ Français: Pour démonter complètement l’équipement de l’alimentation générale, démonter le câble d’alimentation de son réceptacle. La prise d’alimentation restera aisément fonctionnelle.
1. Instructions de sécurité importantes 1. Instructions de sécurité importantes Avant d'utiliser l'appareil, veillez à lire attentivement les instructions de sécurité. Conservez constamment ce document avec l'appareil. 1. 2. 3. 4. 5. 6. 7. 8. 9. 10. 11. 12. 13. 14. 15. 16. 17. 18. 19. 20. 21. 22. 8 Lisez ces instructions. Conservez ces instructions. Tenez compte de tous les avertissements. Suivez toutes les instructions. N’utilisez pas cet appareil avec de l’eau à proximité.
3. Avertissements Pour totalement isoler l’équipement de l’alimentation secteur, débranchez le cordon d’alimentation de son embase. La fiche secteur du cordon d’alimentation doit rester accessible. Pour réduire les risques d’incendie et de choc électrique, n’exposez pas cet appareil à la pluie ou à l’humidité. N’exposez pas ce système/appareil au ruissellement ni aux éclaboussures et assurez-vous qu’aucun objet contenant du liquide, tel qu’un vase, n’est placé sur l’appareil.
1. Wichtige Sicherheitshinweise 1. Wichtige Sicherheitshinweise Lesen Sie bitte diese Sicherheitsanweisungen sorgfältig, bevor Sie das Gerät verwenden. Bewahren Sie dieses Dokument bitte jederzeit zusammen mit dem Gerät auf. 1. 2. 3. 4. 5. 6. 7. 8. 9. 10. 11. 12. 13. 14. 15. 16. 17. 18. 19. 20. 21. 22. 10 Bitte lesen Sie diese Anweisungen. Bitte bewahren Sie diese Anweisungen auf. Beachten Sie alle Warnhinweise. Folgen Sie bitte allen Anweisungen.
3. Warnungen Um das Gerät vollständig vom Stromnetz zu trennen, müssen Sie den Netzstecker des Gerätes aus der Steckdose ziehen. Der Netzstecker des Gerätes sollte jederzeit zugänglich sein. Français: Pour démonter complètement l’équipement de l’alimentation générale, démonter le câble d’alimentation de son réceptacle. La prise d’alimentation restera aisément fonctionnelle.
1. Instrucciones importantes de seguridad 1. Instrucciones importantes de seguridad Antes de usar este aparato, asegúrese de leer completamente estas Instrucciones de seguridad. Conserve este documento junto con el dispositivo. 1. 2. 3. 4. 5. 6. 7. 8. 9. 10. 11. 12. 13. 14. 15. 16. 17. 18. 19. 20. 21. 22. 12 Lea estas instrucciones. Conserve estas instrucciones Cumpla con lo indicado en los avisos. Siga todas las instrucciones. No utilice este aparato cerca del agua. Límpielo solo con un trapo seco.
3. Precaución Para desconectar este aparato completamente de la corriente eléctrica, extraiga el enchufe del cable de alimentación de la salida de corriente. Por este motivo, coloque el cable de forma que siempre pueda acceder a él. Français: Pour démonter complètement l’équipement de l’alimentation générale, démonter le câble d’alimentation de son réceptacle. La prise d’alimentation restera aisément fonctionnelle.
4. Table of Contents 4. Table of Contents 1. Important safety instructions 2 2. Approvals 2 3. Warnings 2 3.1. Explanation of warning symbols 2 3.2. Warnings 2 3.3. Caution 3 3.4. User responsibility 3 3.4.1. Mains connection grounding 3 3.4.2. Speaker output hazard on amplifiers 3 3.4.3. Radio interference 3 3.4.4. Speaker damage 3 3.4.5. Maintenance 3 5. Introduction 16 5.1. Welcome 16 5.2. D Series: Two versions available 16 6.
4. Table of Contents 8. Cooling and fan operation 20 9. Operating voltage 20 9.1. Low voltage country considerations 20 10. Grounding 21 11. Product overview 22 11.1. Front panel 22 11.2. Rear panel 24 12. Signal flow and processing 25 12.1. Signal flow 25 13. Tutorial: Basic system configuration 26 13.1. Software installation and firmware update 26 13.1.1. Tesira Software 26 13.1.2. Firmware update 26 13.2. Network setup 27 13.3.
5. Introduction 5. Introduction 5.1. Welcome Thank you for choosing the Lab.gruppen D Series for your sound reinforcement needs. We are confident that you will be pleased with the performance, unique features, configuration flexibility, reliability, and long-term durability offered by this product. For fast installation and use of this product, your welcome package includes this printed copy of the D Series Quick Start Guide.
6. Feature summary 6.
7. Installation 7. Installation 7.1. Unpacking Carefully open the shipping carton and check for any damage to the device or the supplied accessories. Every Lab.gruppen product is tested and inspected before leaving the factory and should arrive in perfect condition. If any damage is discovered, please notify the shipping company immediately. Only the consignee may initiate a claim with the carrier or their insurers for damage incurred during shipping.
7. Installation Rear support bracket with mounting hardware Rear support bracket mounted for fixed installation and bracket pointing forward Rear support bracket mounted for removable installation and bracket pointing towards back 7.2.2. Mounting front grille The front grille is shipped on top of the amplifier inside the box to protect it during shipping. The front grille adheres to the amplifier with magnets.
8. Cooling and fan operation 8. Cooling and fan operation D Series devices use a forced-air cooling system with airflow from front to rear, allowing high continuous power levels without thermal problems. To facilitate maximum air flow, ensure that no objects such as rack doors or lids are placed at the front or rear of the rack. Never attempt to reverse the airflow.
10. Grounding NOTE: Following connections applicable only for resulting voltage inside the amplifier’s nominal voltage range. Connecting the amplifier in three phase delta configuration In three-phase configuration where the phases are 120 degrees apart, one can connect three balanced loads in a delta configuration. The connection is made between the phases instead of between the neutral and a phase.
11. Product overview 11. Product overview 11.1. Front panel 1 The front panel consists of an outer front with air intake and a centered user interface. The user interface has LEDs for monitoring and six recessed touch buttons for control.
11. Product overview NOTE: The touch buttons use capacitive touch technology and might be sensitive to large temperature and humidity variations. Table 1 LED/category chart See Faults and warnings for a detailed description of status, faults and warnings associated with each LED.
11. Product overview 11.2. Rear panel 1 2 3 4 6 5 ANALOG OPTION Amplifier Outputs - The amplifier output connectors are sturdy terminal block connectors. See Technical Specifications (Section 15) for connector rating. Channels are located from left to right. Each channel has a clearly marked hot (+) and cold (-) terminal.
12. Signal flow and processing 12. Signal flow and processing 12.1. Signal flow The table below depicts the audio signal flow for a D Series Tesira device.
13. Tutorial: Basic system configuration 13. Tutorial: Basic system configuration This section will describe how to get started with associated software and set up a basic system for operation. 13.1. Software installation and firmware update 13.1.1. Tesira Software 1. Download Tesira Software from biamp.com: www.biamp.com/products/tesira/downloads.aspx. Locate the Software and Firmware section and download the latest version of Tesira software. 2.
13. Tutorial: Basic system configuration CAFÉ software 1. Download the latest CAFÉ software from www.labgruppen.com 2. Execute the installer and follow the on-screen instructions. This is a typical software installation where the default settings are acceptable for the vast majority of users. 13.2. Network setup Network connections/topology The following diagram shows a typical setup with Tesira software running on a PC.
13. Tutorial: Basic system configuration Create Tesira system configuration 1. Open Tesira software 2. Select Labgruppen amplifier from the Object bar > I/O Blocks 3. Click somewhere in the layout window to place an amplifier in the system 4. Select the correct model of amplifier on the initialization dialog and click OK 5. Select Input from the Object bar > I/O Blocks 6. Click somewhere in the layout window to place an input block in the system.
13. Tutorial: Basic system configuration NOTE: With some system configurations using TesiraFORTÉ, you may see an Output Window with a notice in red that “…there are no TesiraFORTÉ blocks in the layout.” This requires changing the server mode. From the top menu, navigate through Tools > Options > Document Setting. Click on Server Mode and select “Both Tesira Servers and TesiraFORTÉ.
14. Faults and warnings 14. Faults and warnings The “On Screen Text” given below is displayed by hovering over the corresponding status LEDs (when amber or red) shown in CAFÉ online views.
14. Faults and warnings Category/Type Name On screen text Description Action Fault Temperature fault DSP area TEMP FLT: DSP DSP area reached critical temperature Improve cooling or reduce power Fault Mains voltage above 400 volt peak MAINS > 400 VPK Power supply detects mains voltage above 400 volt peak. Protective shut down, auto restart attempt Check mains distribution/ connection Fault Mains voltage above 270 V MAINS > 270 V Power supply detects mains voltage above operation voltage.
15. Technical Specifications 15. Technical Specifications D 200:4T/Ta D 120:4T/Ta D 80:4T/Ta Tesira® by Biamp / AVB 4 20000 W 12000 W 8000 W Max. Output Power (all ch.’s driven) 1) 2 ohms 2.67 ohms 4 ohms 8 ohms 16 ohms Hi-Z 70 V Hi-Z 100 V 4400 W 5000 W 4400 W 2300 W 1150 W 3300 W 4700 W 3000 W 3000 W 3000 W 1900 W 950 W 3000 W 3000 W 2000 W 2000 W 2000 W 1500 W 750 W 2000 W 2000 W Max output power single channel (all models) 1) 2 ohms 2.
15.
16. Warranty and support 16. Warranty and support 16.1. General This product is manufactured by Lab.gruppen, and it is warranted to be free from any defects caused by components or factory workmanship, under normal use and service, for a period of six (6) years from date of purchase from an authorized Lab.gruppen dealer. If the product fails to perform as specified during the warranty period, Lab.
16. Warranty and support 16.2.2. Factory service In the event a Lab.gruppen product requires factory service, you may contact Lab.gruppen’s service department for return instructions and a Return Authorization number. Please note for product return: 1. Use the original packing. 2. Include a copy of the sales receipt, your name, return address, phone and fax number, email address and description of the defect. 3. Mark the Return Authorization number on the outside of the packing.
16. Warranty and support Notes 36 D SERIES Tesira Quick Start Guide rev 2.2.
Notes Notes D SERIES Tesira Quick Start Guide rev 2.2.
Notes Notes 38 D SERIES Tesira Quick Start Guide rev 2.2.
Notes D SERIES Tesira Quick Start Guide rev 2.2.
Lab.gruppen adopts a policy of continuous improvement and product specification is subject to change. RPM, R.SMPS, PFC, CDM, BEL, UVL, CAFÉ, ESP, ISVPL, Iso–Float, Raised Cosine, MESA EQ, LimiterMax and LoadLibrary are trademarks of Lab.gruppen AB. All other trademarks remain the property of their respective owners. Copyright © 2016 MUSIC Group Innovation Sweden AB. All rights reserved. Item no. QSG-DSERIES-TESIRA labgruppen.