
Instruction Manual


13
Product Service 1-800-522-7658
Chapter 3: Getting Started
Removing the Shipping
Skid
LEAVE THE FUME HOOD
ATTACHED TO ITS SHIPPING SKID
UNTIL IT IS AS CLOSE TO ITS
FINAL LOCATION AS POSSIBLE.
MOVE THE HOOD BY USING A
SUITABLE FLOOR JACK, OR BY
PLACING A FURNITURE DOLLY
UNDERNEATH THE SKID. DO NOT
MOVE THE HOOD BY TILTING IT
ONTO A HAND TRUCK.
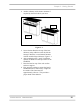
After you verify the fume hood components, move your
hood to the location where you want to install it. Then,
follow the steps listed next to remove the shipping skid
from your unit.
1. Remove the side panels by unscrewing the
Phillips screws.
2. Find the hardware (bolts, washers, nuts) that
attach the fume hood to the skid and remove
the hardware. Some hardware is on the
sides and some is on the back.
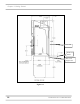
Sash Weight Release
To protect the fume hood from damage in shipment, the
sash weight has been secured to the back of the fume
hood with four (4) screws. Simply remove the screws
and make sure the sash cables are on the pulleys before
operating the sash. On models with more than one
sash, the sash weights have been secured to the
shipping skid with lag screws. Remove the weights
from the skid and attach them to the respective sash
cables using the hooks provided.
NOTE: THE SASH WEIGHT SIZED
WAS FOR THIS SPECIFIC HOOD
AND SHOULD NOT BE
EXCHANGED ON ANY OTHER
HOOD.
)
)