LaCinema Mini HD User Manual Table of Contents page 1 Table of Contents 1. Introduction................................................................................................................. 7 1.1. Minimum System Requirements......................................................................................................... 8 1.1.1. Windows Users.................................................................................................................... 8 1.1.2. Mac Users............
LaCinema Mini HD User Manual Table of Contents page 2 7. Playing Files From a Networked Media Server........................................................... 41 7.1. Network-Attached Storage (NAS).................................................................................................... 41 7.2. From Windows or Mac Computers.................................................................................................. 42 7.2.1. Packet Video TwonkyVision........................................
LaCinema Mini HD User Manual Table of Contents page 3 10.6.4. Shared Folders.................................................................................................................. 72 10.6.5. Auto Login........................................................................................................................ 73 10.6.6. Clear Account Information.................................................................................................. 73 10.7. Settings: Shutdown...............
LaCinema Mini HD User Manual Copyrights Copyright © 2010 LaCie. All rights reserved. No part of this publication may be reproduced, stored in a retrieval system, or transmitted in any form or by any means, electronic, mechanical, photocopying, recording or otherwise, without the prior written consent of LaCie. Trademarks Apple, Mac, and Macintosh are registered trademarks of Apple Inc. Microsoft, Windows XP, Windows Vista, and Windows 7 are registered trademarks of Microsoft Corporation.
LaCinema Mini HD User Manual This symbol on the product or on its packaging indicates that this product must not be disposed of with your other household waste. Instead, it is your responsibility to dispose of your waste equipment by handing it over to a designed collection point for the recycling of waste electrical and electronic equipment.
LaCinema Mini HD User Manual Foreword page 6 Operating Environment Temperatures ■■ Do not expose the LaCinema Mini HD to temperatures outside the range of 5° C to 30° C (41° F to 86° F). As high end audio/ video appliance, the LaCinema Mini HD has been designed with an efficient ventilation system. Allow 5 cm of clearance for airflow on all sides of the LaCinema Mini HD to prevent overheating. See Fig. 01.
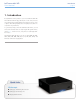
LaCinema Mini HD User Manual 1. Introduction Congratulations on the purchase of your new LaCinema Mini HD! The LaCinema Mini HD plugs directly into a wide array of audio/ visual equipment for instant playback of stored home movies, music or photos. And with high-quality video and quality audio, there’s no compromise on performance.
LaCinema Mini HD User Manual 1.1. Minimum System Requirements 1.1.1. Windows Users ■■ 500MHz Intel Pentium II processor or later ■■ Windows XP, Vista, or Windows 7 ■■ 256MB RAM ■■ USB interface port ■■ Internet connection (for downloading updates) 1.1.2. Mac Users ■■ G5 or later, or Intel Core Duo ■■ Mac OS X 10.4.
LaCinema Mini HD User Manual Introduction page 9 1.2. Supported Formats Video Codecs Photo File Types ■■ MPEG-1 ■■ Xvid ■■ PNG ■■ BMP ■■ MPEG-2 / HD ■■ H.
LaCinema Mini HD User Manual Introduction page 10 1.3. Box Content Your LaCinema Mini HD package contains the system tower and an accessories box containing the items listed below. 1. LaCinema Mini HD 2. Remote control 3. 2 x AAA batteries 4. Video composite + stereo cable 5. HDMI cable 6. USB cable 7. Ethernet cable 8. External power supply 9. Quick Install Guide 10.
LaCinema Mini HD User Manual Introduction page 11 1.5. Views of the LaCinema Mini HD 1.5.1. Front View 1. Infrared receiver – Receives the infrared signal from the remote control. Make sure the receiver is not obstructed. Stand-by button – By default, pushing this button puts the drive into stand-by mode or wakes it from standby (this behavior can be modified; see 1.7. Power Management for more details) 2. Blue status light – If the drive is connected to a TV or computer, this light will be on.
LaCinema Mini HD User Manual Introduction page 12 1.6. Cables and Connectors 1.6.1. A/V (Audio/Video) Cables These cables provide the audio and video signals to your stereo and TV. The LaCinema Mini HD supports the following standards: 1. Composite video + stereo audio – This is the most standard video connection (yellow) as well as left (white) and right (red) stereo audio inputs. If your TV only has a SCART connector, you can purchase a SCART-Composite adapter from your local retailer. 2.
LaCinema Mini HD User Manual Introduction page 13 1.7. Power Management This product features a low power mode which conserves electricity when the drive is not in use, and an instant on mode which optimizes the drive for responsiveness. By default, the LaCinema Mini HD is set to Instant ON mode, which means that when you press the power button on the remote control (Fig. 09) or the standby button on the front of the drive (Fig.
LaCinema Mini HD User Manual Using the Remote Control page 14 2. Using the Remote Control Some of the buttons of the remote control have different functions or no function at all depending on the type of file you are viewing. This chapter discusses the button functions for each type of file (movies, photos and music) and battery installation. 2.1. Battery Installation The remote control uses two AAA batteries.
LaCinema Mini HD User Manual Using the Remote Control page 15 2.2. Remote Control Key Index The LaCinema Mini HD’s remote control allows you to control the LaCinema Mini HD while its connected to your TV or home theatre center. Button 1. Infrared emitter 2. Stand-by 3. Previous track 4. Next track 5. Back (previous screen) 6. Select 7. Home menu 8. Play 9. Menu up 10. Left/rewind 11. Right/fast forward 12. Menu down 13. Stop 14. Pause 15. Access search menu 16. Option/info menu 17.
LaCinema Mini HD User Manual 2.2.1. Using the Remote Control page 16 Important Button Details 1. OK: This button allows you to confirm a selection. 2. Return: Press this button to return to the previous menu. 3. Settings button: This button is used to display the available settings or actions in the different media spaces. During playback, pressing this button will bring up a contextual menu with adjustable settings. Fig.
LaCinema Mini HD User Manual Setting Up: Transferring Files page 17 3. Setting Up: Transferring Files Via USB This chapter explains how to transfer files to the LaCinema Mini HD from your computer via the USB connection. If your files are located on external sources, such as a USB hard drive or a networked device, you can learn about how to play these files in chapter 6. Playing Files Located on USB Hard Drive.
LaCinema Mini HD User Manual Setting Up: Transferring Files page 18 3.1. STEP 1: Connect the USB cable 1. Connect one end of the USB cable to your computer (Fig. 16) and the other end to the small USB port on the rear of the LaCinema Mini HD. IMPORTANT INFO: To avoid data corruption, make sure to unmount your drive before disconnecting the USB cable. See section 3.4. STEP 4: Unmounting Your Drive for details. 3.2. STEP 2: Connect the Power Supply (Optional) Fig.
LaCinema Mini HD User Manual Setting Up: Transferring Files page 19 3.3. STEP 3: Transferring Files 1. Once you connect the USB cable (and, if necessary, the power supply), the drive will mount on your computer. Windows Users The drive will mount in My Computer/Computer (Windows users) (Fig. 18). Mac Users a. As the drive is preformatted in NTFS for immediate use with Windows, you will need to reformat the drive into HFS+ in order for the drive to mount on your Mac. Follow the steps in section 9.2.
LaCinema Mini HD User Manual Setting Up: Transferring Files page 20 3.4. STEP 4: Unmounting Your Drive As the LaCinema Mini HD behaves like an external USB device when it is connected to your computer via USB, you should unmount its volume before unplugging the USB cable. Windows Users From the System Tray (located in the lower right-hand side of your screen), click the Eject icon (a small green arrow over a hardware image) (Fig. 20). Fig.
LaCinema Mini HD User Manual Setting Up: Connecting to TV page 21 4. Setting Up: Connecting to TV This chapter explains how to connect your LaCinema Mini HD to your television in order to browser and play files. Once the connection is established, move on to section 5. Playing Multimedia Files for information on playing files. Setup consists of these steps: 4.1. STEP 1: Connect HDMI or Composite Cables 4.2. STEP 2: Connect the Ethernet Cable 4.3. STEP 3: Connect the Power Supply Composite Router 4.4.
LaCinema Mini HD User Manual 4.1.1. Setting Up: Connecting to TV page 22 HDMI (High-Definition) Connection 1. Connect the HDMI cable to your television’s HDMI port and to the corresponding port on the LaCinema Mini HD (Fig. 23). 2. Move on to the next step, 4.2. STEP 2: Connect the Ethernet Cable. 4.1.2. Composite Video & Stereo Audio Cable 1.
LaCinema Mini HD User Manual 4.1.3. Setting Up: Connecting to TV page 23 Optical Audio (S/PDIF) Connection In each of the above connection methods, it is possible to connect the LaCinema Mini HD to home theater systems by plugging the S/ PDIF cable (not included) into your digital amplifier via the LaCinema Mini HD’s digital optical audio connector. IMPORTANT INFO: Before connecting the cable, power off your digital amplifier. 1. Connect one end of a S/PDIF cable to your digital amplifier (Fig. 25). 2.
LaCinema Mini HD User Manual Setting Up: Connecting to TV page 24 4.2. STEP 2: Connect the Ethernet Cable NOTE: If you prefer to connect to the network wirelessly, skip this step. You will set up wireless in 4.4. STEP 4: Complete the Installation Wizard. 1. Connect the Ethernet cable to the Ethernet port on the back of the LaCinema Mini HD (Fig. 28). 2.
LaCinema Mini HD User Manual Setting Up: Connecting to TV page 25 4.3. STEP 3: Connect the Power Supply IMPORTANT INFO: If your power supply cable is already connected, turn on your TV and then skip to 4.4. STEP 4: Complete the Installation Wizard. 1. Plug one end of the power adapter cord into the back of LaCinema Mini HD and the other end into a power outlet (Fig. 29). 2. Turn on your television.
LaCinema Mini HD User Manual Setting Up: Connecting to TV page 26 4.4. STEP 4: Complete the Installation Wizard The first time you turn on the LaCinema Mini HD, a wizard appears to help you configure your settings. The wizard appears only the first time you turn on the LaCinema Mini HD unless you have reset drive. 1. Make sure the LaCinema Mini HD is connected to the TV, the power supply has been connected, and the TV is turned on. 2. A startup screen will appear during product initialization. 3.
LaCinema Mini HD User Manual Setting Up: Connecting to TV page 27 6. Select the type of network connection (Wireless or Ethernet) and click Next, or click Skip (Fig. 34). IMPORTANT INFO: If you choose the Ethernet (wired) connection, make sure you have connected the Ethernet cable as described in section 4.2. STEP 2: Connect the Ethernet Cable. 7. Select whether your network is assigned an IP address automatically of if you want to assign a static IP and click Next (Fig. 35). 8.
LaCinema Mini HD User Manual Playing Multimedia Files page 28 5. Playing Multimedia Files This chapter explains how to use the interface and to play files you’ve transferred to the LaCinema Mini HD’s internal storage. For information on accessing files located on external sources, refer to section 6. Playing Files Located on USB Hard Drive. To access your files, use the remote control to browse through the different media spaces – Movie, Photo, or Music.
LaCinema Mini HD User Manual Playing Multimedia Files page 29 5.1. Movie Space Navigate to the Movies Space using the Left and Right buttons. Then use the Up and Down buttons to browse within the Movie Space (Fig. 38). The Movie Space will display all of the supported video files that are accessible to the LaCinema Mini HD. Only files recognized as video files will be displayed. Music and Photo files will not be displayed. The way files are organized will be based on their location, i.e.
LaCinema Mini HD User Manual 5.1.1. Playing Multimedia Files page 30 Movie Space Options While a movie is playing, you can adjust several playback pa rameters. Press the Setup button to display or exit the on-screen menu, and use the Left and Right buttons to navigate to a setting and to enter the setting menu (see Fig. 41 for reference). Once you’ve selected the option you want, click the button. 1. Audio Languages: Select this option to modify the audio language (if alternates are available) 2.
LaCinema Mini HD User Manual 6. Change play mode: By pressing the Setup adjust the play mode as follows: Playing Multimedia Files page 31 button you can a. Normal (Fig. 45) b. Repeat one: The currently playing file will repeat continuously (Fig. 46) c. Repeat all: All files in the current folder will play in succession repeatedly (Fig. 47) 7. Display info: Click this button to display information about the currently playing file such as time remaining and time elapsed.
LaCinema Mini HD User Manual Playing Multimedia Files page 32 5.2. Photos Space Navigate to the Photo Space using the Left and Right buttons. Then use the Up and Down buttons to browse within the Photo Space (Fig. 48). The Photo Space will display all of the supported video files that are accessible to the LaCinema Mini HD. Only files recognized as photo files will be displayed. Music and video files will not be displayed. The way files are organized will be based on their location, i.e.
LaCinema Mini HD User Manual 5.2.1. Playing Multimedia Files page 33 Photo Space Options While a photo is being displayed, you can adjust several playback parameters. Press the Setup button to display or exit the onscreen menu, and use the Left and Right buttons to navigate to a setting and to adjust (see Fig. 51 for reference). Once you’ve selected the option you want, click the button. 1. Scroll: If you have zoomed into a video, select this icon to scroll around the video.
LaCinema Mini HD User Manual Playing Multimedia Files page 34 5.3. Music Space Navigate to the Music Space using the Left and Right buttons. Then use the Up and Down buttons to browse within the Music Space (Fig. 54). The Music Space will display all of the supported video files that are accessible to the LaCinema Mini HD. Only files recognized as audio files will be displayed. Photo and video files will not be displayed. The way files are organized will be based on their location, i.e.
LaCinema Mini HD User Manual Playing Multimedia Files page 35 ■■ Now playing: If a music file is playing, this icon will be present (Fig. 57). Clicking the button will take you to the Now Playing window. Click the button to stop music playback. To load a music file, select the file you wish to display and press the button. NOTE: It is possible to watch a photo slideshow while listening to music. To do so, first start the music.
LaCinema Mini HD User Manual 5.3.1. Playing Multimedia Files page 36 Music Space Options During playback, you can adjust several parameters (Fig. 59). Press the Setup button to display or exit the on-screen menu and configure the following settings. Once you’ve selected the option you want, click the button. 1. Normal : The currently playing file will repeat continuously (Fig. 60). 2. Repeat one: The currently playing file will repeat continuously (Fig. 61). 3.
LaCinema Mini HD User Manual Playing Multimedia Files page 37 4. Random: Files in the current folder or playlist will play in random order (Fig. 63). 5. Random repeat all: Files in the current folder or playlist will play in random order and in succession repeatedly (Fig. 64). Fig. 63 Fig.
LaCinema Mini HD User Manual Playing Multimedia Files page 38 5.4. Network Space Navigate to the Network Space using the Left and Right buttons. Then use the Up and Down buttons to browse within the Network Space (Fig. 65). From this menu, you can access media servers and computer shared folders located on your home network. 5.4.1. Media Servers Files located on networked UPnP/DLNA devices will appear in this section (Fig. 65). For more information on playing files from networked media servers, see 7.
LaCinema Mini HD User Manual Playing Files Located on USB Hard Drive page 39 6. Playing Files Located on USB Hard Drive Simply turn on and plug in external hard disks to the LaCinema Mini HD’s front USB port (Fig. 69, left) or rear device USB port (Fig. 69, right) to be able to play multimedia files on your television. See below for more details. TECHNICAL NOTE: It is not possible to transfer files from an external source to the LaCinema Mini HD using the TV interface.
LaCinema Mini HD User Manual Playing Files Located on USB Hard Drive page 40 4. Once connected, use the remote control to navigate to one of the Media Spaces (Movies, Photos, or Music). Files located on the external USB hard drive can be accessed under the USB1 heading (Fig. 70). 6.2. Compatibility In addition to hard disks, you can also connect card readers, digital cameras, or digital camcorders with USB Mass storage support.
LaCinema Mini HD User Manual Playing Files From a Networked Media Server page 41 7. Playing Files From a Networked Media Server You can stream content to your LaCinema Mini HD via the network connection from a networked UPnP or DLNA server located on a host computer (Mac or PC) or a network-attached hard disk (NAS). In addition, the LaCinema Mini HD can read files from any UPnP device connected your Ethernet or wireless network.
LaCinema Mini HD User Manual Playing Files From a Networked Media Server page 42 7.2. From Windows or Mac Computers Television You can install software on your computer which will enable it to act as a UPnP media server and stream files to the LaCinema Mini HD via your Ethernet or wireless network. Once the software has been installed and configured, files located on the host computer will appear in the various Spaces on the LaCinema Mini HD (see Fig. 73).
LaCinema Mini HD User Manual 7.2.2. Playing Files From a Networked Media Server page 43 Windows Media Player (WMP) IMPORTANT INFO: This software is compatible with Windows only. Television Install Windows Media Player (WMP) 11 to allow you to stream content to the LaCinema Mini HD via your Ethernet or wireless network. Follow these steps to configure the connection: 1. Make sure that the software is installed on your computer.
LaCinema Mini HD User Manual 7.2.3. Playing Files From a Networked Media Server page 44 Shared folders on your Computer After you modify some settings in your operating system, you can make files located in certain folders on your computer available for playback on your LaCinema Mini HD in Network > Shared Folders (Fig. 78). Follow the steps below according to your operating system. Windows XP 1. Log on to your computer as an administrator. 2.
LaCinema Mini HD User Manual Playing Files From a Networked Media Server page 45 Windows Vista 1. Locate the folder with the files you want to share. 2. Right-click the folder that you want to share, and then click Share (Fig. 82). 3. In the File Sharing dialog box, click the arrow to the right of the text box and click Everyone to share the files with any device on your network (Fig. 83, 1), and then click Add (Fig. 83, 2). 4.
LaCinema Mini HD User Manual Playing Files From a Networked Media Server page 46 Mac OS X 10.5.x 1. Open your System Preferences and select Sharing. 2. Click File Sharing in the left-hand column and check the box (Fig. 84, 1). 3. Click the + sign under the column Shared Folders (Fig. 84, 2), and add the folders you would like to share with the LaCinema Mini HD. 4. Select the first folder listed under Shared Folders.
LaCinema Mini HD User Manual Sharing Files Throughout Your Home Network page 47 8. Sharing Files Throughout Your Home Network Thanks to its support for the network protocols, your LaCinema Mini HD can share files located on its internal storage and on an external USB connected to its device port to computers and digital media players on your network. To manage files located on your LaCinema Mini HD from a networked PC or Mac, see section 8.1. Manage Files from a Networked Computer.
LaCinema Mini HD User Manual 8.1.1. Sharing Files Throughout Your Home Network page 48 STEP 1: Connect the Power Supply 1. Plug one end of the power adapter cord into the back of LaCinema Mini HD and the other end into a power outlet (Fig. 86). The LaCinema Mini HD may take a few seconds to boot. Move on to the next step, 8.1.2. STEP 2: Connect the Ethernet Cable. CAUTION: Only use the AC adapter supplied with your specific LaCie device.
LaCinema Mini HD User Manual 8.1.2. Sharing Files Throughout Your Home Network page 49 STEP 2: Connect the Ethernet Cable 1. Connect the Ethernet cable to the Ethernet port on the back of the LaCinema Mini HD (Fig. 87). 2. Connect the other end of the Ethernet cable into an available Ethernet LAN (local area network) port on your router or hub (refer to your router or hub’s documentation if necessary). Allow a few moments for your network to recognize the drive. Now move on to the next step, 8.1.3.
LaCinema Mini HD User Manual 8.1.4. Sharing Files Throughout Your Home Network page 50 STEP 4: Configure Network Settings In order for your LaCinema Mini HD to be assigned an IP address, which will allow it to connect to the network, you must either follow the setup steps in the Installation Wizard or configure network settings in the Settings Space.
LaCinema Mini HD User Manual 8.1.5. Sharing Files Throughout Your Home Network page 51 STEP 5: LaCie Network Assistant: Install LaCie Network Assistant software detects all LaCie network attached storage devices on your network and gives you easy ways to connect to or configure them. Once installed and running, LaCie Network Assistant (LNA) will appear in your task bar (Windows users) or in the menu bar (Mac users) and automatically search for storage devices on your network.
LaCinema Mini HD User Manual 8.1.6. Sharing Files Throughout Your Home Network page 52 STEP 6: LaCie Network Assistant: Transfer Files Windows Users: a. Select LaCie Network Assistant in Start/Programs. A Network Assistant icon will appear in the system tray (Fig. 95) and Network Assistant will automatically detect your LaCinema Mini HD. b. From the system tray, click the LaCie Network Assistant icon then click Connect Manually (Fig. 97). The volume will open in an explorer window. Fig. 95 c.
LaCinema Mini HD User Manual Sharing Files Throughout Your Home Network page 53 IMPORTANT INFO: Make sure that IPConf support is activated in the LaCie Network Assistant preferences (Fig. 98, PC users, and Fig. 99, Mac users). IMPORTANT INFO: If you want to remove files from the LaCinema Mini HD, you must empty the Trash or Recycle Bin after placing the files there. Otherwise, the files will still have a reference and occupy hard drive space.
LaCinema Mini HD User Manual 8.1.7. Sharing Files Throughout Your Home Network page 54 Alternative Network Connection Methods If your LaCinema Mini HD is connected to your home network, it is possible to access its volume without using the LaCie Network Assistant. Windows Users To access the volume in Windows, look in My Network Places, and select Microsoft Windows Workgroup. By default, the volume will be named MiniHD * (Fig. 100).
LaCinema Mini HD User Manual Sharing Files Throughout Your Home Network page 55 8.2. Play Files on Networked Media Players LaCinema is both a network media player and server. It can play content located on a local network server and also share the content located on its internal storage to other UPnP- and DLNA-compatible digital media players on your network. Examples include Playstation, XBox, DLNA TV or mobile phones, Kodak Photoframe, and Philips Streamium. 8.2.1.
LaCinema Mini HD User Manual 8.2.2. UPnP Usage Example: XBOX Here is a typical example using an XBOX: 1. Connect the LaCinema Mini HD to your computer using the USB cable (see 3.2. STEP 2: Connect the Power Supply (Optional) and 3.1. STEP 1: Connect the USB cable). 2. Load content on the LaCinema Mini HD’s internal storage. 3. If not already done, connect the LaCinema Mini HD to your TV (see 4.1. STEP 1: Connect HDMI or Composite Cables). 4.
LaCinema Mini HD User Manual Reformatting the LaCinema Mini HD page 57 9. Reformatting the LaCinema Mini HD Please read the following information on file system formats for Windows and Mac operating systems to determine if you need to reformat the LaCinema Mini HD. The LaCinema Mini HD is formatted in NTFS for immediate use with Windows. If you would like to reformat the drive, follow the steps below for your operating system.
LaCinema Mini HD User Manual Reformatting the LaCinema Mini HD page 58 9.1. Reformatting: Windows Users The process of formatting a drive on a computer running Windows XP, Windows Vista, or Windows 7 consists of two steps: (1) installing a signature on the drive, and (2) formatting the drive. These steps will erase anything that is on the disk. CAUTION: Following these steps will erase everything from the LaCinema Mini HD.
LaCinema Mini HD User Manual Reformatting the LaCinema Mini HD page 59 8. Click Next. 9. Click Next. 10. Click Next. 11. Click Next. 12. On the Format Partition window, select Quick Format. Click Next. 13. Click Finish to begin the formatting process. 14. Windows Disk Management will format and partition the disk according to your settings (Fig. 108), and your drive will appear in My Computer, ready to use.
LaCinema Mini HD User Manual Reformatting the LaCinema Mini HD page 60 9.2. Reformatting: Mac Users TECHNICAL NOTE: The LaCinema Mini HD is formatted in NTFS for immediate use with Windows. Mac users must reformat the drive into Mac OS Extended (NOT journaled). IMPORTANT INFO: You can alternatively choose to format the LaCinema Mini HD in MS-DOS (FAT32), which is compatible with almost all computers, keep in mind that you will not be able to transfer files larger than 4GB to the LaCinema Mini HD.
LaCinema Mini HD User Manual Settings Menu page 61 10. Settings Menu The LaCinema Mini HD Setup Space will help you to properly configure and customize your device. Access it at any time by clicking the Setup button. When the setup menu is shown, the playback will be automatically paused. Scroll through the Setup menu using the Up tons (Fig. 111). and Down but- To display the available options of a setup category, press the Right or button. To confirm your choice, press the button.
LaCinema Mini HD User Manual Settings Menu page 62 10.1.2. Display Resolution Choose a display resolution to match your television (default is Auto). 10.1.3. Aspect Ratio Depending on your television’s setup, choose either (Fig. 114) (note that Widescreen is the default setting): ■■ Normal ■■ Widescreen 10.1.4. Audio Output Fig. 114 Choose either (Fig.
LaCinema Mini HD User Manual Settings Menu page 63 10.1.5. NTSC/PAL Depending on your television’s configuration, choose either PAL or NTSC (Fig. 116) (note that PAL is the default setting). Alternatively, you can change this setting by pressing and holding the Setup button until the standard changes. ■■ NTSC ■■ PAL 10.2. Settings: Video 10.2.1. Video Sequence Choose from the following (Fig. 117): Fig.
LaCinema Mini HD User Manual Settings Menu page 64 10.2.2. Subtitle Font Size Choose from a range of 24pt to 40pt (Fig. 119): Fig.
LaCinema Mini HD User Manual Settings Menu page 65 10.3. Settings: Music 10.3.1. Music Sequence Choose from the following (Fig. 120): ■■ Repeat one: The currently playing file will repeat continuously. ■■ Repeat all: All files in the current folder will play in succession repeatedly. ■■ Random: Files in the current folder or playlist will play in random order. 10.3.2. Audio Track Display The parameter affects how audio tracks are displayed (Fig. 121). Choose from: Fig. 120 ■■ File name ■■ Title Fig.
LaCinema Mini HD User Manual Settings Menu page 66 10.4. Settings: Photo 10.4.1. Slideshow This parameter allows you to change the way pictures are played back (default is Normal) (Fig. 123): ■■ Normal ■■ Shuffle ■■ Repeat All ■■ Repeat All and Shuffle 10.4.2. Picture Scaling This parameter affects how the picture fits on screen (default is Keep as Original) (Fig. 124): Fig. 122 ■■ Keep as Original ■■ Fit to Screen ■■ Display in Full Screen Fig. 123 Fig.
LaCinema Mini HD User Manual Settings Menu page 67 10.4.3. Transition Effect This parameter allows you to modify the transition effects between photos (default is Normal) (Fig. 125): ■■ Normal ■■ Fade ■■ Random 10.4.4. Interval Time This settings allows you to set the amount of time a photo is displayed (default is 3 Seconds) (Fig. 126): ■■ 3 ■ 5 ■■ 10 ■ 20 ■■ 30 ■ 1 Minute Fig. 125 ■■ 5 Minutes Fig.
LaCinema Mini HD User Manual Settings Menu page 68 10.5. Settings: System 10.5.1. Language Choose your language. 10.5.2. Content Aggregation This setting activates or deactivates the file database, which allows you to browse files within each media type according to certain parameters (date, recent, etc.).
LaCinema Mini HD User Manual Settings Menu page 69 10.5.5. Additional Encoding Support Change this setting if you encounter incorrect text characters in file names in the drive operating system (default is Western Europe) (Fig. 130). 10.5.6. System Reset This feature allows you to reset the product to its factory defaults, erasing all files and reverting all settings (Fig. 131). Fig. 130 Fig.
LaCinema Mini HD User Manual Settings Menu page 70 10.5.7. About Clicking this feature will provide you with the firmware version of your LaCinema Mini HD (Fig. 132). 10.5.8. Update Device This feature allows you to update your LaCinema Mini HD’s operating system. Update using USB Key If the drive does not have internet access, you can download an update file from the LaCie website, copy it to a USB flash drive, and connect the drive to the front port of the LaCinema Mini HD.
LaCinema Mini HD User Manual Settings Menu page 71 10.6. Settings: Network 10.6.1. Network Setup: Wired / Wireless This page will display your LaCinema Mini HD’s network values, such as IP address (Fig. 136). To modify these values, click the Configure button. 1. Wired/Wireless: Choose whether your network connection is wired (Ethernet) or wireless (WiFi). 2.
LaCinema Mini HD User Manual Settings Menu page 72 10.6.2. Device Name This page allows you to change the device name of your LaCinema Mini HD. This is the name that will appear on your network. (Fig. 138). Use the arrow keys and the button to use the on-screen keyboard to type a new name. 10.6.3. Media Server Use this page to turn on or off the Media servers (default is OFF). For details on configuring your LaCinema Mini HD as a UPnP multimedia server, see section 8.2.
LaCinema Mini HD User Manual Settings Menu page 73 10.6.5. Auto Login This feature allows your LaCinema Mini HD to connect automatically to your wireless network (default is ON) (Fig. 141). If auto login is turned off, you will need to type your network password each time your drive is turned on. 10.6.6. Clear Account Information This function will delete your network login credentials from the LaCinema Mini HD’s operating system. Press OK to confirm (Fig. 142). 10.7. Settings: Shutdown Fig.
LaCinema Mini HD User Manual Technical Information page 74 11. Technical Information 11.1. HD File Format Compatibility The LaCinema Mini HD is fully compatible with the hi-def formats below, and can play any video encoded with these compression formats: MPEG-2 HD Xvid H.264 (MPEG-4 P10) MPEG-4.2 WMV9 VC-1 11.2. Optimizing Data Transfers Data transfers are the flow of data that accomplishes a task, usually related to moving data from storage to computer RAM, or between storage devices.
LaCinema Mini HD User Manual 12. Troubleshooting If your LaCinema Mini HD is not working correctly, please refer to the following checklist to determine the source of the problem. If you have gone through all of the points on the checklist and your LaCinema Mini HD still does not work properly, please check the FAQs that are regularly published on our website – www.lacie.com. One of these FAQs may provide an answer to your specific question.
LaCinema Mini HD User Manual Troubleshooting page 76 12.1. Troubleshooting the Television/Stereo Connection Problem Question Answer The drive is connected, but the TV doesn’t recognize it. Have you properly set the video out parameters in the Settings menu? Using the remote control, click the Info button to change from HDMI (default) to Composite Video Out mode. Checking the firmware version.
LaCinema Mini HD User Manual Troubleshooting page 77 12.2. USB Connection (Mac Users) Problem Question Answer The drive is not recognized by the computer. Does an icon for the drive appear on the desktop? There should be an icon for the LaCie drive on the desktop (unless you’ve set the Finder preference not to show External disks on the desktop). If the drive does not appear, follow the rest of the Troubleshooting tips to isolate the problem.
LaCinema Mini HD User Manual Troubleshooting page 78 Problem Question Answer The drive is not running noticeably faster when connected via Hi-Speed USB 2.0. Is the drive connected to a HiSpeed USB 2.0 port on your computer? Check to see that the Hi-Speed USB 2.0 drivers for both your host bus adapter and device have been installed correctly. If in doubt, uninstall the drivers and re-install them. Also, make sure that you are connected directly to a Hi-Speed USB 2.0 port on your computer.
LaCinema Mini HD User Manual Troubleshooting page 79 12.3. USB Connection (Windows Users) Problem Question Answer The drive is not recognized by the computer. Has the drive been formatted? Make sure that the drive has been formatted properly. Please see section 9. Reformatting the LaCinema Mini HD. Does your computer’s operating system support the file system? Check your computer’s documentation and see section 6. Reformatting the LaCinema Mini HD.
LaCinema Mini HD User Manual Troubleshooting page 80 Problem Question Answer The drive is not running noticeably faster when connected via Hi-Speed USB 2.0. Is the drive connected to a standard USB port on your computer? If your drive is connected to a standard USB port, this is normal. A HiSpeed USB 2.0 device can only operate at Hi-Speed USB 2.0 performance levels when it is connected directly to a Hi-Speed USB 2.0 port. Otherwise, the Hi-Speed USB 2.
LaCinema Mini HD User Manual Contacting Customer Support page 81 13. Contacting Customer Support Before You Contact Technical Support 1. Read the manuals and review section 12. Troubleshooting. 2. Try to isolate the problem. If possible, make the drive the only external device on the CPU, and make sure that all of the cables are correctly and firmly attached.
LaCinema Mini HD User Manual Contacting Customer Support page 82 13.1. LaCie Technical Support Contacts LaCie Asia Contact us at: http://www.lacie.com/asia/contact/ LaCie Australia Contact us at: http://www.lacie.com/au/contact/ LaCie Belgium Contact us at: http://www.lacie.com/be/contact/ LaCie Canada Contact us at: http://www.lacie.com/caen/contact/ (English) LaCie Denmark Contact us at: http://www.lacie.com/dk/contact LaCie Finland Contact us at: http://www.lacie.
LaCinema Mini HD User Manual Warranty Information page 83 14. Warranty Information This Limited Warranty applies only to hardware products manufactured by or for LaCie that can be identified by the “LaCie” trademark, trade name, or logo affixed to them. The Limited Warranty does not apply to any non-LaCie hardware products or any software, even if packaged or sold with LaCie hardware.