Oven User Manual LAM3208
Contents Safety information Page 3 Safety instructions Page 4 Product description Page 7 Before first use Page 7 Daily use Page 8 Using the accessories Page 9 Additional functions Page 10 Hints and tips Page 10 Care and cleaning Page 15 Troubleshooting Page 18 Installation Page 19 Energy efficiency Page 21 Your guarantee Page 22 Subject to change without notice.
Safety information Before the installation and use of the appliance, carefully read the supplied instructions. The manufacturer is not responsible for any injuries or damages that are the result of incorrect installation or usage. Always keep the instructions in a safe and accessible location for future reference.
• • • • • • Before maintenance cut the power supply. Ensure that the appliance is switched off before replacing the lamp to avoid the possibility of electric shock. Do not use a steam cleaner to clean the appliance. Do not use harsh abrasive cleaners or sharp metal scrapers to clean the glass door since they can scratch the surface, which may result in shattering of the glass.
• Do not let mains cables touch or come near the appliance door, especially when the door is hot. • The shock protection of live and insulated parts must be fastened in such a way that it cannot be removed without tools. • Connect the mains plug to the mains socket only at the end of the installation. Make sure that there is access to the mains plug after the installation. • If the mains socket is loose, do not connect the mains plug. • Do not pull the mains cable to disconnect the appliance.
unit or the floor. Do not close the furniture panel until the appliance has cooled down completely after use. Care and cleaning WARNING! Risk of injury, fire, or damage to the appliance. • Before maintenance, deactivate the appliance and disconnect the mains plug from the mains socket. • Make sure the appliance is cold. There is the risk that the glass panels can break. • Replace immediately the door glass panels when they are damaged. Contact the Authorised Service Centre.
Product description General overview 1 2 3 4 5 6 9 5 4 3 2 1 7 8 1 2 3 4 5 6 7 8 9 Control panel Knob for the oven functions Knob for the timer Knob for the temperature Temperature indicator / symbol Heating element Lamp Aqua cleaning container Shelf positions Accessories • Wire shelf For cookware, cake tins, roasts. • Grill- / Roasting pan To bake and roast or as pan to collect fat. • Trivet For roasting and grilling. Use the trivet only with the Grill- / roasting pan.
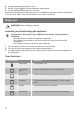
2. Let the appliance operate for 1 hour. 3. Set the function and set the maximum temperature. 4. Let the appliance operate for 15 minutes. Accessories can become hotter than usual. The appliance can emit an odour and smoke. This is normal. Make sure that the airflow in the room is sufficient. Daily use WARNING! Refer to Safety chapters. Activating and deactivating the appliance It depends on the model if your appliance has lamps, knob symbols or indicators: • The lamp comes on when the appliance operates.
Using the accessories WARNING! Refer to Safety chapters. Inserting the accessories Wire shelf: Push the shelf between the guide bars of the shelf support and make sure that the feet point down. Deep pan: Push the deep pan between the guide bars of the shelf support. Trivet and Grill- / Roasting pan WARNING! Be careful when you remove the accessories from a hot appliance. There is a risk of burns. You can use the trivet to roast larger pieces of meat or poultry on one shelf position. 1.
2. Put the deep pan into the oven on the necessary shelf position. You can use the trivet to grill flat dishes in large quantities and to toast. 1. Put the trivet into the deep pan so that the supports of the wire shelf point down. 2. Put the deep pan into the oven on the necessary shelf position. Additional functions Cooling fan When the appliance operates, the cooling fan activates automatically to keep the surfaces of the appliance cool.
General information • The appliance has five shelf positions. Count the shelf positions from the bottom of the appliance floor. • Moisture can condense in the appliance or on the door glass panels. This is normal. Always stand back from the appliance when you open the appliance door while cooking. To decrease the condensation, operate the appliance for 10 minutes before cooking. • Clean the moisture after each use of the appliance.
Food Top / Bottom Heat Time (min) Comments Temperature (°C) Shelf position Jam-tart 170 2 30 - 40 In a 26 cm cake mould Sponge cake 170 2 50 - 60 In a 26 cm cake mould Christmas cake / Rich fruit 160 2 90 - 120 In a 20 cm cake mould Plum cake1) 175 1 50 - 60 In a bread tin Small cakes one level 170 3 20 - 30 In a baking tray Small cakes two levels - - 25 - 35 In a baking tray Small cakes three levels - - 30 - 45 In a baking tray Biscuits / pastry stripes - one level
Food Top / Bottom Heat Time (min) Comments Temperature (°C) Shelf position Rich fruit cake 160 1 110 - 120 In a 24 cm cake mould Victoria sandwich 170 1 50 - 60 In a 20 cm cake mould Time (min) Comments 1) Preheat the oven for 10 minutes.
Meat Food Top / Bottom Heat Time (min) Comments Temperature (°C) Shelf position Beef 200 2 50 - 70 On a wire shelf Pork 180 2 90 - 120 On a wire shelf Veal 190 2 90 - 120 On a wire shelf English roast beef, rare 210 2 50 - 60 On a wire shelf English roast beef, medium 210 2 60 - 70 On a wire shelf English roast beef, well done 210 2 70 - 75 On a wire shelf Shoulder of pork 180 2 120 - 150 With rind Shin of pork 180 2 100 - 120 2 pieces Lamb 190 2 110 - 130 L
Food Quantity Pieces (g) Fillet steaks 4 800 Beef steaks 4 Sausages Temperature (°C) Time (min) Shelf position 1st side 2nd side max. 12 - 15 12 - 14 4 600 max. 10 - 12 6-8 4 8 - max. 12 - 15 10 - 12 4 Pork chops 4 600 max. 12 - 16 12 - 14 4 Chicken (cut in 2) 2 1000 max. 30 - 35 25 - 30 4 Kebabs 4 - max. 10 - 15 10 - 12 4 Breast of chicken 4 400 max. 12 - 15 12 - 14 4 Hamburger 6 600 max. 20 - 30 - 4 Fish fillet 4 400 max.
Stainless steel or aluminium appliances Clean the oven door with a damp cloth or sponge only. Dry it with a soft cloth. Do not use steel wool, acids or abrasive materials as they can damage the oven surface. Clean the oven control panel with the same precautions. Cleaning the door gasket • Regularly do a check of the door gasket. The door gasket is around the frame of the oven cavity. Do not use the appliance if the door gasket is damaged. Contact an Authorised Service Centre.
3. Close the oven door halfway to the first opening position. Then pull forward and remove the door from its seat. 4. Put the door on a soft cloth on a stable surface. 5. Hold the door trim (B) on the top edge of the door at the two sides and push inwards to release the clip seal. 2 B 1 6. Pull the door trim to the front to remove it. 7. Hold the door glass panel by its top edge and carefully pull it out. Make sure the glass slides out of the supports completely.
8. Clean the glass panel with water and soap. Dry the glass panel carefully. When the cleaning is completed, install the glass panel and the oven door. Do the above steps in the opposite sequence. The screen-printing zone must face the inner side of the door. Make sure that after the installation the surface of the glass panel frame on the screen-printing zones is not rough when you touch it. Make sure that you install the internal glass panel in the seats correctly.
What to do if... Problem Possible cause Remedy The oven does not heat up. The oven is deactivated. Activate the oven. The oven does not heat up. The fuse is blown. Make sure that the fuse is the cause of the malfunction. If the fuse is blown again and again, contact a qualified electrician. The lamp does not operate. The lamp is defective. Replace the lamp. Steam and condensation settle on the food and in the cavity of the oven. You left the dish in the oven for too long.
Building In 548 21 558 min. 550 114 16 20 600 min. 560 589 594 573 594 5 3 548 21 min. 550 20 590 558 16 114 min. 560 589 594 573 594 5 3 Securing the appliance to the cabinet A B Electrical installation The manufacturer is not responsible if you do not follow the safety precautions from the Safety chapters. This appliance is supplied without a main plug and a main cable.
Applicable types of cables for Europe: • Minimum size Cable / flex: 1,5 mm² • Cable / flex type: H07 RN-F, H05 RN-F, H05 RRF, H05 VV-F, H05 V2V2-F (T90), H05 BB-F Applicable types of cables for UK only Connection via Min. size cable / flex Cable / flex type Fuse Oven Control Circuit 2,5 mm² PVC / PVC twin and earth 15 A min. 20 A max. Energy efficiency Product Fiche and information according to EU 65-66/2014 Supplier's name Lamona Model identification LAM3208 Energy Efficiency Index 103.
When the cooking duration is longer than 30 minutes, reduce the oven temperature to minimum 3 - 10 minutes before the end of the cooking time, depending on the duration of the cooking. The residual heat inside the oven will continue to cook. Use the residual heat to warm up other dishes. Keep food warm Choose the lowest possible temperature setting to use residual heat and keep a meal warm.
867340213-A-372016 CN612070V1 If supplied, please stick your self adhesive product rating plate here, or make a note of the product serial number below for future reference Serial Number:......................................................