CONGRATULATIONS Congratulations, and thank you for purchasing your new Landon Appliances product. We are confident you will be pleasantly surprised with the simplicity of use. Before installing and operating your new appliance, please thoroughly read through this manual for product description and functions.
USAGE: 1. Doors must be closed properly at all times. Open door only when necessary in order to maintain optimum cabinet temperature and environment to preserve integrity of wine. 2. Place bottles on racks and avoid unnecessary movement until you are ready to enjoy your favorite bottle of wine. Maintaining minimal movement and vibration is essential in allowing wines to age to their fullest potential for maximum flavor.
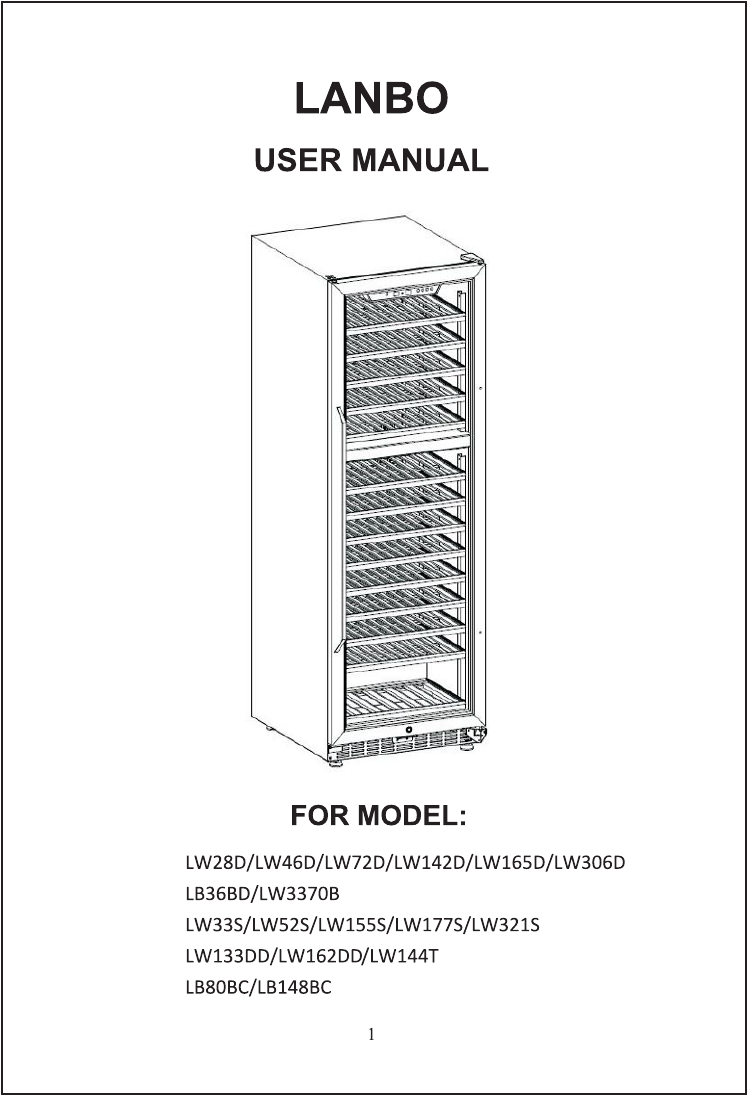
FOR MODELS: LW46D/LW72D/LW142D/LW165D/LW306D LW52S/LW1555/LW1775/LW321S LW133DD/LW162DD/LW144T LB148BC PLEASE NOTE: Included in Plastic Bag upper door hinge cover replacement part and LANDON User Manual Please store properly for future use.
CONTENTS Important Safety Instructions 6 Diagram of Product emo.
1. Important Safety Instructions: v Warnings v To traduce the risk of fire, electrical shock, or injury when using your appliance, follow these basic precautions: # Carefully read all instructions before operating appliance. #8 Keep children away from the wine cooler. Never allow children to operate, play with, or crawl inside the appliance. #8 Never clean appliance parts with flammable liquids. Fumes can create a fire hazard or explosion.
removing the adjustable shelves. Place the cooler close to a direct power source or outlet. Once wines have been stored Inside the cooler, avoid moving. Choose a location for your cooler that isn't too cold . The ambient room temperature should be above 50°F . Stand your cooler in a dry place — avoid areas of high moisture or humidity. Don't put the cooler In frosty or unprotected areas lke a garage or patio. Keep the cooler out of direct sunlight.
— Commercial restaurants, catering and similar applications Appearance and structure of the product may be different from the manual, however, this does not affect the normal use of the product. 2.
Support Bracket (9) Adjustable Feet (10) Upper Door Hinge {11} Glass Door With Lock (12) Door Seal (13) Handle (14) Lock Hook (15) Lower Door Hinge (16) Front Vent 2.
Small Wooden Shelf (10) Door Support Bracket (11) Adjustable Feet (12) Upper Door Hinge (13) Glass Door With Lock {14)Door Seal {15} Handle (16) Lock Hook (17) Lower Door Hinge (18) Front Vent 3.
Small Wooden Shelf (13) Door Support Bracket {14} Adjustable Feet (15) Upper Door Hinge (16) Glass Door With Lock (17) Door Seal (19) Lock Hook (20) Lower Door Hinge (21) Front Vent 5.
structure diagram: (1) Left Upper Dewar Hinges (2) Left Control Panel (3) Large Wire Shelf with Wooden Front (4) Left Glass Door with Lock/Gasket & Handle (5) Small Wire Shelf with Wooden Front (6) Left Lower Door Support (7) Front Vent (8) Right Upper Door Hinge (9) Right Control Panel {10) Wire Shelf (11) Left Glass Door with Lock/Gasket & Handle (12) Wire Basket (13) Right Lower Door Support Bracket (14) Adjustable Feet (15) Lock Hook 13
3.Installation Instructions © Before Using Your Wine Cooler / Beverage Cooler 3% Remove the exterior and interior packing. 38 Before connecting the wine cooler / beverage cooler to the power source, let it stand upright for approximately 24 hours. This will reduce the possibility of a malfunction in the cooling system from handling during transportation. #8 Clean the interior surface with lukewarm water with a soft cloth. 8 The cooler is specially designed for wine storage, please do not put in other goods.
5. Operation Instruction 4.1 Control Panel Below (LW33S/LW52S/LW155S/LW177S/ LW321S/LB30BC/LB148BC): O Display Windows RUN light: Indicator light of compressor working. While the compressor operating, the red light Is on. While It stops operating, the red light Is off. “SETTING : Display of the temperature you set.
CIF Button: Celsius and Fahrenheit conversion button; ON/OFF button: Power on and off button; Press the button for 3 seconds, to start; press it 3 seconds again, to stop. 4.2 Control Panel Below(LB36BD): ioe a ew wi Lettuce © Display Windows + RUN light : Indicator light of compressor working. While the compressor Is operating, the red light is on. When it stops operating, the red light is off.
4.3 Control Panel Hod mee © Display Windows ‘CHAMBER: Display of the setting and actual temperature Inside the cabinet; The range is or “CIT light: When the TC light Is on, It Indicates Celsius temperature; When the T light is on, it indicates Fahrenheit temperature. O Button Operation “4 +¥ uw" Button: Temperature setting button; Once you press “ + ° button, the temperature Increase you want to decrease the temperature, press the button, the temperature decreased 1°C or 1°F each time.
4.4 Control Panel Below ( only for model LW144T): \ Eee / i {Upper Control Panel) © Display Windows CHAMBER: Display of the actual temperature of the upper chamber. The range is 0C~37C or 32F~99F. O Button Operation '" Button: Temperature setting button. Each time you press the button button the temperature Increased 1°C or 1°F. Or press “° button the temperature decreased 1C or 17F; Setting range is between 5C~18C or 41TF~64F of upper zone. Gro {Middle and Lower Control Panel) © Display Windows .
O Button Operation * “47 Button: Temperature setting button; If you need setting the temperature of middle chamber, press the @ button one time, the screen of middle chamber will be flashing, then press set the temperature of middle chamber, setting range is between 5C~12C you need setting the temperature of lower chamber, press the button two times, the screen of lower chamber will be flashing, press set the temperature of lower chamber, setting range is between or 54 + LIGHT Button : Cabinet light control
4.5 Control Panel Below (LW28D/LW46D/LW72D/LW142D/ LW165D/LW306D): © Display Windows RUN light: Indicator light of compressor working. While the compressor operating, the red light is on. While it stops operating, the red light is off. UPPER CHAMBER: Display of the actual temperature of the upper chamber.
Note: This series of wine coolers has its delay protection function. The compressor will start fo work about 3 to 5 minutes after it is power has been connected or powered on. Please use the wine cooler under the T type of climate. The temperature inside the cabinet will fluctuate and influence the refrigerating effect if the surrounding temperature is too high or too cold.
O Shelf Change LB80BC, LB148BC, LB36BD, LW3370B Pull out the wire shelf, make the cove position toward to the pillar at two sides of the cabinet, then lift up and pull out the wire shelf. Pull out the glass shelf, make the cove position toward to the pillar at two sides of the cabinet, then lift up and pull out the glass shelf.
Placement and storage of wines Several common layouts of wines: Your cabinet was designed to store a maximum number of bottles adequately. The shelves are designed to accommodate wines uniformly.
© Reversing the door swing of your appliance (only suitable for model LW46D,LB148BC,LW72D,LW142D,L W165D,LW352S,LW1558,LW177S, LW144T) The unit is delivered to you with the door opening from the left side (hinge on right side). The door of this appliance is capable of opening from either the left or right side. To reverse the door swing of your cooler and open from the right side, please follow the instructions and diagram as follows.
Figures 9: NOTE: All parts removed must be saved to allow the door swing to be reversed 1.Use the sharp tools to pry the decoration nail on the top of the cabinet and the cap of door spindle carefully. (Fig 1) 2. Pan the door to an angle, unscrew the screw of the door hinges cover, remove the cover of the upper door hinge; then unscrew all the screws on the upper door hinge. Be careful to hold the glass door firmly after removing the screw and take off the door.
3.Remove the screw of lower door hinge and the left side screw of the front vent (Fig 3); and then install the lower door hinge at the designated position on the opposite side (Fig 4) 4.Remove the screw of door handle, then remove the bottom screw of left side of the door and remove the lower supporter of the door(Fig 5); Install the lower support of the door to the opposite 6) 5.
#X KX RO Power Failure Most power failures are corrected within a few hours and will not affect the temperature of your appliance if you minimize the number of times the door is opened. If the power is going to be off for a longer period of time, you need to take the proper steps to protect your contents. Vacancy time Short vacancy: Leave the Wine Cooler off for around three weeks. Long vacancy: If the appliance will not be used for several months, remove all items and tum off the appliance.
6. Troubleshooting You can solve many common wine cooler problems easily, saving you the cost of a possible service call. Try the suggestions below to see if you can solve the problem before calling the service. PROBLEM POSSIBLE CAUSE Solution Not plugged in roan ONION Refrigerate dean ret The appliance le fumed OFF at the control Chock and mask ere the paws pig la wall connected mopier Ska sheeting for help para The rut breaker hae tipped or a fuse has.
WARRANTY INFORMATION Please speak fo your retailer before calling Landon International Inc. If you did not purchase your refrigerator directly from LANDON. Limited warranty — If your refrigerator is not operating properly, LANDON reserves the right to repair or replace the refrigerator. LANDON may request the consumer to contact a local refrigeration company to service the refrigerator. All cost for labor and materials are covered for 12 months whole parts and compressor covered for 36 months warranty.