
User guide
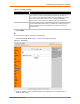
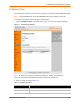
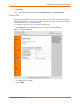
Table Of Contents
- EDS1100/2100 User Guide
- 1: About This Guide
- 2: Overview
- 3: Installation of EDS1100
- 4: Installation of EDS2100
- 5: Using DeviceInstaller
- 6: Configuration Using Web Manager
- 7: Network Settings
- 8: Line and Tunnel Settings
- 9: Terminal and Host Settings
- 10: Services Settings
- 11: Security Settings
- 12: VIP
- 13: Maintenance and Diagnostics Settings
- 14: Advanced Settings
- 15: Branding the EDS1100/2100
- 16: Updating Firmware
- A: Technical Support
- B: Binary to Hexadecimal Conversions
- C: Compliance
- Index
13: Maintenance and Diagnostics Settings
EDS1100/2100 User Guide 114
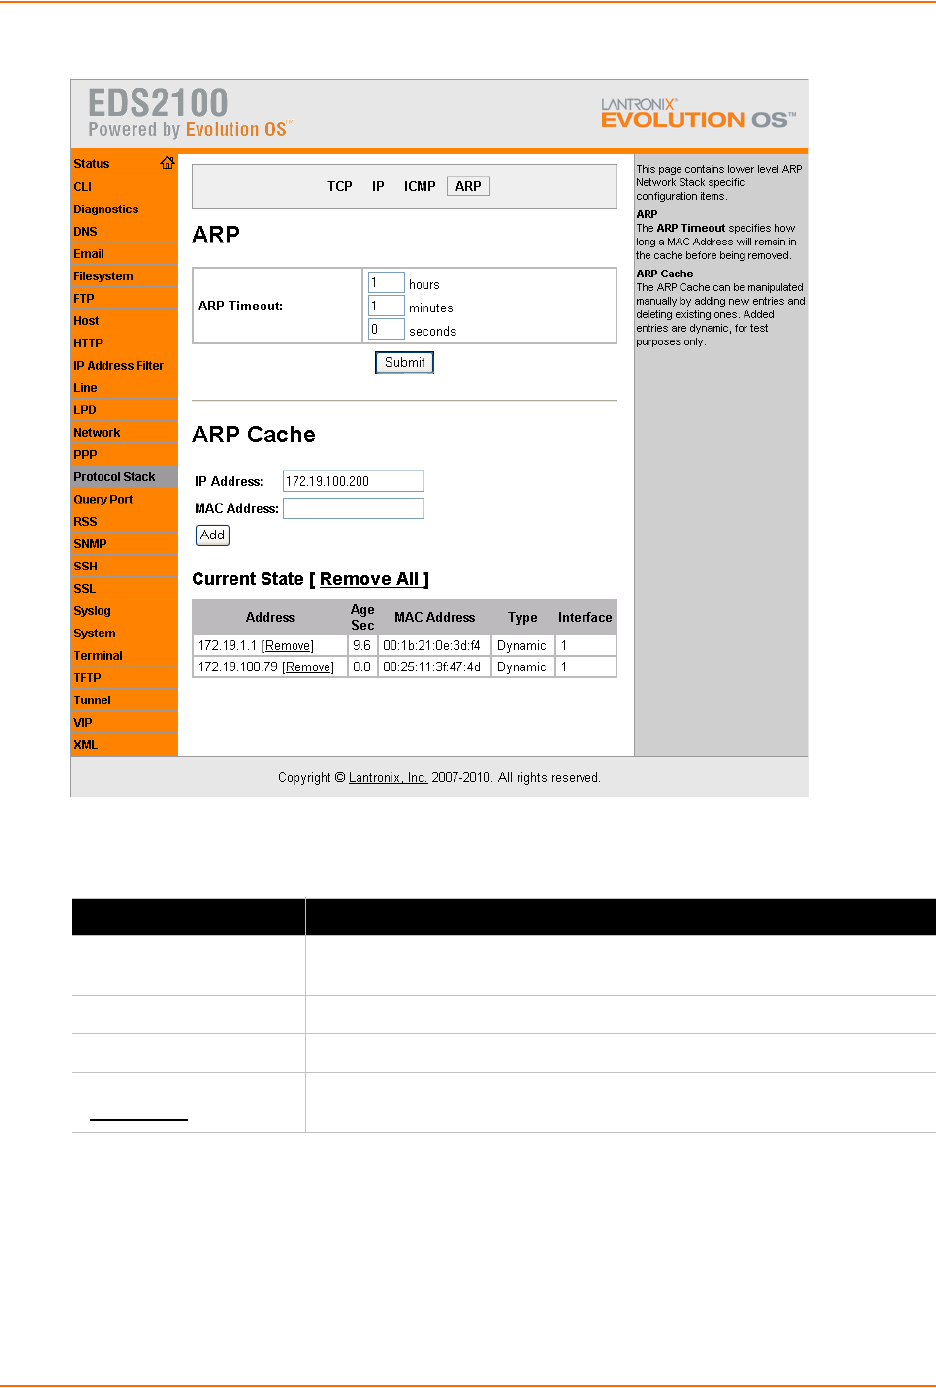
Figure 13-6 ARP Web Page
1. Enter the fields in Table 13-3.
2. Click Submit for ARP or click Add for ARP Cache.
Note: Both the IP and MAC addresses are required for the ARP cache.
Table 13-3 ARP Web Page Fields
Field Description
ARP Timeout Enter hours, minutes and seconds. This is the maximum duration an address
remains in the cache.
IP Address Enter the IP address for the ARP cache.
MAC Address Enter the MAC address to add to the ARP cache.
Current State
[Remove All
]
Removes all entries in the ARP cache or click [Remove] in the specific table
entry to remove that entry.