
User guide
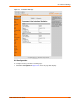
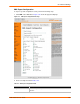
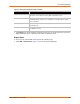
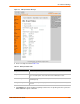
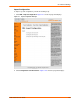
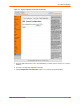
Table Of Contents
- EDS1100/2100 User Guide
- 1: About This Guide
- 2: Overview
- 3: Installation of EDS1100
- 4: Installation of EDS2100
- 5: Using DeviceInstaller
- 6: Configuration Using Web Manager
- 7: Network Settings
- 8: Line and Tunnel Settings
- 9: Terminal and Host Settings
- 10: Services Settings
- 11: Security Settings
- 12: VIP
- 13: Maintenance and Diagnostics Settings
- 14: Advanced Settings
- 15: Branding the EDS1100/2100
- 16: Updating Firmware
- A: Technical Support
- B: Binary to Hexadecimal Conversions
- C: Compliance
- Index

14: Advanced Settings
EDS1100/2100 User Guide 136
3. Click Export. The groups display if exporting to the browser. If exporting to the file system, the
EDS1100/2100 requests a filename for the XML configuration record.
Export Status
To export system status in XML format, perform the following steps.
1. Click XML > Export Status. Figure 14-6 shows the page that displays.
Export to local file Select this option to export the XCR data to a file on the device. If you select
this option, enter a file name for the XML configuration record.
Export secrets Only use this with extreme caution. If selected, secret password and key
information will be exported. Use only with a secure link, and save only in
secure locations.
Lines to Export Select the instances you want to export in the line, LPD, PPP, tunnel, and
terminal groups.
Groups to Export Check the configuration groups that are to be exported to the XML
configuration record.
Table 14-3 XML Export Configuration Fields (continued)
Field Description