STS65BT OWNER’S MANUAL Mobile Video System VOL AV IN • • • • • • • • • 6.5 Inch Touch Screen Monitor DVD Player with Stereo Radio Multi-subtitle/audio Languages Function Multi-angle Function Parental Control Bluetooth Function USB Interface IPOD Ready Remote Control www.lanzar.
FEATURES Compatible with PAL DVD (Video CD) and NTSC DVD (Video CD) This player can play discs recorded in either PAL or NTSC format. Use Authorized Service Centers Do not attempt to disassemble or adjust this precision product. Please refer to the Service Center list included with this product for service assistance. • A single chip now integrates all major DVD playback circuit functions including MPEG2 decoder, video D/A converter, and audio decoders.
CONTENTS FEATURES ....................................................................................................2 SAFETY INFORMATION...............................................................................4 DISC NOTES .................................................................................................5 INSTALLATION .............................................................................................6 THE PLAYER.................................................................
SAFETY INFORMATION CAUTION: MOBILE DVD PLAYER IS A CLASS I LASER PRODUCT. HOWEVER THIS MOBILE DVD PLAYER USES A VISIBLE/INVISIBLE LASER BEAM WHICH COULD CAUSE HAZARDOUS RADIATION EXPOSURE IF DIRECTED. BE SURE TO OPERATE THE MOBILE DVD PLAYER CORRECTLY AS INSTRUCTED. USE OF CONTROLS OR ADJUSTMENTS OR PERFORMANCE OF PROCEDURES OTHER THAN THOSE SPECIFIED HEREIN MAY RESULT IN HAZARDOUS RADIATION EXPOSURE. DO NOT OPEN COVERS AND - DO NOT REPAIR YOURSELF. REFER SERVICING TO QUALIFIED PERSONNEL.
DISC NOTES Disc formats supported by this player DVD 12 cm disc (Single-sided disc only) Label side up Video CD 12 cm disc Do not touch the underside of the disc CD 12 cm disc MP3 12 cm disc Do not bend Handling and Cleaning • Dirt, dust, scratches and warping disc will cause misoperation. • Do not place stickers or make scratches on discs. • Do not warp discs. • A disc should always be kept in its case when not in use to prevent from damage. • Do not place discs in the following places: 1.
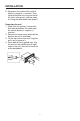
INSTALLATION Method A: TAKE OUT SCREW BEFORE INSTALLATION Before install the unit, please remove the two screws. effective. Bending open the appropriate tabs behind the dashboard to secure the sleeve in place. Dashboard Take out screw before installation Tabs Screwdriver Sleeve Installing the unit Be sure you test all connections first, and then follow these steps to install the unit. 1.
INSTALLATION 8. Reconnect the cable to the vehicle battery's negative (-) terminal. Then replace the outer trim ring and install the unit's front panel. (see the steps of “using the detachable front panel”). Removing the unit 1. Make sure the ignition is turned off, and then disconnect the cable from the vehicle battery's negative (-) terminal. 2. Remove the metal strap attached the back of the unit (if attached). 3. Lift the top of the outer trim ring then pull it out to remove it. 4.
INSTALLATION Method B: Install the unit onto the car bracket using the supplied screws (M5X8mm). The holes of the car bracket to use will differ depending on the car model.
THE PLAYER LOCATION OF THE KEYS 1 2 VOL 8 3 4 5 AV IN 7 6 1. Microphone 2. POWER Button 3. VOL^/v 4. Eject Button/MENU 5. Remote Sensor 6. Reset Button 7. AV IN 8.
ELECTRICAL CONNECTION RGB Input FUSE SUBWOOFER (GREEN) COAXIAL (ORANGE) (GREEN) (YELLOW) L IN (WHITE) R IN (RED) VIDEO IN (YELLOW) (BLACK) R OUT (RED) L OUT (WHITE) (GREY) VIDEO OUT (YELLOW) (RED)Rch PINK FRONT RCA CABLE(BROWN) NEXT TO IT (PARKING SWITCH) BLUE (WHITE)Lch (WHITE)Lch RED 1A REAR RCA CABLE(GREY) (RED)Rch YELLOW BLACK (FOR RCA LINE OUT VERSION ONLY) FRONT Lch SPEAKER REAR Lch SPEAKER WHITE GREY WHITE/BLACK GREY/BLACK GREEN VIOLET GREEN/BLACK VIOLET/BLACK + + - POWE
REMOTE CONTROL LOCATION AND FUNCTION OF KEYS 2 1 7 21 34 33 29 3 22 19 20 16 18 17 11 12 14 13 36 4 8 15 31 9 30 26 35 24 27 23 28 10 5 25 6 32 11
REMOTE CONTROL 1. 2. 3. EQ 4. SUBT/BACK 5. ANG 6. DISP 7. MODE 8. SETUP 9. PROG 10. AUD 11. TITLE(DSP) 12. MENU 13. / , / CH+/14. OK 15. 16. 17. / 18. / / 19. 20. 21. 0-9 22. MO/ST -/-23. P/N PIC 24. S-M 25. ZOOM 26. VOL+ 27. GOTO AUTO 28. RDM (SHF) 29. LOC(CLEAR) 30. VOL31. RPT 32. A-B 33. AS/PS 34. BAND(PBC) 35. MUTE 36. DVD-AUDIO Press POWER to turn the unit ON or OFF. Shortly press to eject the disc, Press and hold it, the unit will return to the Main Menu.
REMOTE CONTROL Preparing the Remote Control Inserting the Batteries 1. Open the battery compartment cover. 2. Insert the new batteries. Make sure that the positive and negative terminals of the batteries are oriented as indicated. 3. Close the cover • Battery: One button cell lithium battery. Using the Remote Control Point the remote control towards the remote control signal receiver on the player front face. Operation angle: About ± 30 degree in each the direction of the front of the remote sensor.
OPERATION BASIC OPERATION Turn the Unit on/off When all the connection is finished, Shortly press POWER button on the front panel or on the remote control will turn the unit on. And the screen will be automatically drawn to 30 angle with the unit. Shortly press on the front panel or on the remote control to turn the unit off. And the screen will be drawn in automatically. submenu. In submenu tap or press BACK button will return to the previous menu. A.
OPERATION Note: In System setup menu, press PROG button on the remote control can change the wallpaper. Use / buttons or tap the corresponding icon to select the items, Then use / buttons on the C. Radio Setup / to change remote control or tap the setup. In this menu, you can change Time Disp On or Off and Switch Beep On or Off. Note: If you set time disp is on, when you turn off the unit, the current time will be displayed on the center of the screen like followed.
OPERATION Picture adjustment Press PIC button on the remote control will enter PICTURE menu like followed: Reset function There is a reset button on the front panel, It must be activated with either a ballpoint pen or thin metal object. The reset button is to be activated for the following reasons: 1. Initial installation of the unit when all wiring is completed. 2. All the function buttons do not work. 3. Error symbol on the display.
OPERATION next/previous track. (PBC-playback control), / buttons may be unavailable. DVD Video Menu Play 1. When playing a DVD disc, press TITLE button on the remote control will stop the playback and return to the TITLE menu that is stored in DVD disc. The disc will be played automatically and stop at menu picture. 2. Use / , / cursor buttons to move between the highlight bars in the menu. 3) Press OK button on the remote control to confirm the selected item.
OPERATION - Some discs only contain one soundtrack language. Repeat Play/Paragraph Repeat Play 1. When you want to repeat playing the whole disc or track or a chapter in the disc. Press REPEAT button repeatedly to select different repeat mode. For different kinds of discs, press REPEAT button has different effects. For DVD: REP:[CHAPTER] REP:[TITLE] Program Play In program play mode, you can play the track in your desired sequence. To program play a disc, please follow the next instructions.
OPERATION Note: When playing tracks you programmed, press PROG button to enter the program interface, press PROG for second time will exit the menu and the unit will resume to normal play. When you want to return to program play, press PROG to enter program interface and select PLAY then use OK button to confirm, it will begin program play. And “PROG PLAY” will appear on the screen.
OPERATION that the parental setting allows. A section of the disc can have several different sequences that vary in parental control level. In the above example of a disc with parental control, the player will show a different section depending on the parental control level set in the player’s menu. In this way parents can control the content of films and there is no indication that any censorship has occurred.
OPERATION AV OPERATION Switching to AV Mode 7) C: Display the played time of the current chapter. 1/1 ENG 5.1CH 3/4 FRE OFF 8) Display the current disc’s LANGUAGE, AUDIO TYPE, SUBTITLE LANGUAGE and PLAY ANGLE. FOR VCD: CD TRK 4/16 HDCD C 00:00:08 CD TRK 4/16 HDCD C -00:03:31 CD TRK 4/16 HDCD T 00:13:21 CD TRK 4/16 HDCD T -00:58:04 Tap icon on the Main Menu will enter AV mode. And the following interface will be displayed: The meaning of the menu is the same with the DVD menu above.
OPERATION RADIO OPERATION Switching to Radio Mode Press MODE button on remote control or press MOD button on the DVD unit or tap icon on the touch screen to select radio mode. In radio mode, the following information will appear on the display. Selecting the Frequency Band Press BAND button on remote control to select desired band.
OPERATION BLUETOOTH OPERATION Bluetooth Mode Selection icon on Main Menu will enter Tap Bluetooth mode. And the Bluetooth interface will be displayed: Dial the Phone Number 1) Dail a phone number manually In Bluetooth menu, tap the numeric icons to input the phone number then tap to confirm. Or you can input the phone number by pressing the numeric buttons on the Pairing Tap icon on the screen to enter BT Setup interface: remote control then tap to confirm.
OPERATION Phonebook Operation ——Delete the selected item. Tap icon on the Bluetooth menu will enter phonebook operation interface. ——Go to the previous page. ——Go to the next page. ——Display the current page number. 3) Check the received call Tap bar the received call will be list on the screen. The interface is like Find Call interface. You can select a received phone number then 1) Add a new phone number Tap interface: to enter the following tap icon to dial.
TROUBLE SHOOTING If it appears that your DVD unit is faulty, first consult this checklist. It may be that something simple has been overlooked. • Check if the volume is minimum, and adjust the VOL+ to increase the volume level. Under no circumstances should you try to repair the player yourself, as this will invalidate the warranty. Only qualified service personnel can remove the cover or service this player.
SPECIFICATIONS GENERAL Power Supply Requirements Maximum Output Power Current Drain : DC12 Volts, Negative Ground : 4 x 80 Watts : 15 Ampere (max.) RADIO FM Frequency Coverage 87.5 to 107.9 MHz Sensitivity (S/N = 30 dB) 4 μV Image Rejection > 45 dB Stereo Separation > 25 dB RD PSG < 38 dB AM Frequency Coverage 530 to 1710 KHz Sensitivity (S/N = 20 dB) 36 dBu Image Rejection 45 dB DVD Signal System Discs Played : Compositive video 1.