
Installation Guide


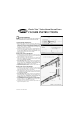


202220565 CLASSIC-VIEW SERIES
11
C L A S S I C - V I E W
™
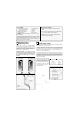
T R O U B L E S H O O T I N G
Aluminum doors must have the surface scrubbed with steel wool, sand paper (very fine grit), or a
ScotchBrite pad to remove the sheen (gloss), then cleaned with a solvent to remove any grease or
oils. Apply an epoxy primer. Top coat with a premium grade, solvent-based acrylic lacquer or
solvent-based enamel paint. For best results, have it painted at a professional body shop.
Only paint finishes applied by Larson Manufacturing are covered under the company's warranty.
SYMPTOM POSSIBLE CAUSE SOLUTION
A Door binding.
Hinge to Jamb screws are too tight.
Door opening out of square.
Expander dragging on threshold.
Hinge z-bar is bent.
Back off screws 1/4 of a turn.
Square up opening.
Raise expander so that bottom of sweeps only
touch top of threshold.
Replace.
B
Door squeaking
when opening.
Hinge to Jamb screws are too tight.
Door opening is out of square.
New hinges are tight.
Hinges rubbing against wood jamb.
Back off screws 1/4 of a turn.
Square up opening.
Lubricate with 3-in-1 oil, cooking oil, or a silicone
spray lubricant.
Chisel wood out from under individual hinge.
Use a utility knife.
C
Sash retainers
fall out.
Warped or deformed.
Improper installation.
Replace. Call 1-888-483-3768
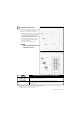
With retainer strips removed, center glass
or screen assembly in the opening. To install the
retainers, start from the top or the bottom and
continue to snap it into place from that end.
Refer to the picture in the instruction manual.
D
Door leaking.
Screen in position for top ventilation.
(Self-Storing models)
Drainage holes blocked.
Move screen to bottom ventilation.
Inspect drainage holes located on outside of door
below window.
E
Door not closing
(slowly or not at all).
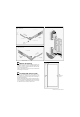
Unpainted portion of closer rod
extended beyond 1/16"
Readjust door bracket to allow only 1/16" or less of
the unpainted portion of closer rod showing.
To double check: Close door, measure distance from
center of hole in closer rod to the center of the
OUTER hole on the closer itself—distance should
be: (12-3/4" for a V150 closer) and (12-11/16" for a
V920 closer)
Recheck instruction manual for proper closer
installation. Proceed by removing the closer
adjusting screw from the closer. Fully open door and
allow it to close (door should slam shut). Reinstall
closer adjusting screw allowing only 1 or 2 threads of
the screw to be turned in. Fully open door and allow
the door to close. Adjust the screw 1/4 to 1/2 turn to
achieve the desired closing speed sufficient to latch
door. NOTE: On two closer models adjust each
closer individually (with the other closer being
disconnected from the door); the closing speed
should be the same for each closer). If more latching
force is desired, the jamb bracket may be moved up
to 1" away from the door (rather than the
recommended 1/4"). NOTE: moving the jamb bracket
further from the door reduces the door opening.
Raise expander or leave window open to allow air to
escape.
Air pressure between prime door and
storm door (back pressure being created).
Closer speed improperly adjusted.