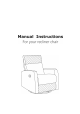
Congratulations! This product will provide many years of service if you adhere to the following guidelines for assemble, operation , care and maintenance . Please read all instructions carefully before assembling and using this recliner chair. Improper assembly can result in damage to your chair or cause harm to your child. Proper assembly is critical to ensure a safe and comfortable end result.
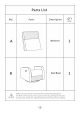
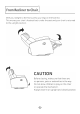
Assembly Instruction Attach the Backrest to the Seat Base Part A � (Backrest) Part B (Seat Base) Push \ 0 Slide the backrest female brackets onto the backrest male Brackets. Push until you hear a click on both sides. This indicates that the backrest locks into place.
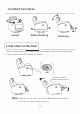
Comfort Functions Swivel Glider/Rocking Reclining [ From Chair to Recliner] When sitting on the chair, simply pull the handle located at the outside right armrest, the chair will be made to recliner d Note: Press your back against the backrest Before first use, the chair should be tested to ensure that all functions are working correctly.
l
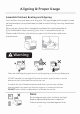
Aligning & Proper Usage Assemble finished, Beating and Aligning Your recliner chair just went on a long trip. During storage and transport, some upholstered parts may have been pushed in and stitching lines may have been moved. Take a couple of minutes to straighten and beat the upholstered parts. If you followed all steps correctly, your chair is now perfectly set up. Please read all further instructions on your chair's functions and cover maintenance. A.
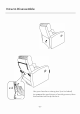
How to Disassemble x2 Use your hand or a strong tool (not included) to upwarp the small piece of metal grooves, then the backrest will be pulled out.
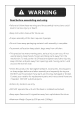
Contact Information We're here to help. For any missing or damaged parts or installation assistance, please call us! We will use the information provided on-line to contact you only if there is a safety alert or recall of this product. We will not sell, rent, or share your personal information. You will need below codes when contacting customer services.