
Installation Guide


LMW - Colony Collection Owner’s Manual
it. Fill your tub to the overflow and if you have a pump and/or blower, operate it for 15 minutes. Inspect the
entire unit during and after for leaks. Any defects that are discovered MUST be reported at this time to
qualify for warranty coverage. Qualified plumbers and electricians MUST be used for all tub connections to
assure you follow local codes and acquire any permits required for the install. NEVER LIFT the unit by any
portion of the plumbing or stand in the unit during installation as this may cause serious damage to the unit.
*It is VERY important that your tub is supported by its base and not the rim.
*Take your installation measurements directly from your tub, as they may vary slightly from our literature.
When installing the drain fitting, you will notice it protrudes below the bottom of the tub. You will need to
allow clearance in the sub-floor for this dimension. Now you are ready to place your tub in its desired
location. Check the unit and sub-floor to ensure it is level. If it is not, insert wood shims between the sub-
floor and support base. Mark stud wall underneath the tub’s return lip. Remove the unit from position and
install a 1x stop to stud wall for lip to rest on to prevent deflection. At this time, check to see if any wiring
needs to be completed (see wiring instructions).
Since a great variety of installations are possible with this bath, special framing procedures may be needed. A
ledge under the rim, or an apron without a ledge, may be constructed as required. Where installation is
planned against a wall, install the tub against the studs as indicated, adding blocking below the rim to prevent
deflection or movement of the tub, but ensuring that the weight of the tub is not supported in any way by the
blocking (Diagram A). When placing the unit in a platform floor or cut out installation, the opening should be
1” smaller than the specified rim dimensions.
A 1” integral up-flange is available on many rectangular and corner models. These units should be placed in a
pre-measured studded pocket. Pre-drill holes through the flange to align with studs. Use screws to secure
studs (Diagram B). DO NOT attempt to nail directly through the flange. Always pre-drill the holes.
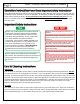
In every “system” installation, an access panel must be placed near the pump/blower for servicing. This
access may be through the wall or platform apron. In the case of a sunken installation, access may be through
the ceiling below the bathtub. See Diagram C for instructions for the access panel provided on the skirted tub.